The Windows Credential Manager can be used to securely store user id’s and passwords, so they can be referenced in code without being written in your code when automating a sign in process. This opens up the door to access secure objects, such as a Microsoft SQL Server databases, as shown below. To see how to do this on a Mac, check this out.
Add Credentials to Windows Credential Manager
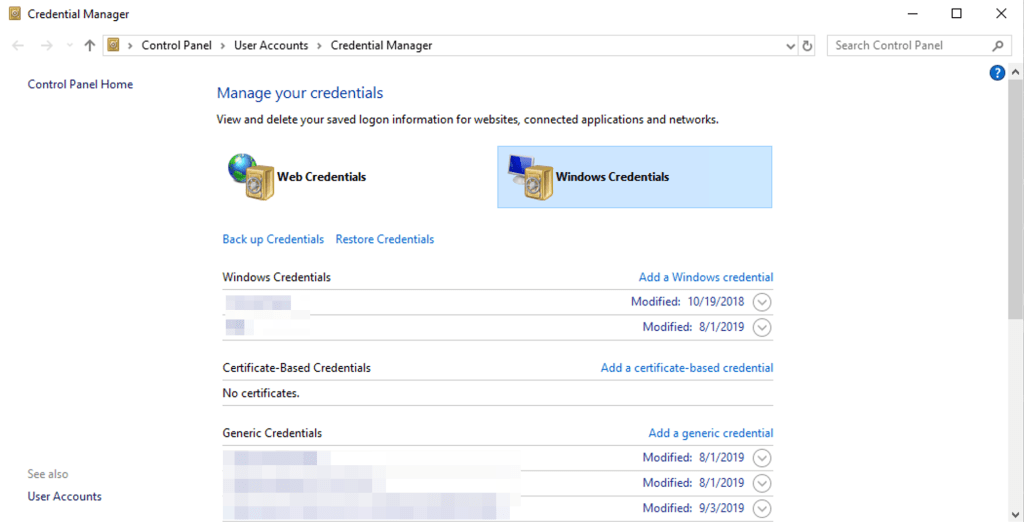
The Credential Manager app is native to Windows and can be found by searching from the start menu. Once open, navigate to the “Windows Credential” menu. This will display existing credentials and allow credentials to be added by selecting “Add a Windows Credential”.
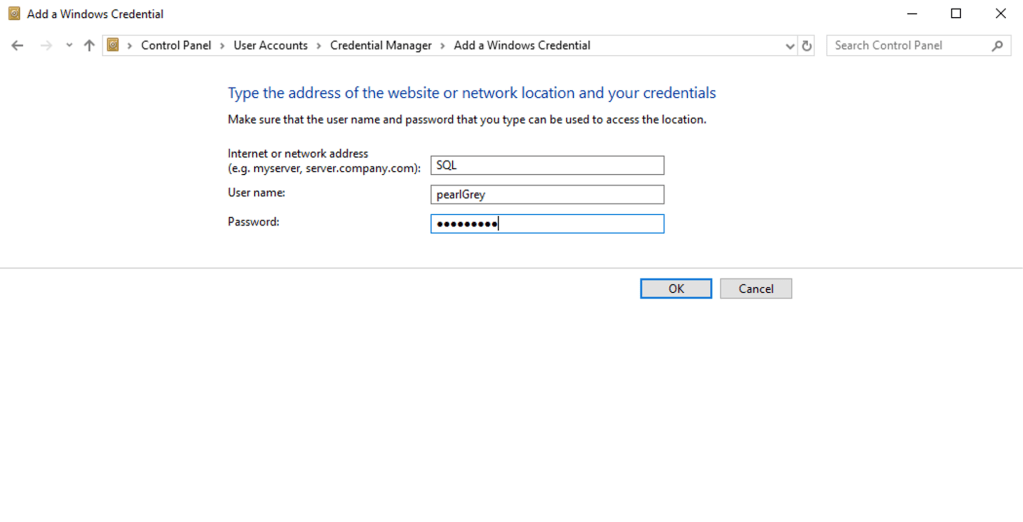
In the Add a Windows Credential menu, enter the easy to understand name for what the credentials connect to, in this case SQL. The username and password fields are what would would be entered to connect to the SQL instance.
After selection “OK” the credential will display and is ready to be referenced in an R script.
Connect to SQL in R
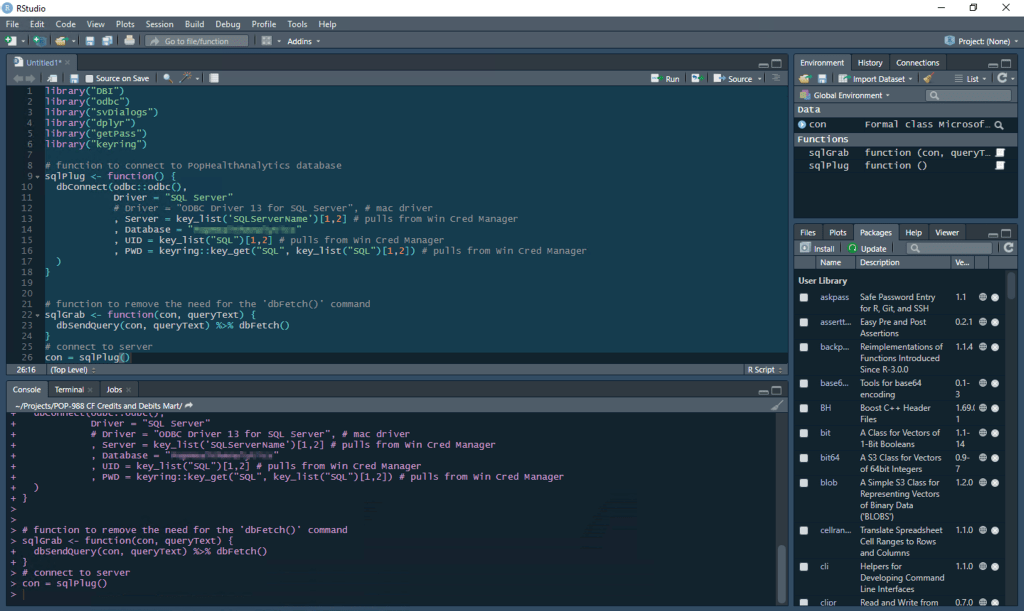
Now that the credentials have be added to the manager, functions can be written in R to automate connecting to SQL, using the sqlPlug() and sqlGrab() functions and the Windows SQL driver. In the below example, the Server is referenced through the Credential Manager as well, but this can also be referenced as a character string. The user id and password are referenced using the “SQL” entry created above.
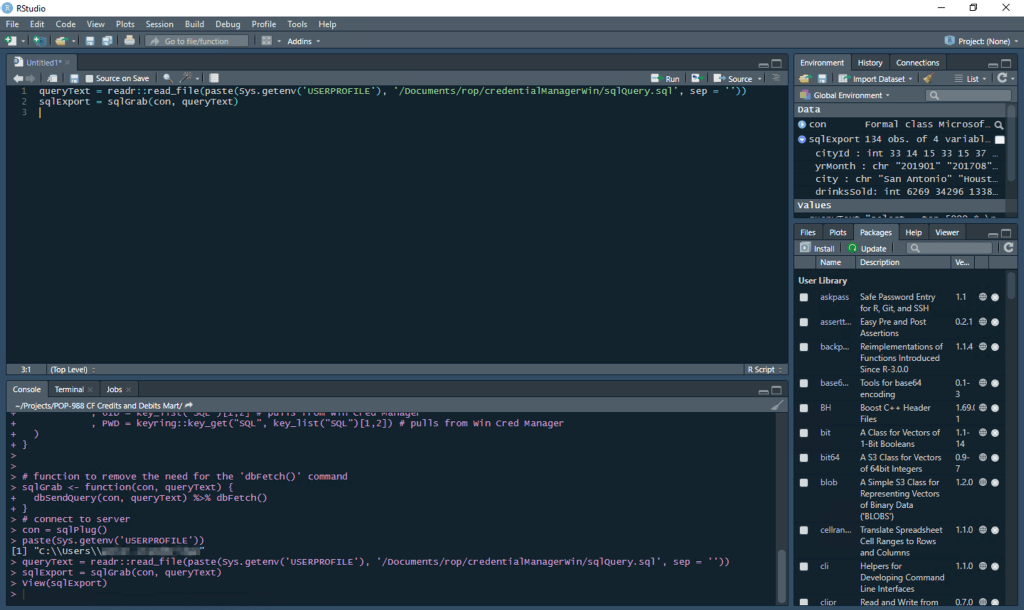
Using the read_file() function from the readr package, a prewritten query can be called to execute and return number of drinks sold for all the branches of a chain restaurant in a given city. The sqlGrab() function will execute the query text and save the results as a data frame.
Once the data is in R, the possibilities are endless! This restaurant example in later posts to show how to other data from a Google Sheets file (or other sources) and compare both sources by programmatically generating a pivot table.
Sometimes data dictionaries are skimpy or non-existent. In these cases, it’s sometimes helpful to list out the columns and tables for a database, or even for an entire instance to get a better idea of the structure.
List All Databases in a Connection
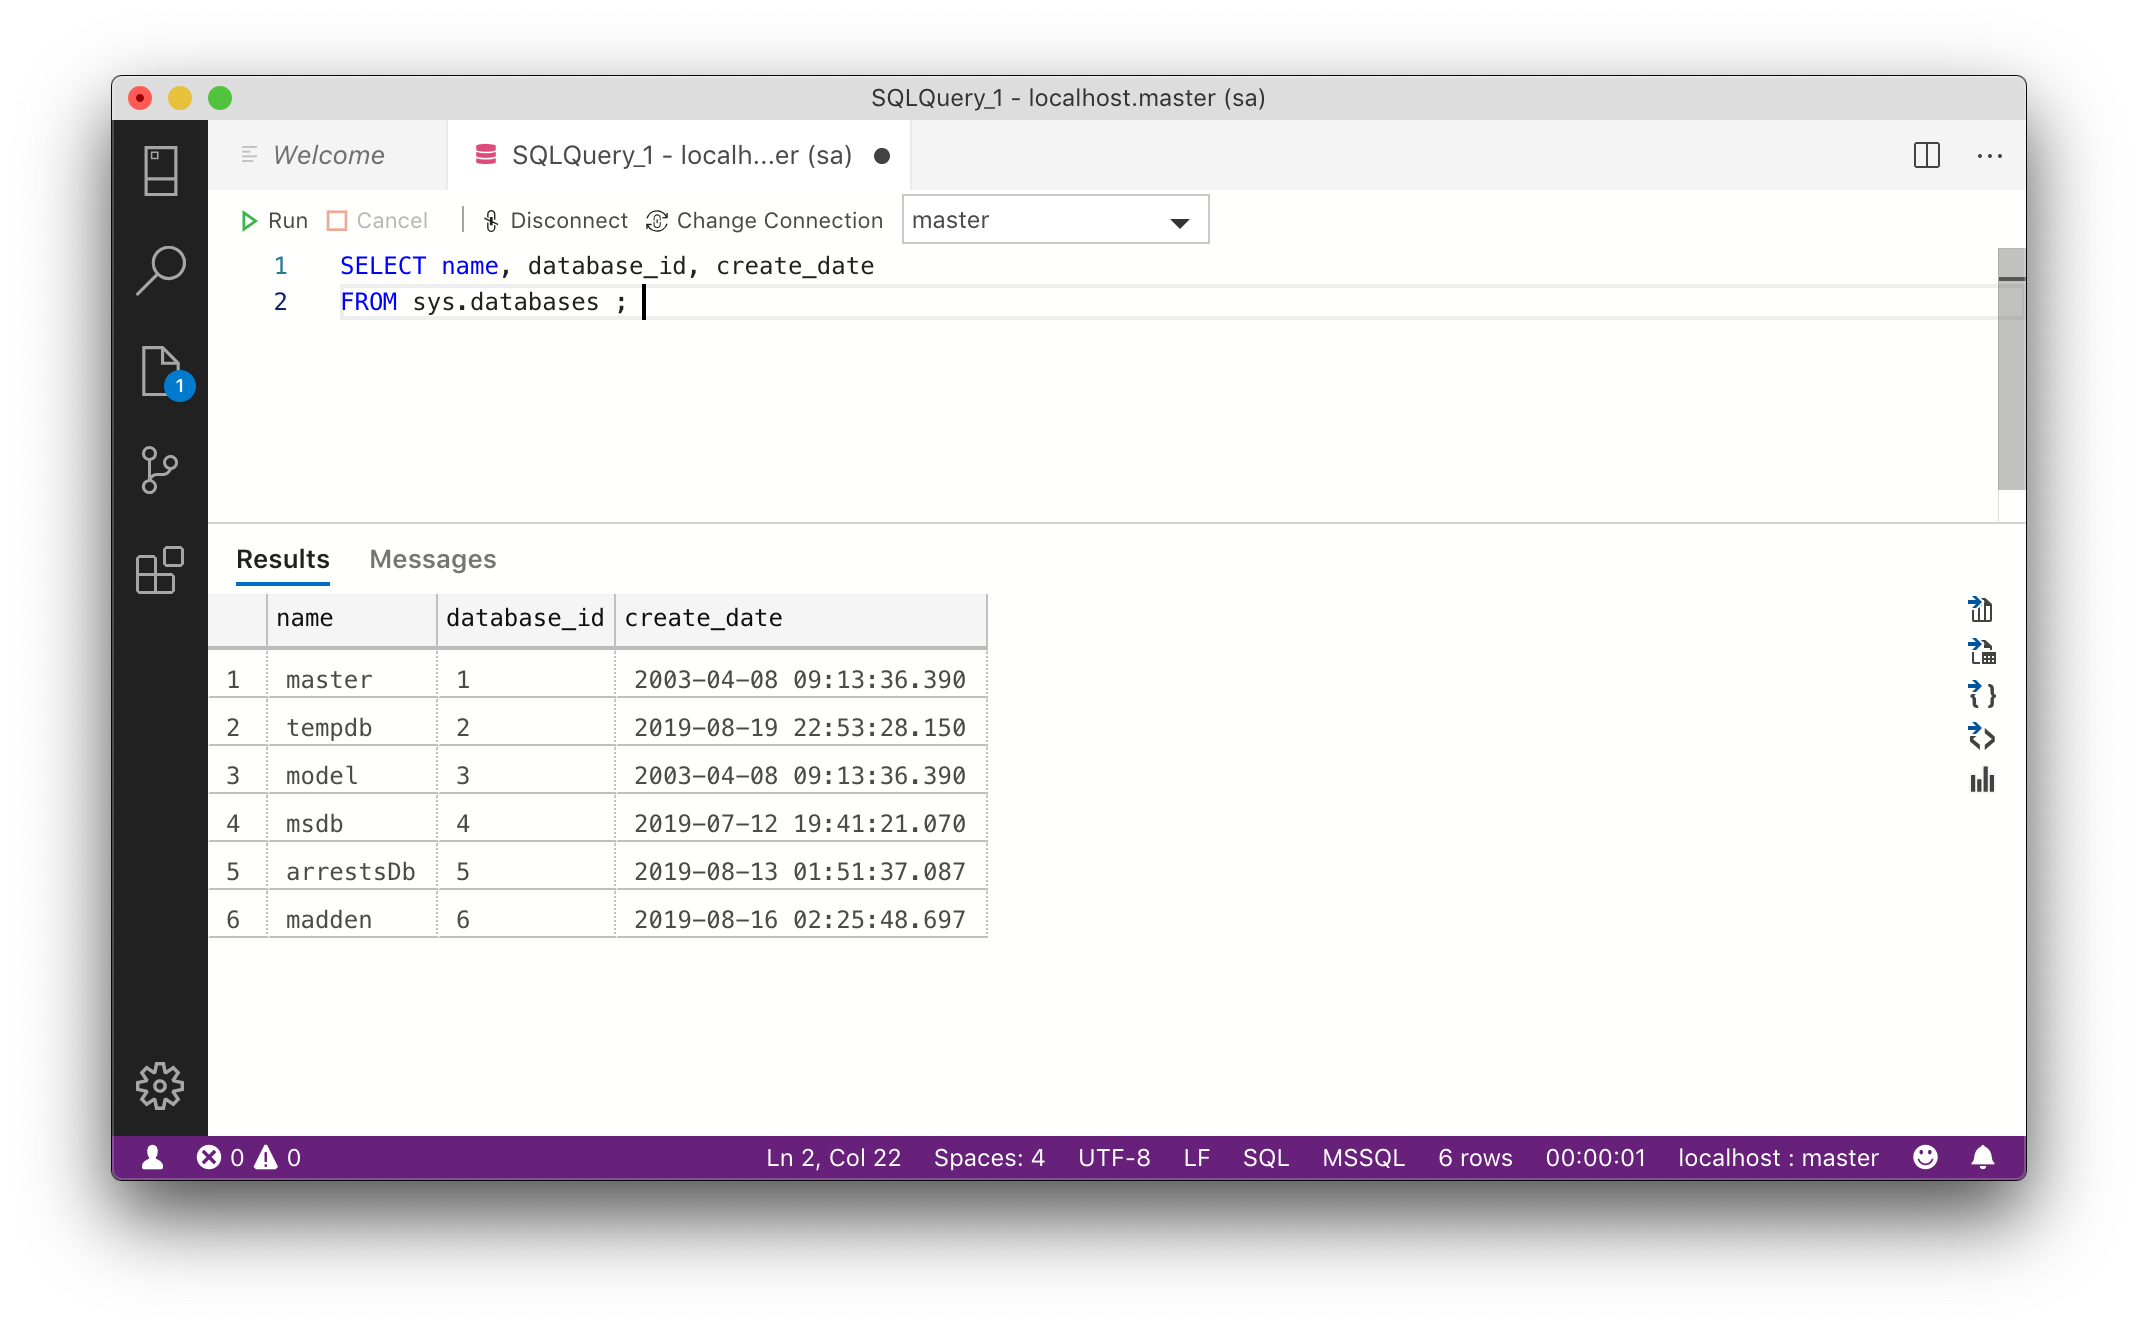
Before diving into specific tables and columns, it’s a good idea to get an idea of what databases exist in the connection. This example uses a localhost SQL Express server.
select name, database_id, create_date
from sys.databases;
List All Tables and Columns in a Database
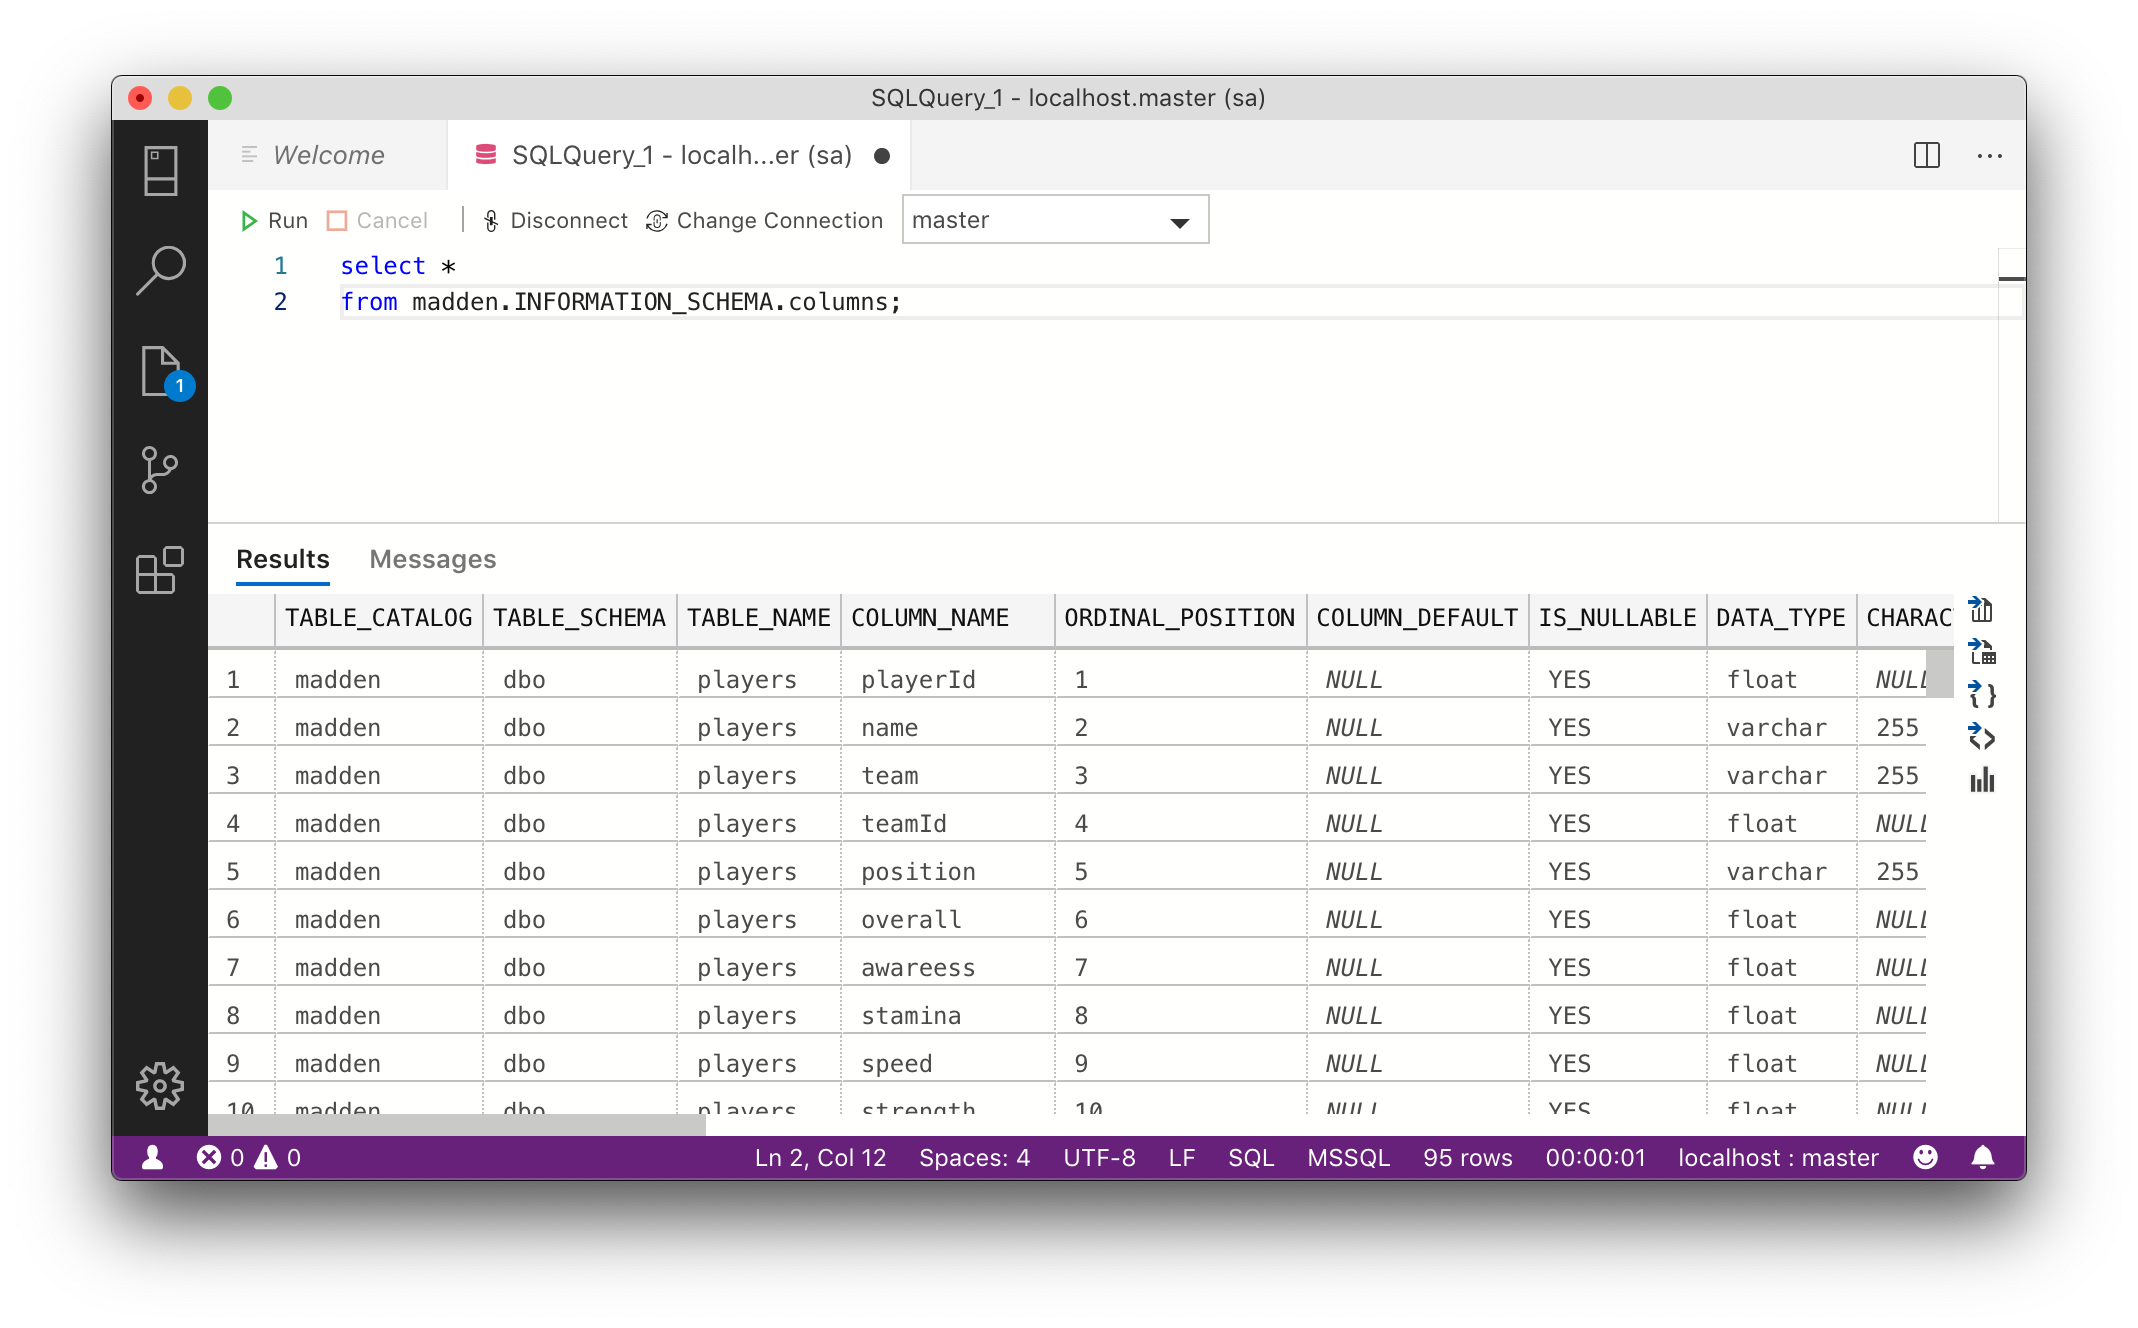
Now that we know what databases are available, it is helpful to list all tables and columns in those tables, for a given database. In this case, the madden database is used.
select * from madden.INFORMATION_SCHEMA.columns;
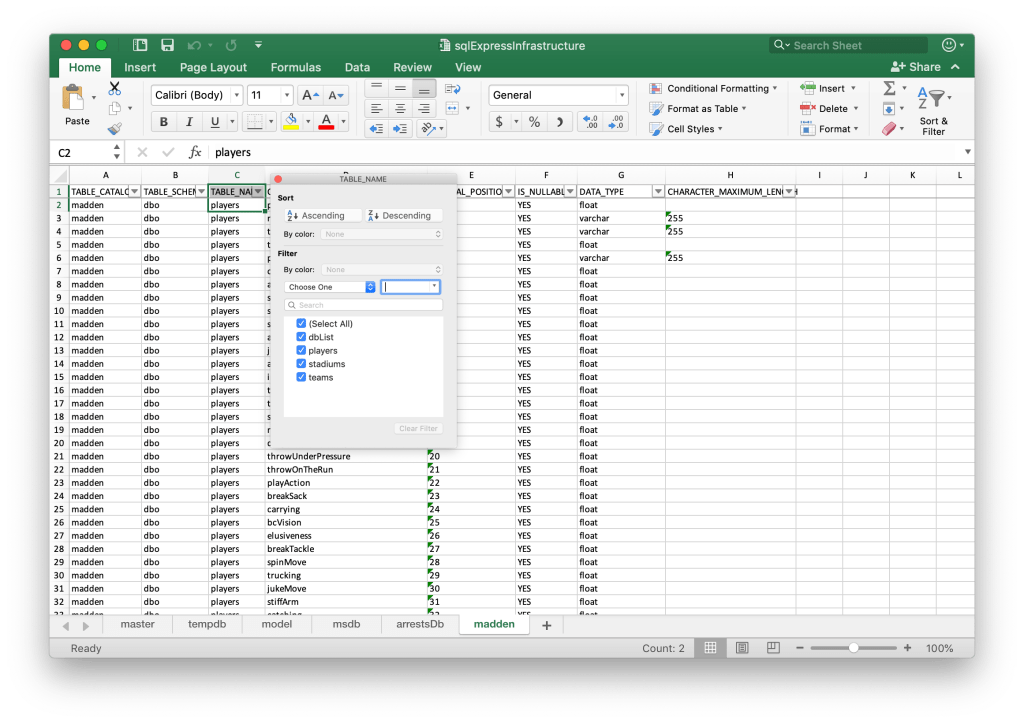
Write All Databases, Tables and Columns to Excel Using Loop
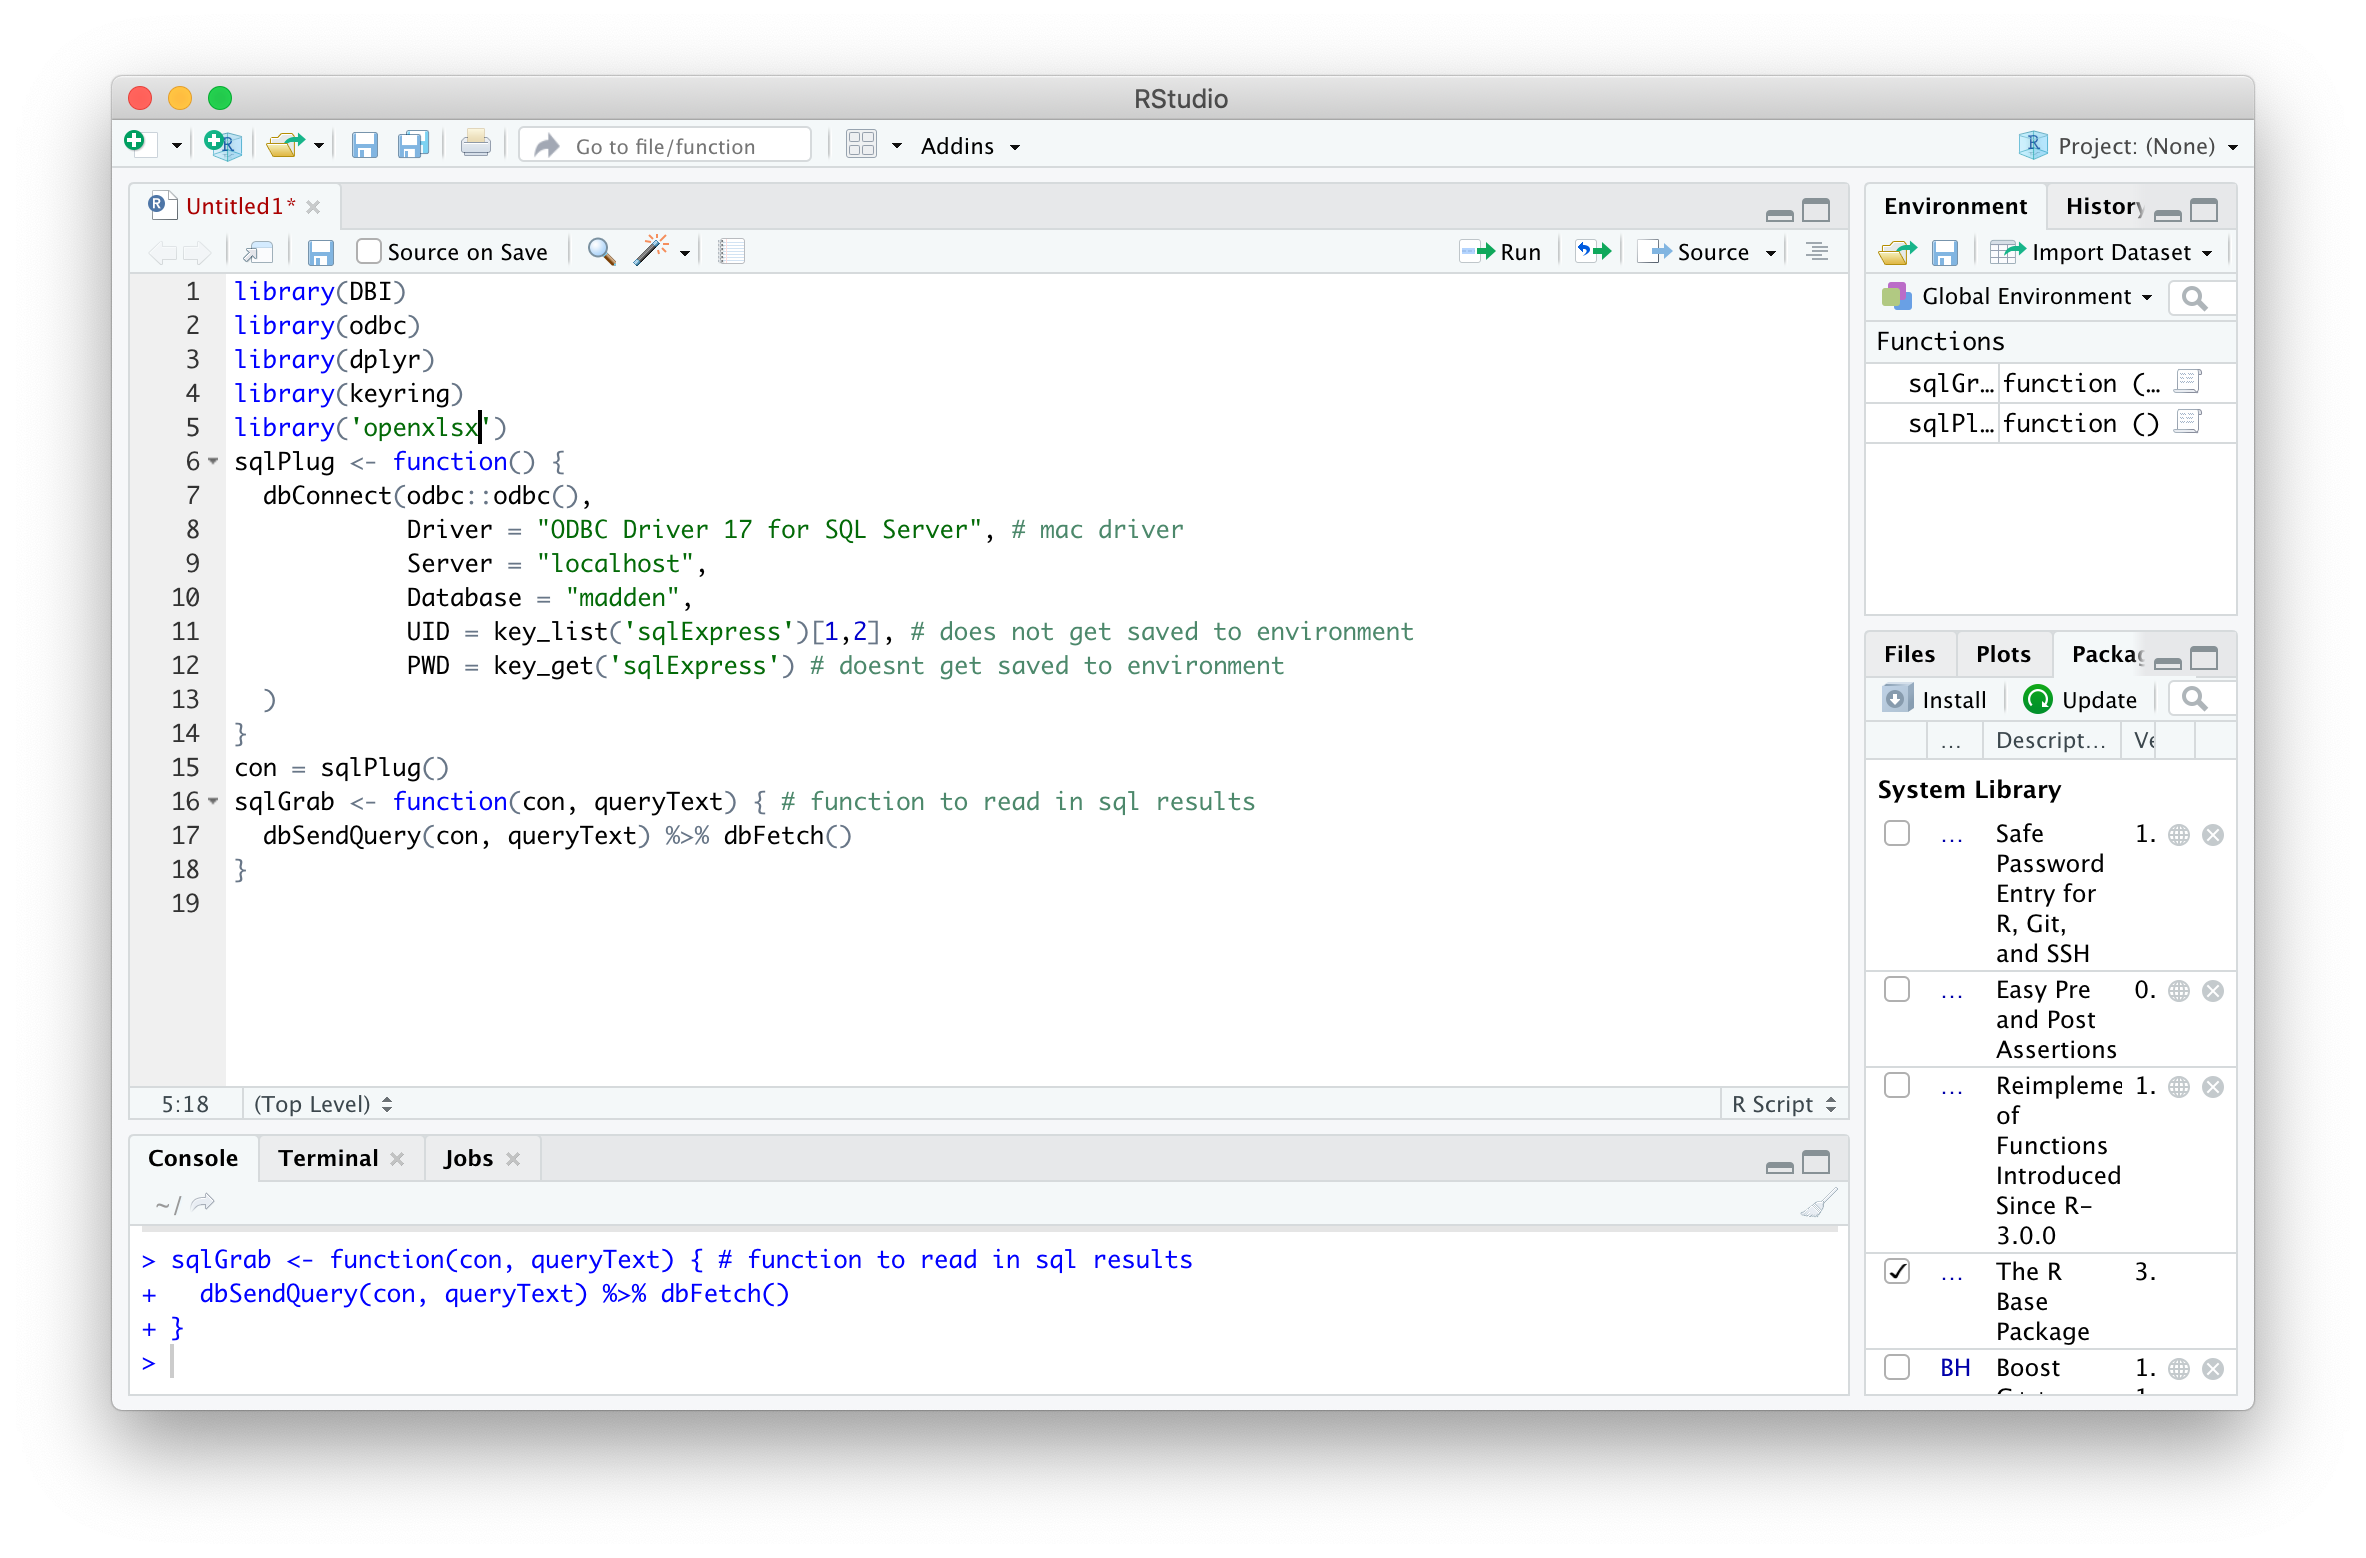
Listing out the contents was pretty straightforward, but as Server instances get bigger and bigger, it gets harder to track what’s in around. Using the sqlTalk() function and the openxlsx package, the tables and columns of each database can be written to an Excel file with each database on its own tab. The first step is calling the packages and creating the function.
library(DBI)
library(odbc)
library(dplyr)
library(keyring)
library(openxlsx)

sqlPlug <- function() {
  dbConnect(odbc::odbc(),
            Driver = "ODBC Driver 17 for SQL Server", # mac driver
            Server = "localhost",
            Database = "madden",
            UID = key_list('sqlExpress')[1,2], # does not get saved to environment
            PWD = key_get('sqlExpress') # doesnt get saved to environment
  )
}
con = sqlPlug()
sqlGrab <- function(con, queryText) { # function to read in sql results
  dbSendQuery(con, queryText) %>% dbFetch()
}
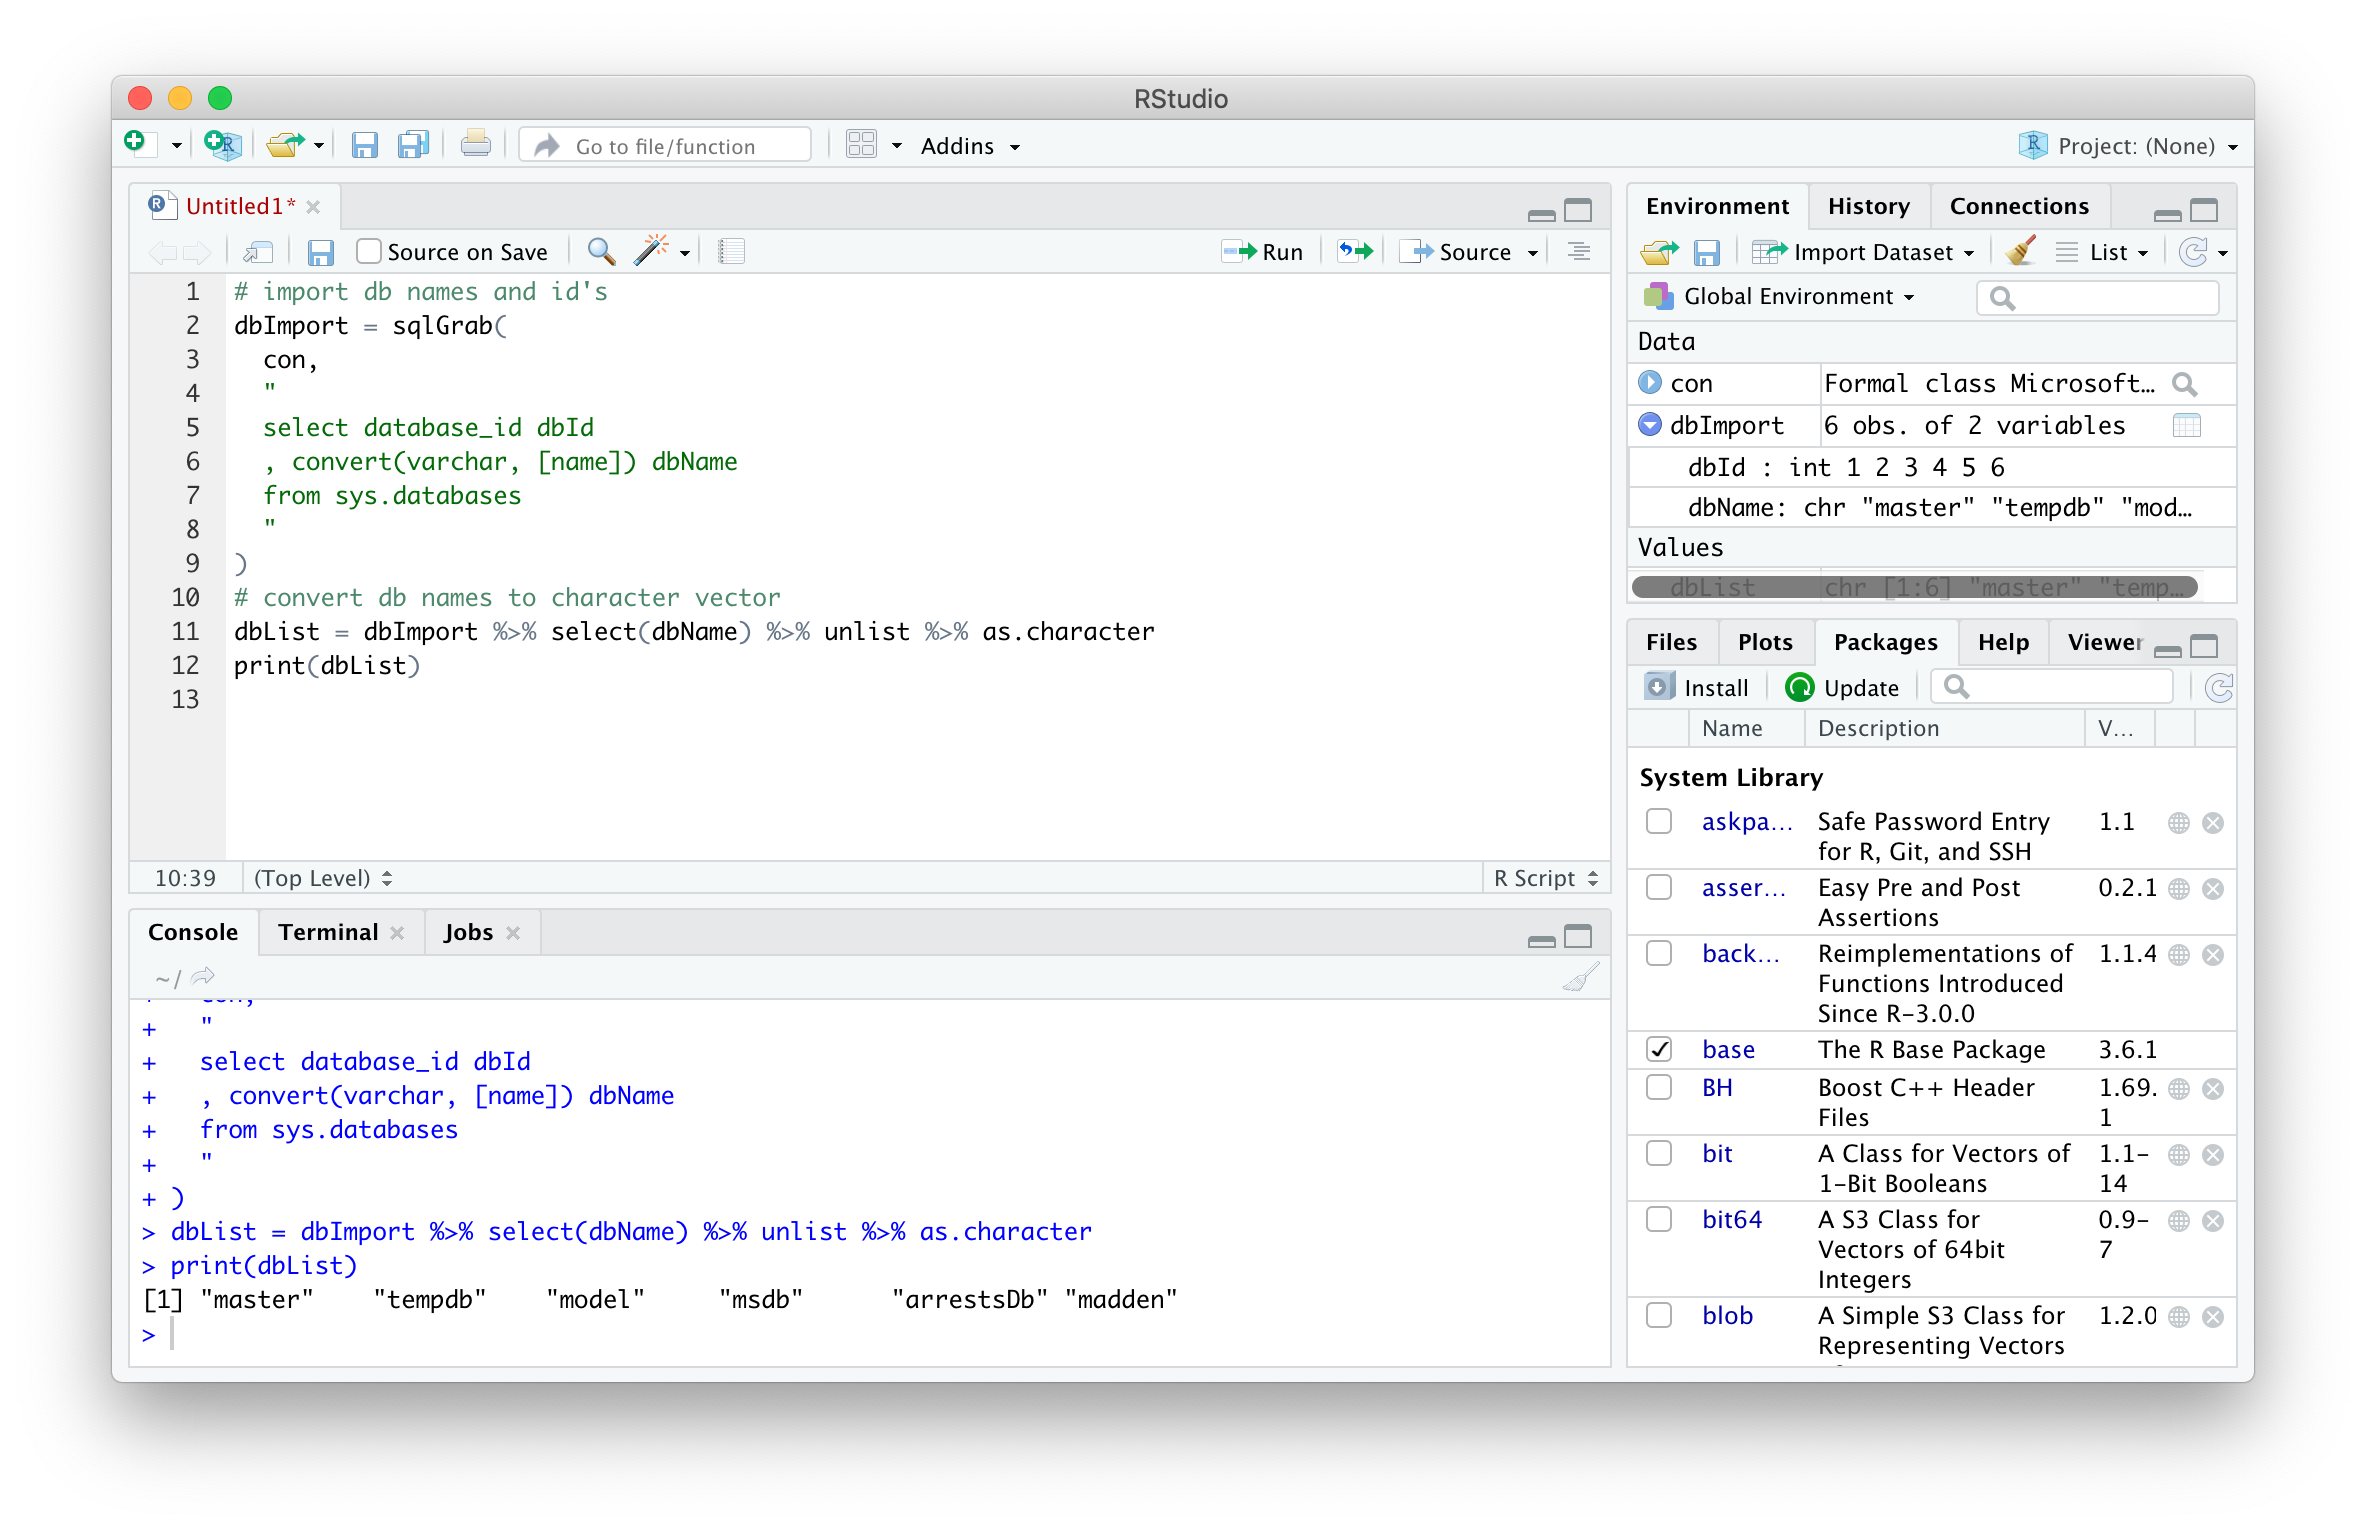
First, the database names can be extracted using the sqlGrab function. Some of the datatypes in the sys objects described above are of the sysname data type, so to ensure that no data is lost, these columns must be converted to varchar data types. The database names can then be converted to a character vector to loop over later.
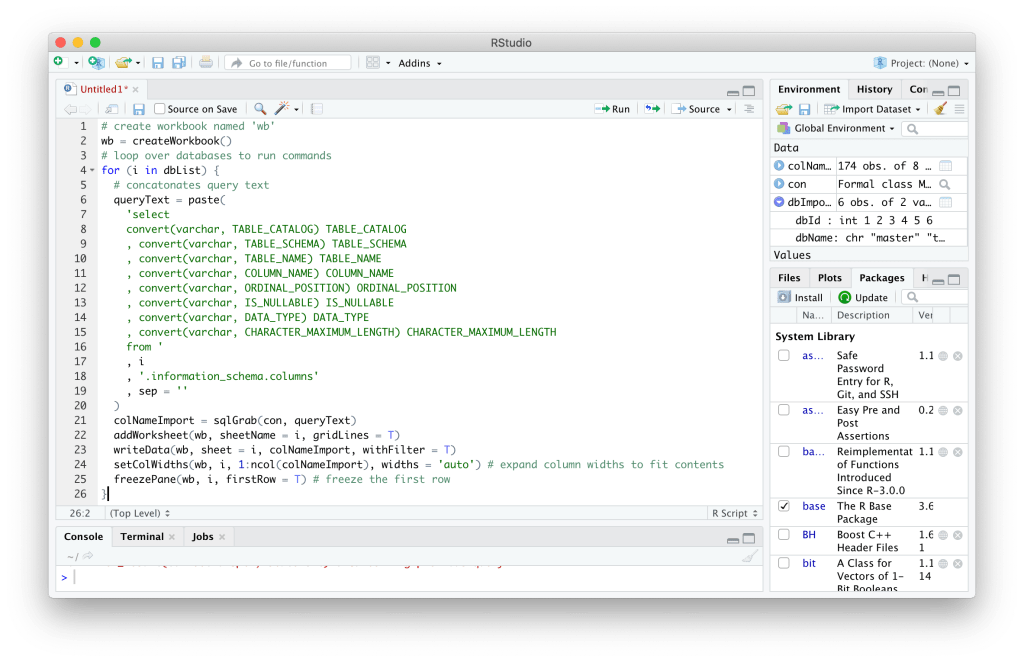
Using this list, the same operations can be completed for each database. But because the output here will be oneexcel file for all databases rather than oneexcel file for each database, an Excel workbook object must be defined before the loop is created. Using the openxlsx package, a workbook object can be created. Then, a “for” loop is used to (a) concatenate the SQL query text that will return all tables and columns for a given database and (b) add the query results to a sheet in the workbook that was just created. The value i in this example will be the name of the database.
create workbook named 'wb'
 wb = createWorkbook()
 for (i in dbList) {
   queryText = paste(
     'select
     convert(varchar, TABLE_CATALOG) TABLE_CATALOG
     , convert(varchar, TABLE_SCHEMA) TABLE_SCHEMA
     , convert(varchar, TABLE_NAME) TABLE_NAME
     , convert(varchar, COLUMN_NAME) COLUMN_NAME
     , convert(varchar, ORDINAL_POSITION) ORDINAL_POSITION
     , convert(varchar, IS_NULLABLE) IS_NULLABLE
     , convert(varchar, DATA_TYPE) DATA_TYPE
     , convert(varchar, CHARACTER_MAXIMUM_LENGTH) CHARACTER_MAXIMUM_LENGTH
     from '
     , i
     , '.information_schema.columns'
     , sep = ''
   )
   colNameImport = sqlGrab(con, queryText)
   addWorksheet(wb, sheetName = i, gridLines = T)
   writeData(wb, sheet = i, colNameImport, withFilter = T)
   setColWidths(wb, i, 1:ncol(colNameImport), widths = 'auto') # expand column widths to fit contents
   freezePane(wb, i, firstRow = T) # freeze the first row
 }
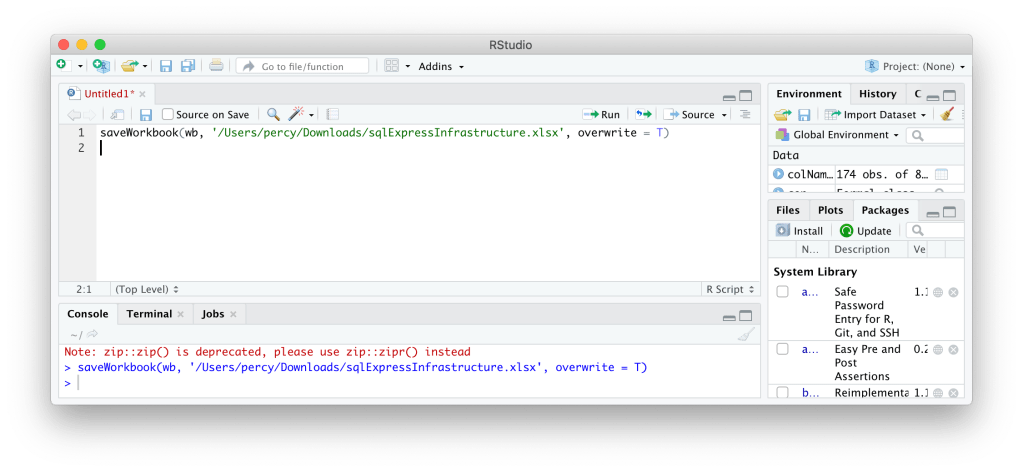
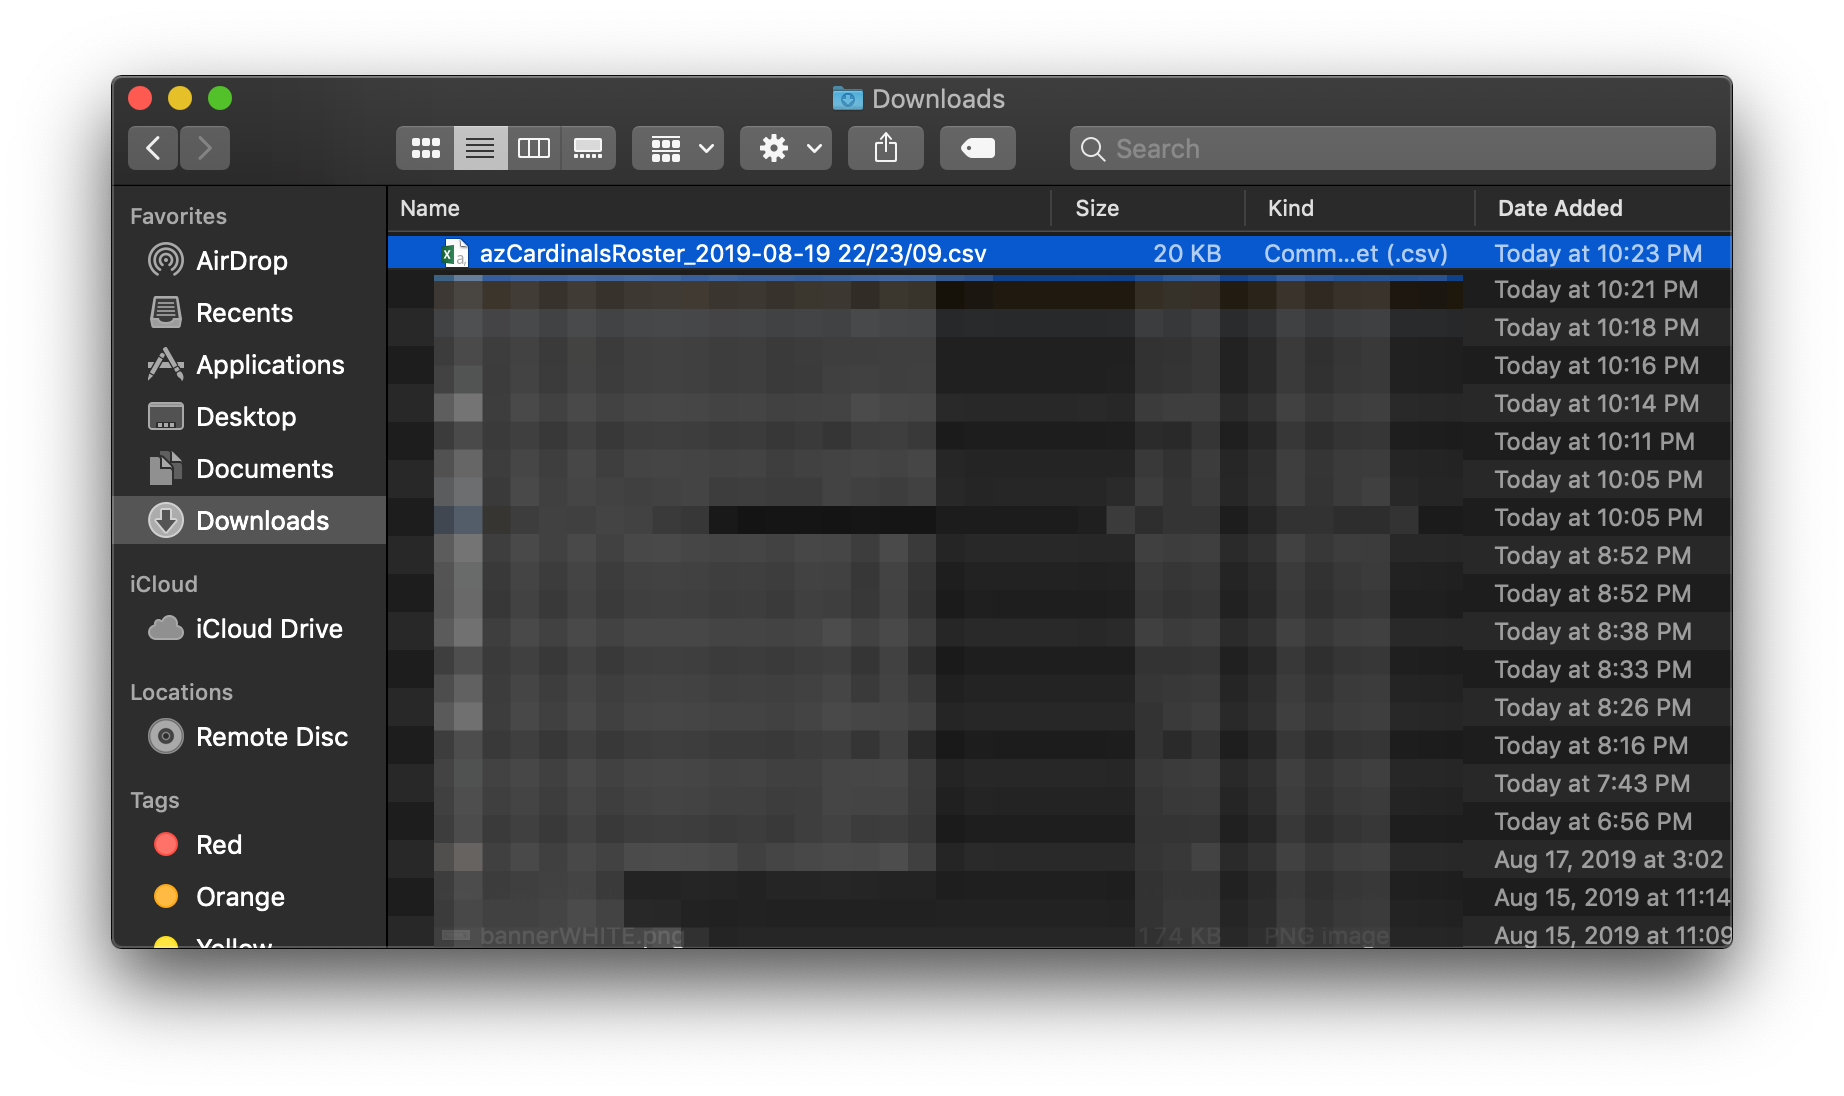
The workbook object can be saved to a specified destination, in this case the Downloads folder.
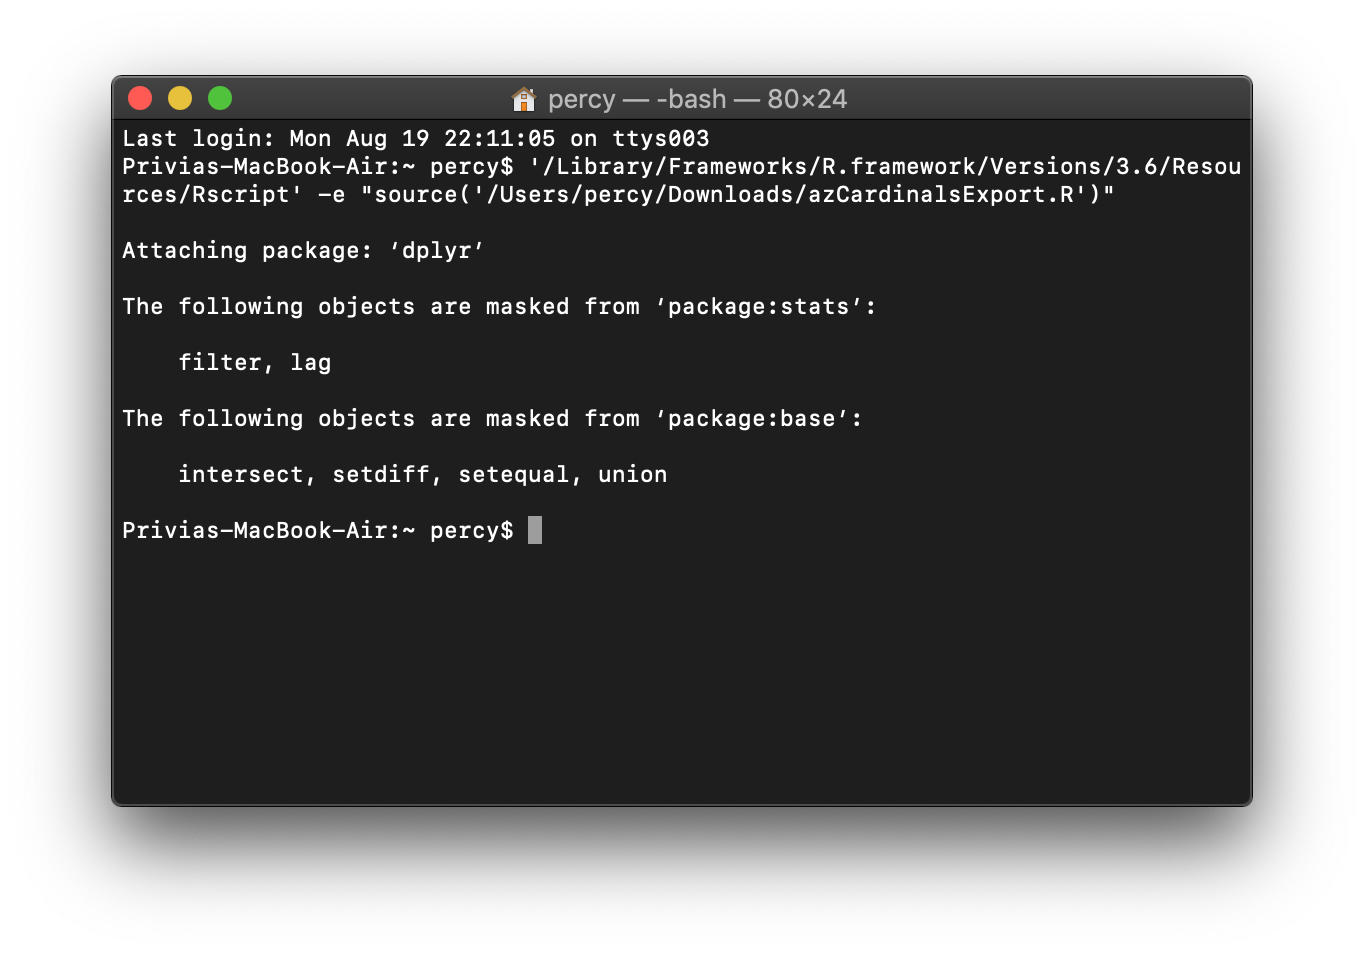
Running R scripts from the command line can be advantageous for saving time and setting up jobs to run them automatically down the line. In a few short steps this can be set up.
Write Executable R Script
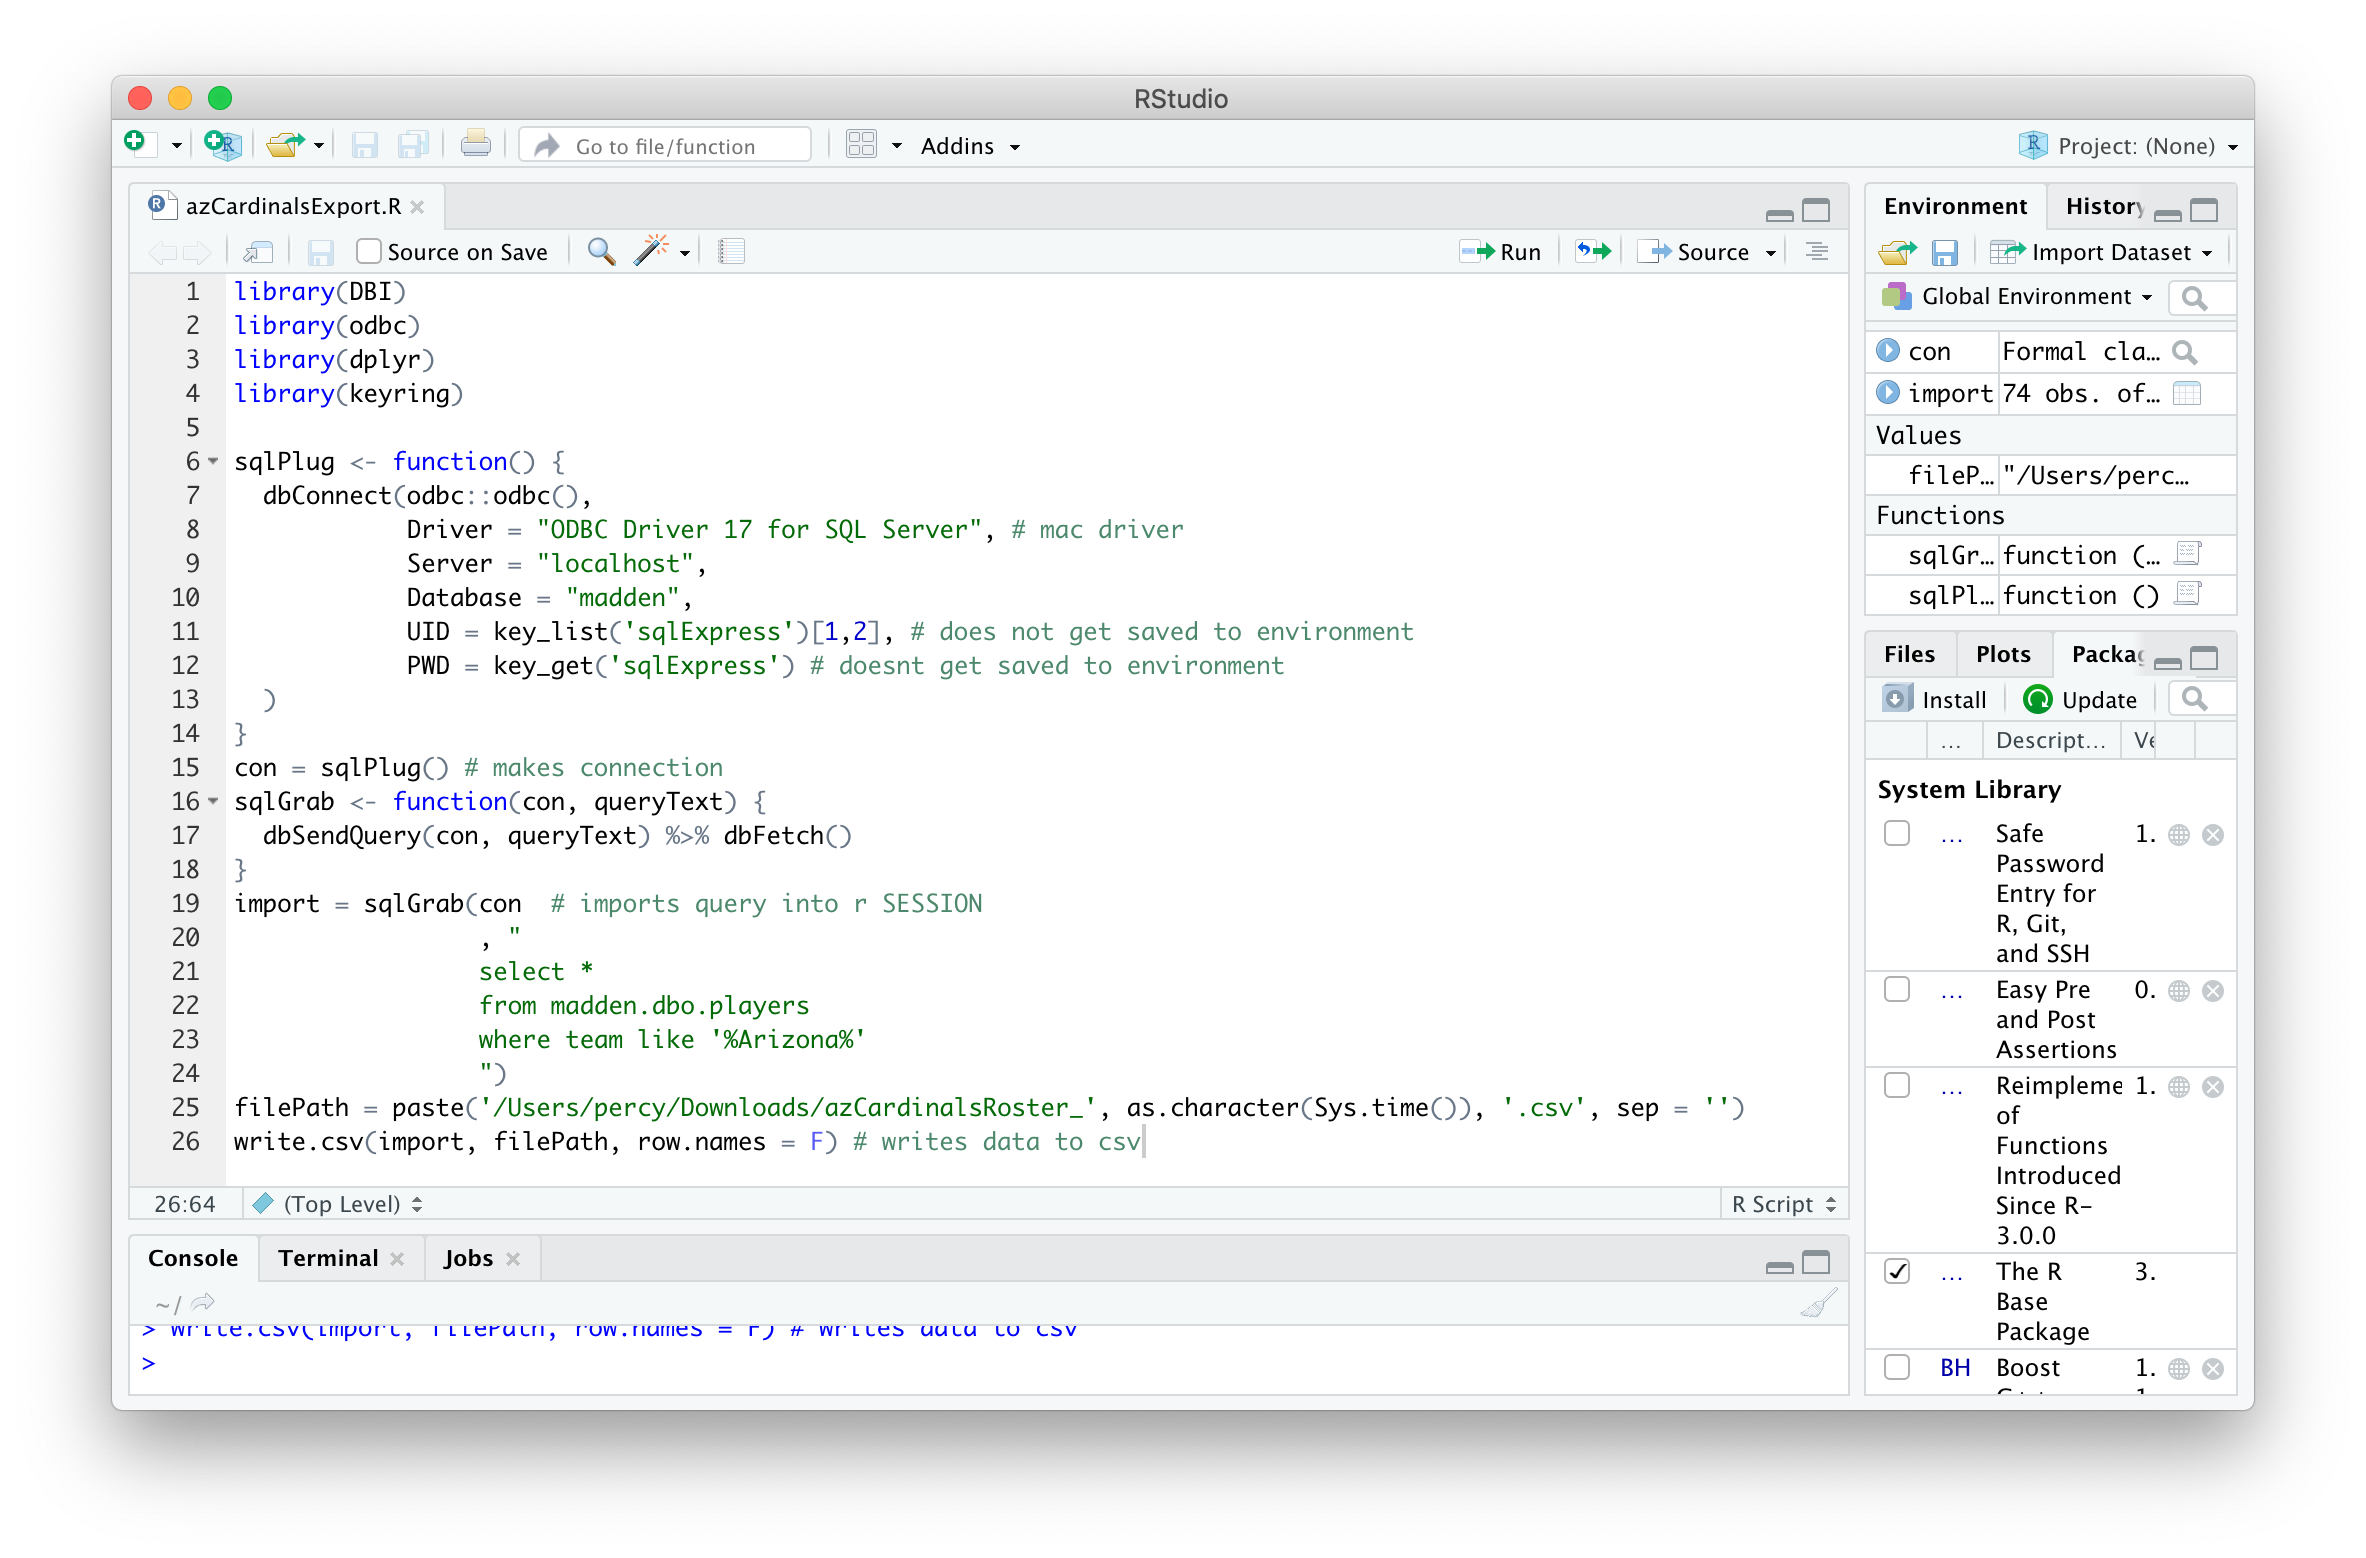
To run an R script from Terminal, it must be executable without any errors or human inputs. In this example, the sqlPlug() function can be used to connect to a local SQL Server database and export to a CSV. It’s best to test the script in RStudio or the R console to make there are no errors that will throw off the Terminal command later.
library(DBI)
library(odbc)
library(dplyr)
library(keyring)
sqlPlug <- function() {
dbConnect(odbc::odbc(),
Driver = "ODBC Driver 17 for SQL Server", # mac driver
Server = "localhost",
Database = "madden",
UID = key_list('sqlExpress')[1,2], # does not get saved to environment
PWD = key_get('sqlExpress') # doesnt get saved to environment
)
}
con = sqlPlug() # makes connection
sqlGrab <- function(con, queryText) {
dbSendQuery(con, queryText) %>% dbFetch()
}
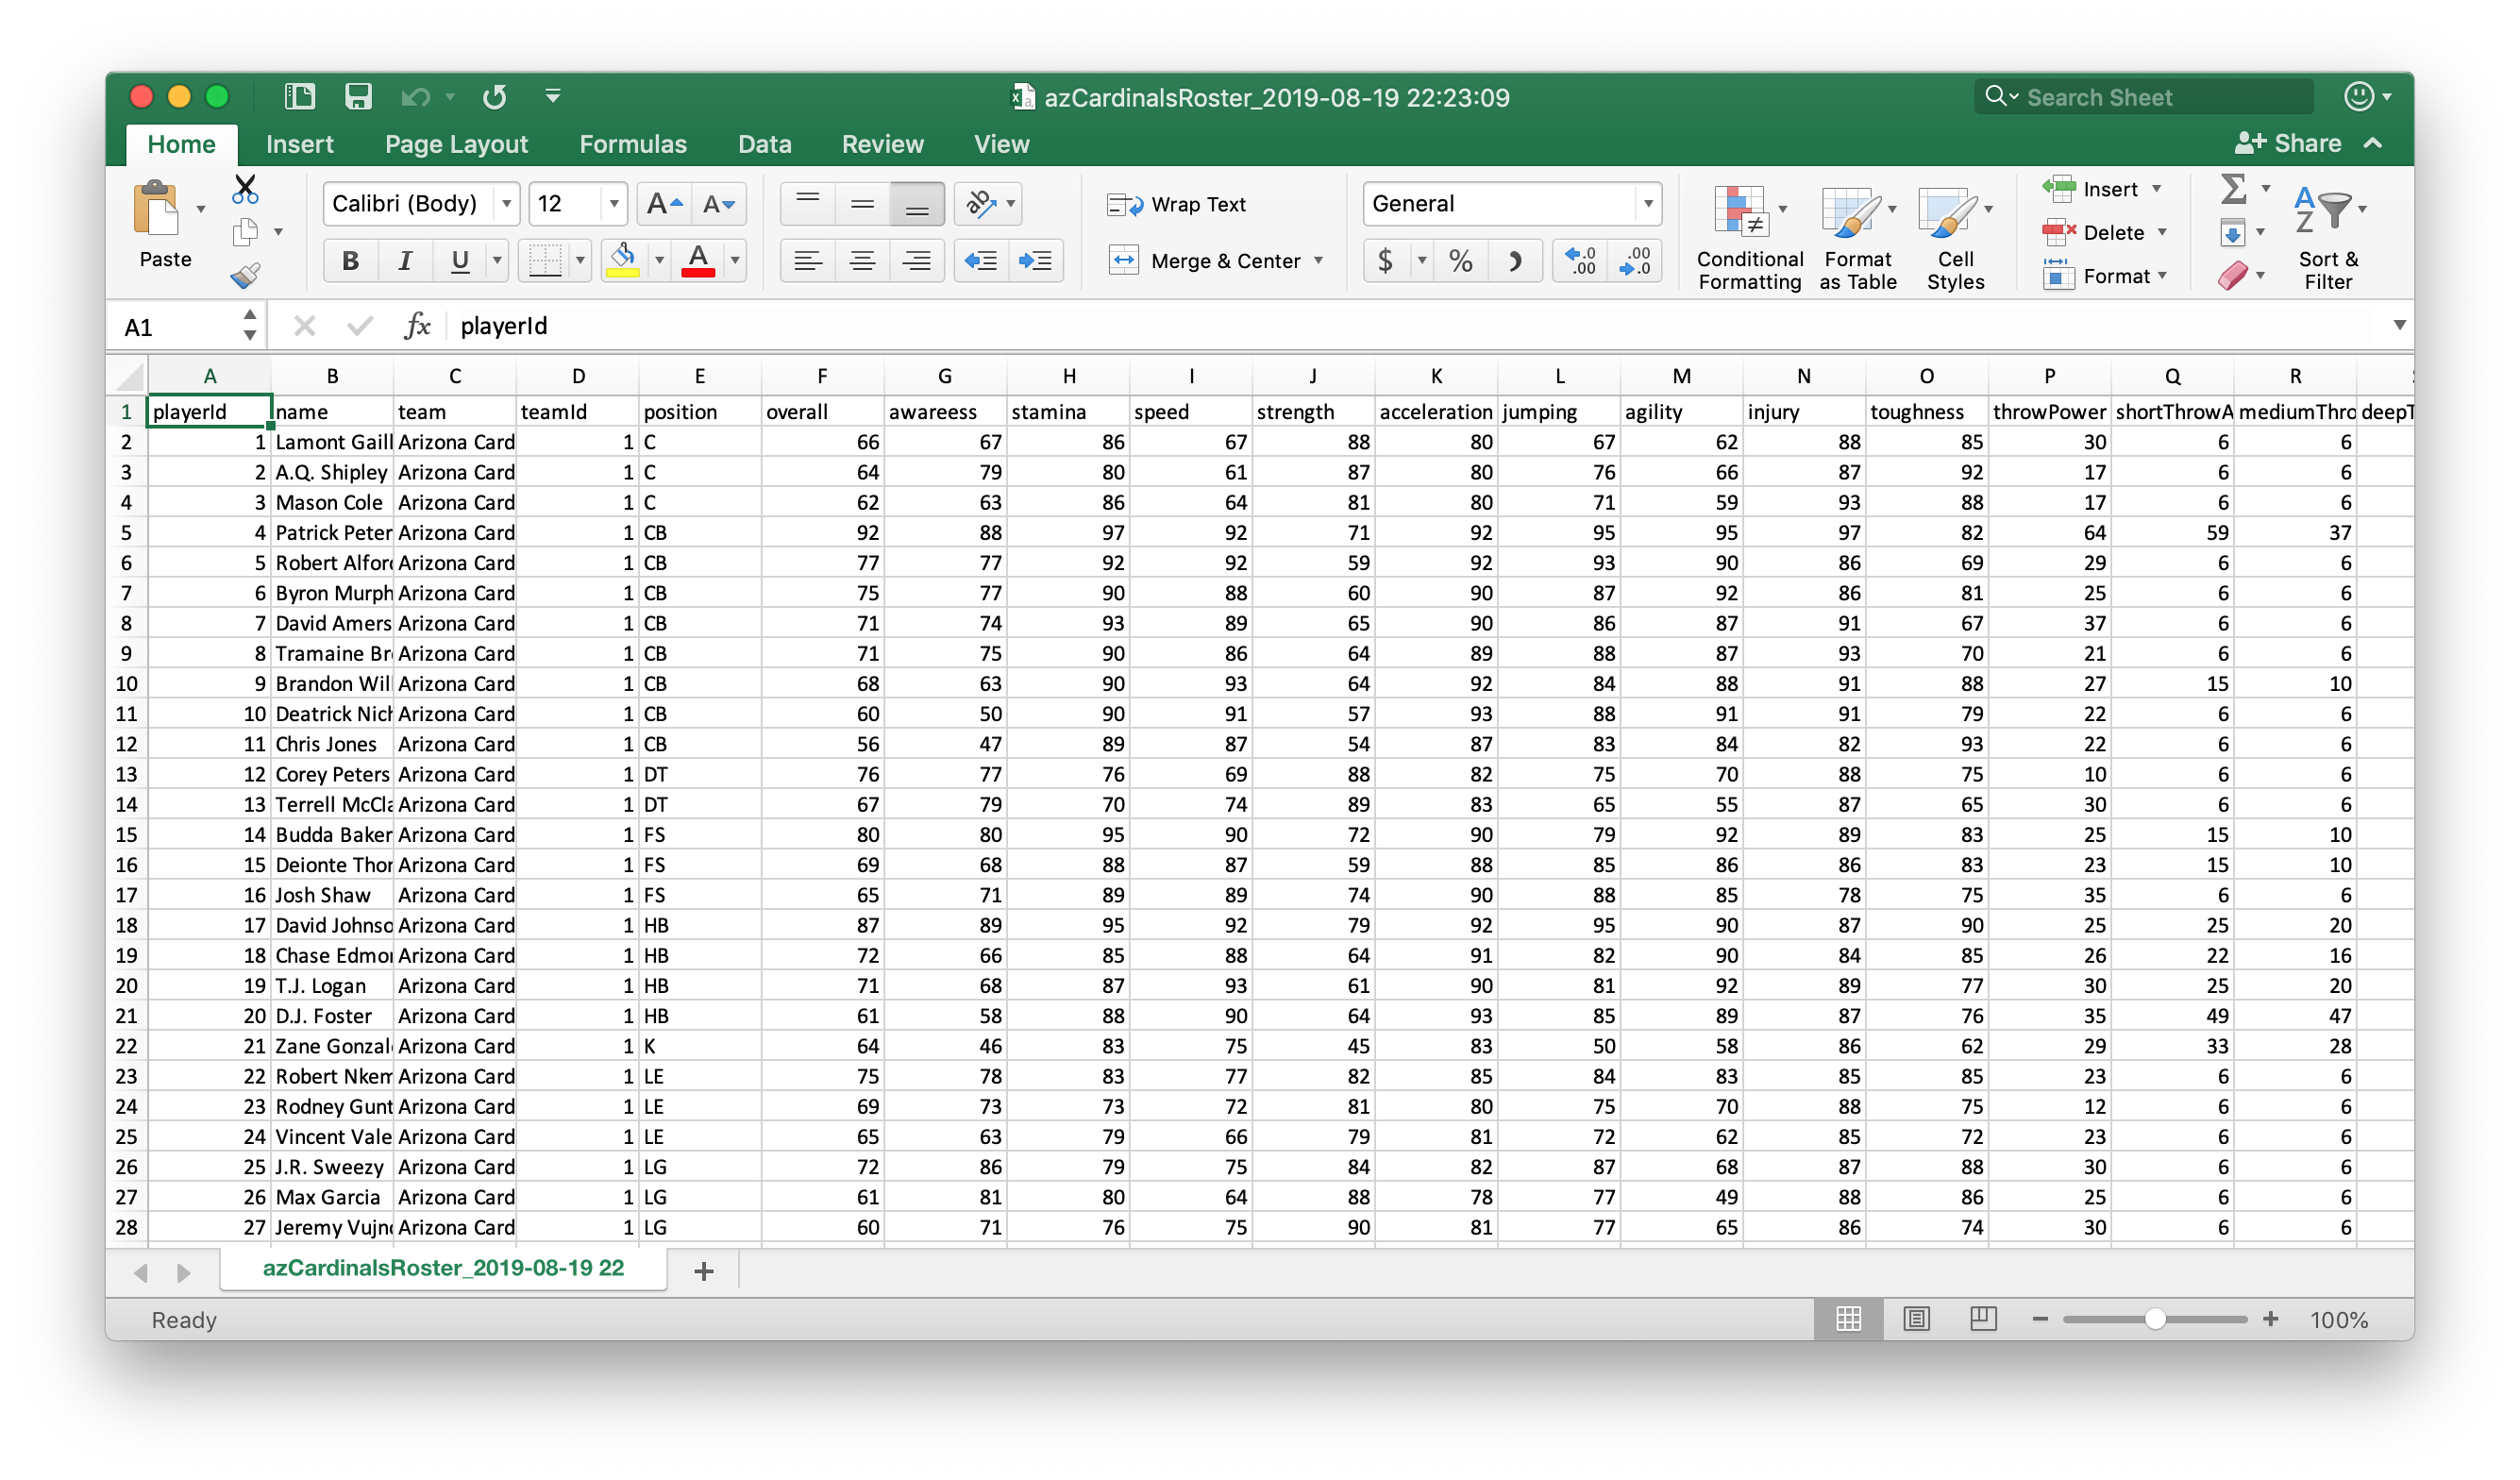
import = sqlGrab(con # imports query into r SESSION
, "
select *
from madden.dbo.players
where team like '%Arizona%'
")
filePath = paste('/Users/percy/Downloads/azCardinalsRoster_', as.character(Sys.time()), '.csv', sep = '') # define file name
write.csv(import, filePath, row.names = F) # writes data to csv
Find Rscript application Path
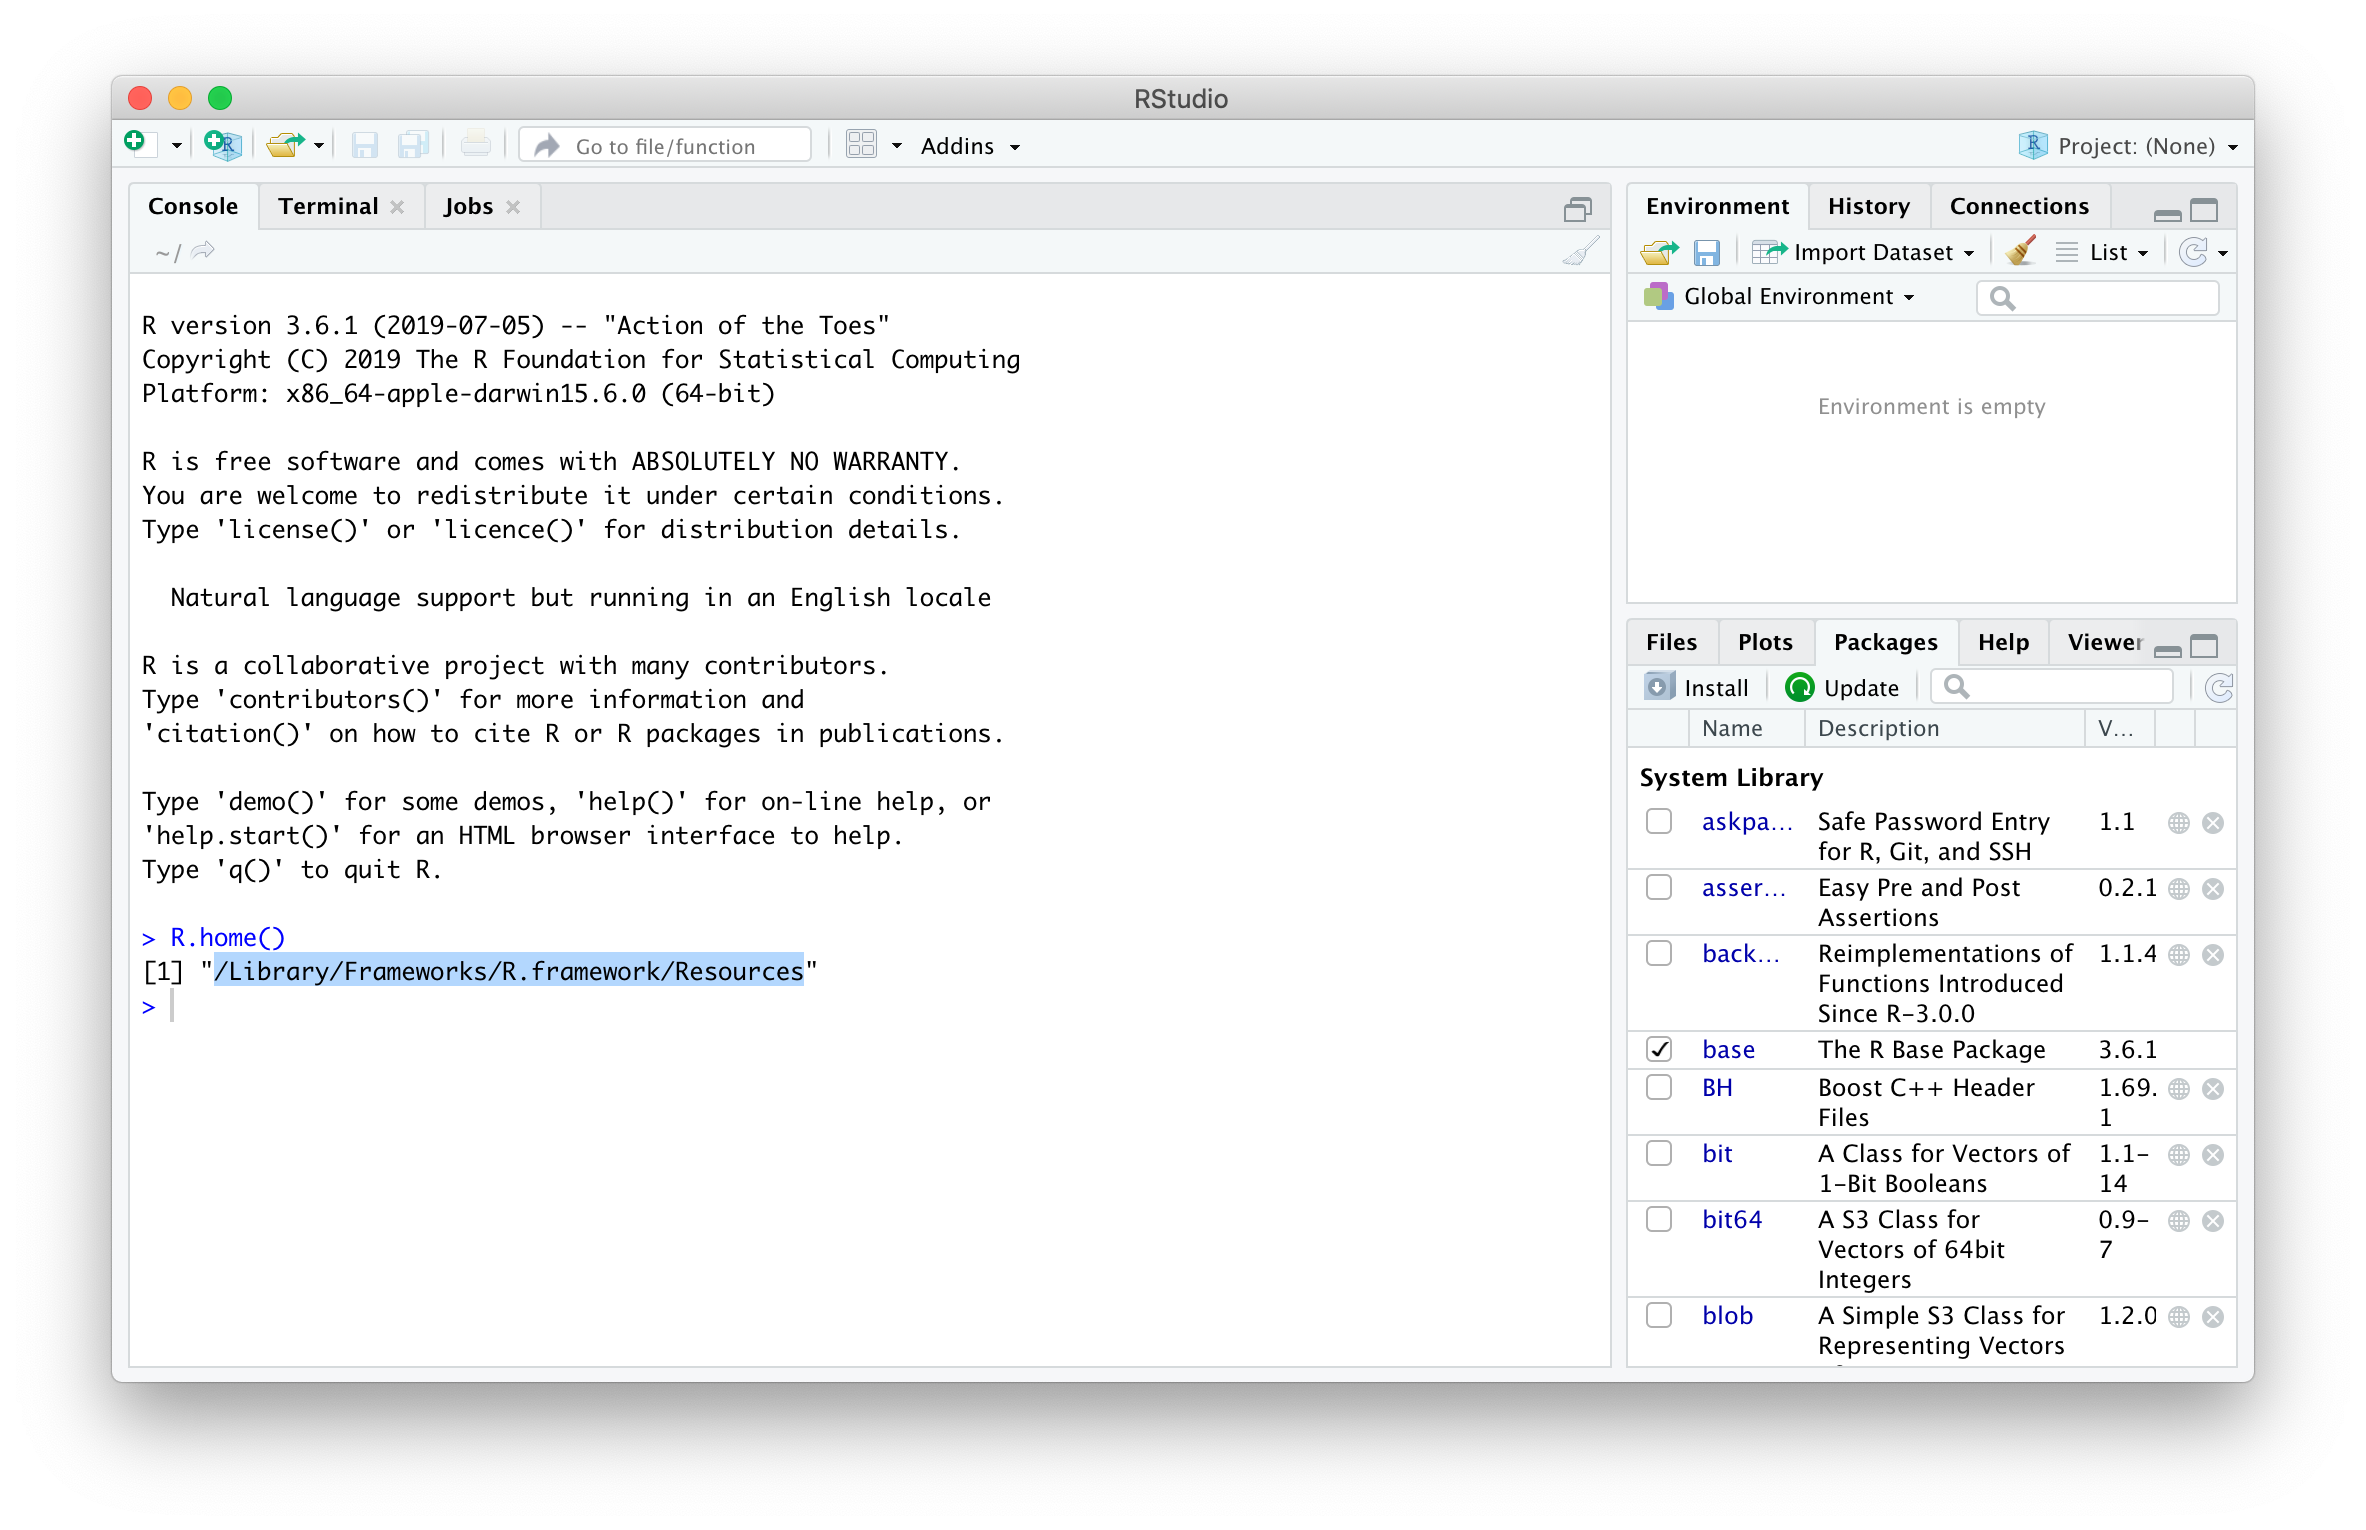
When R is installed, there are features that can be used to execute R from the terminal, in this case: Rscript. This can be found by opening R or RStudio and executing the R.home() command.
R.home()
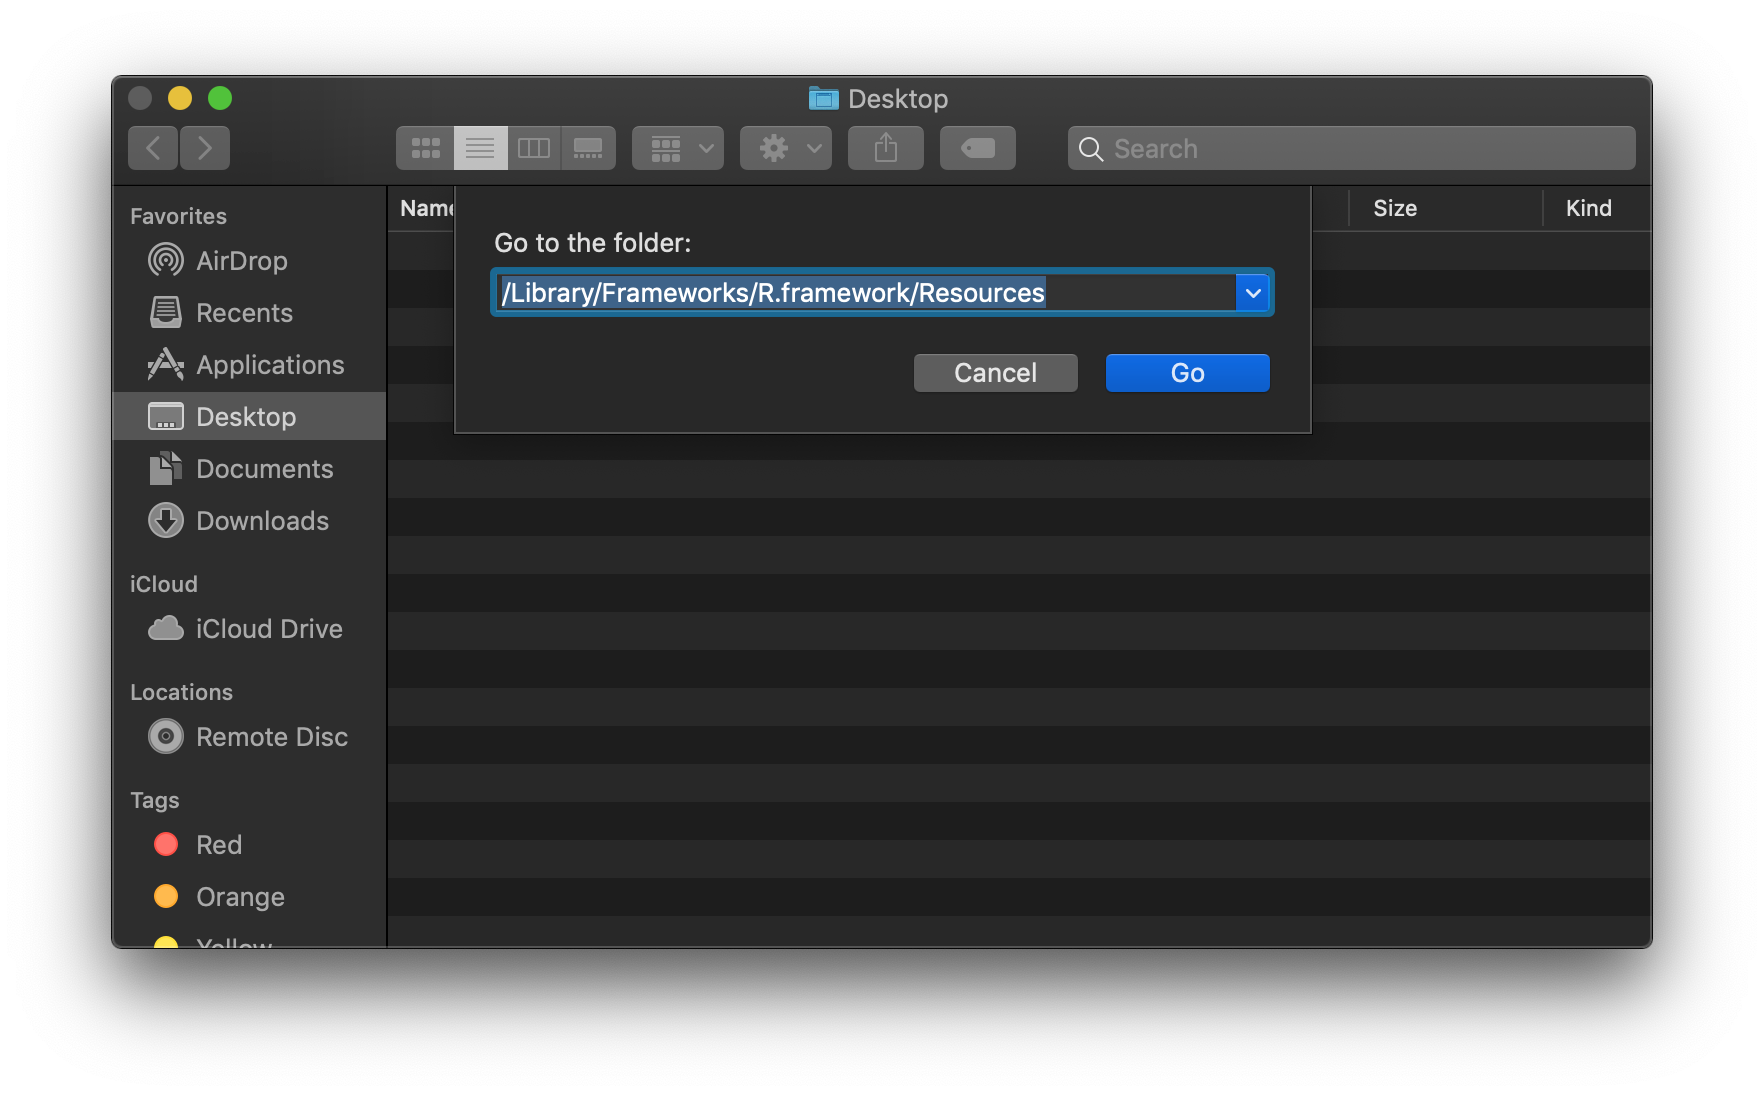
Copy and paste the results of the R.home() command and press Cmd + Shift + G in Finder. Paste the copied path in field and press Go.
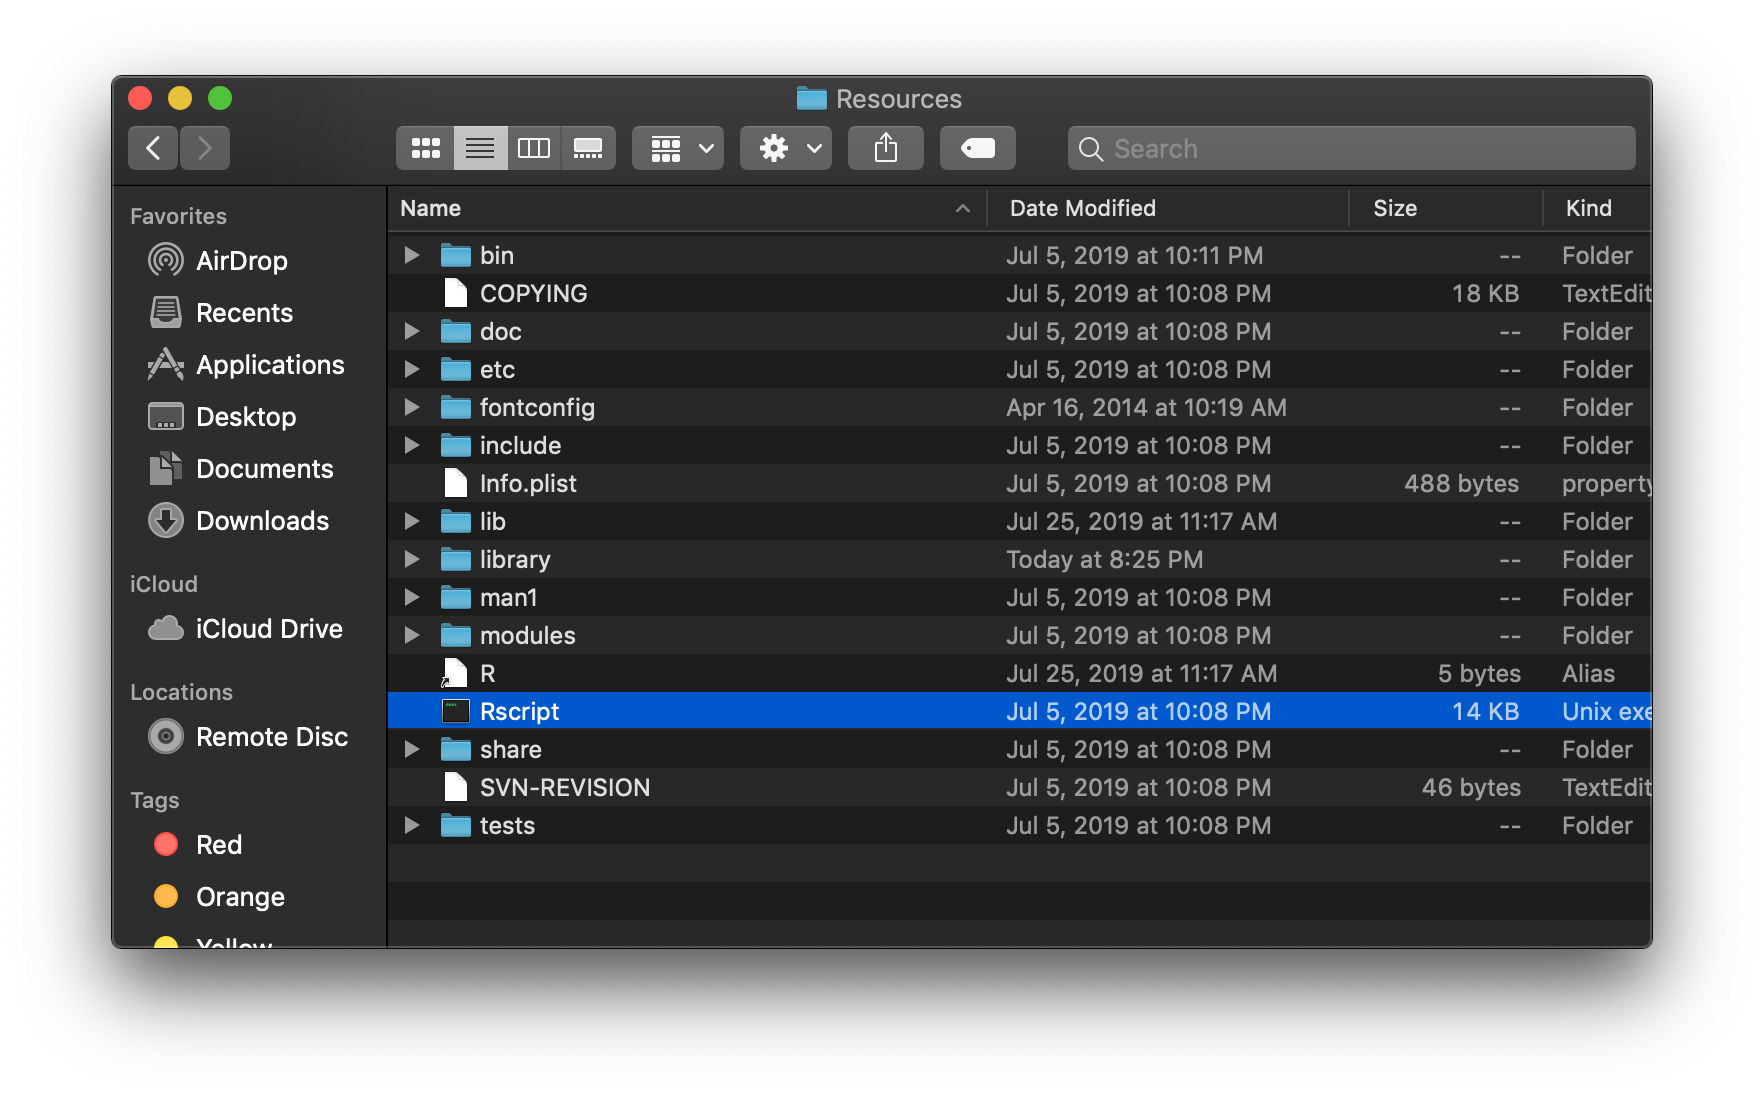
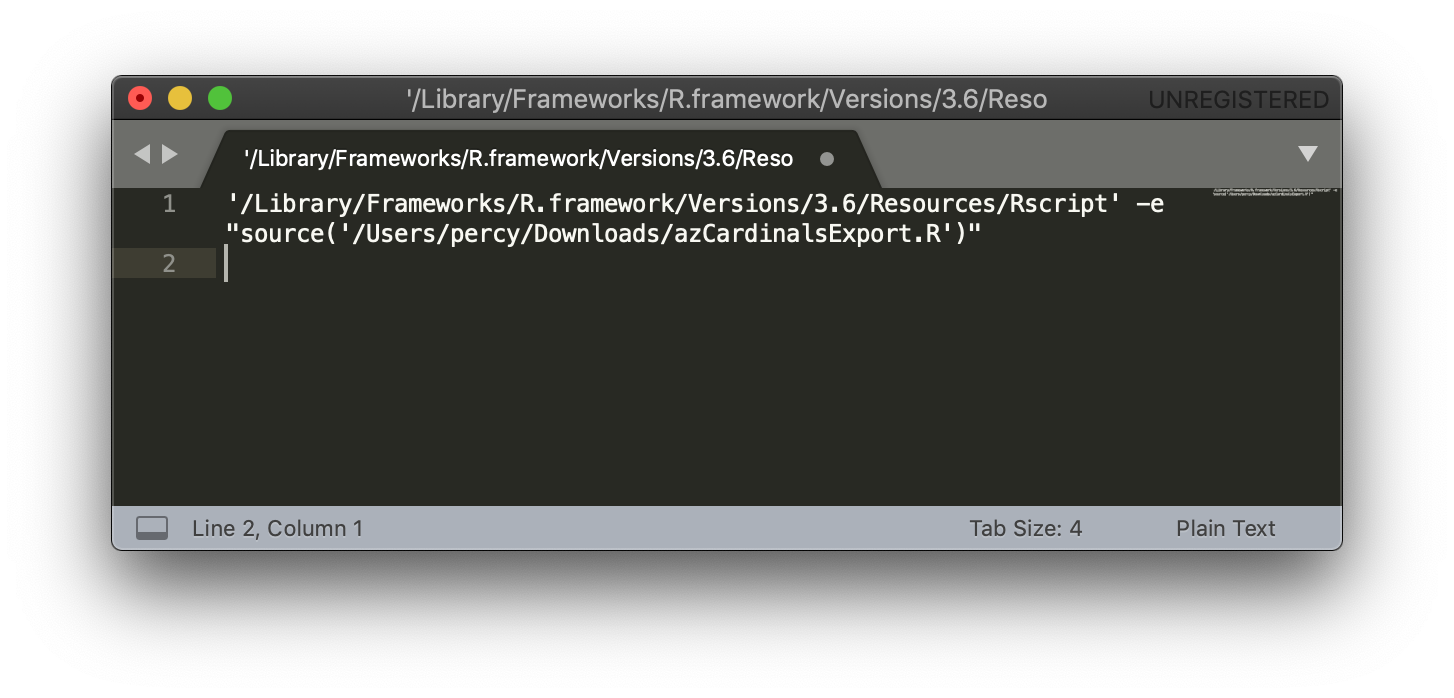
Right click on the Rscript file and press the Alt key to to Copy “Rscript” as Pathname. Copy this into a text editor, along with the path to the R script to be executed via the terminal.
The conveniences of connecting to SQL through R are plentiful, but the human touch of entering SQL credentials remains in many cases. While it may only take a few seconds to enter credentials, some folks may want true automation, which requires a secure way for R to read these credentials. Using keyring package, a script can be written to reference credentials in the Mac Keychain to connect to SQL in R scripts. If Windows is your OS of choice, check this out.
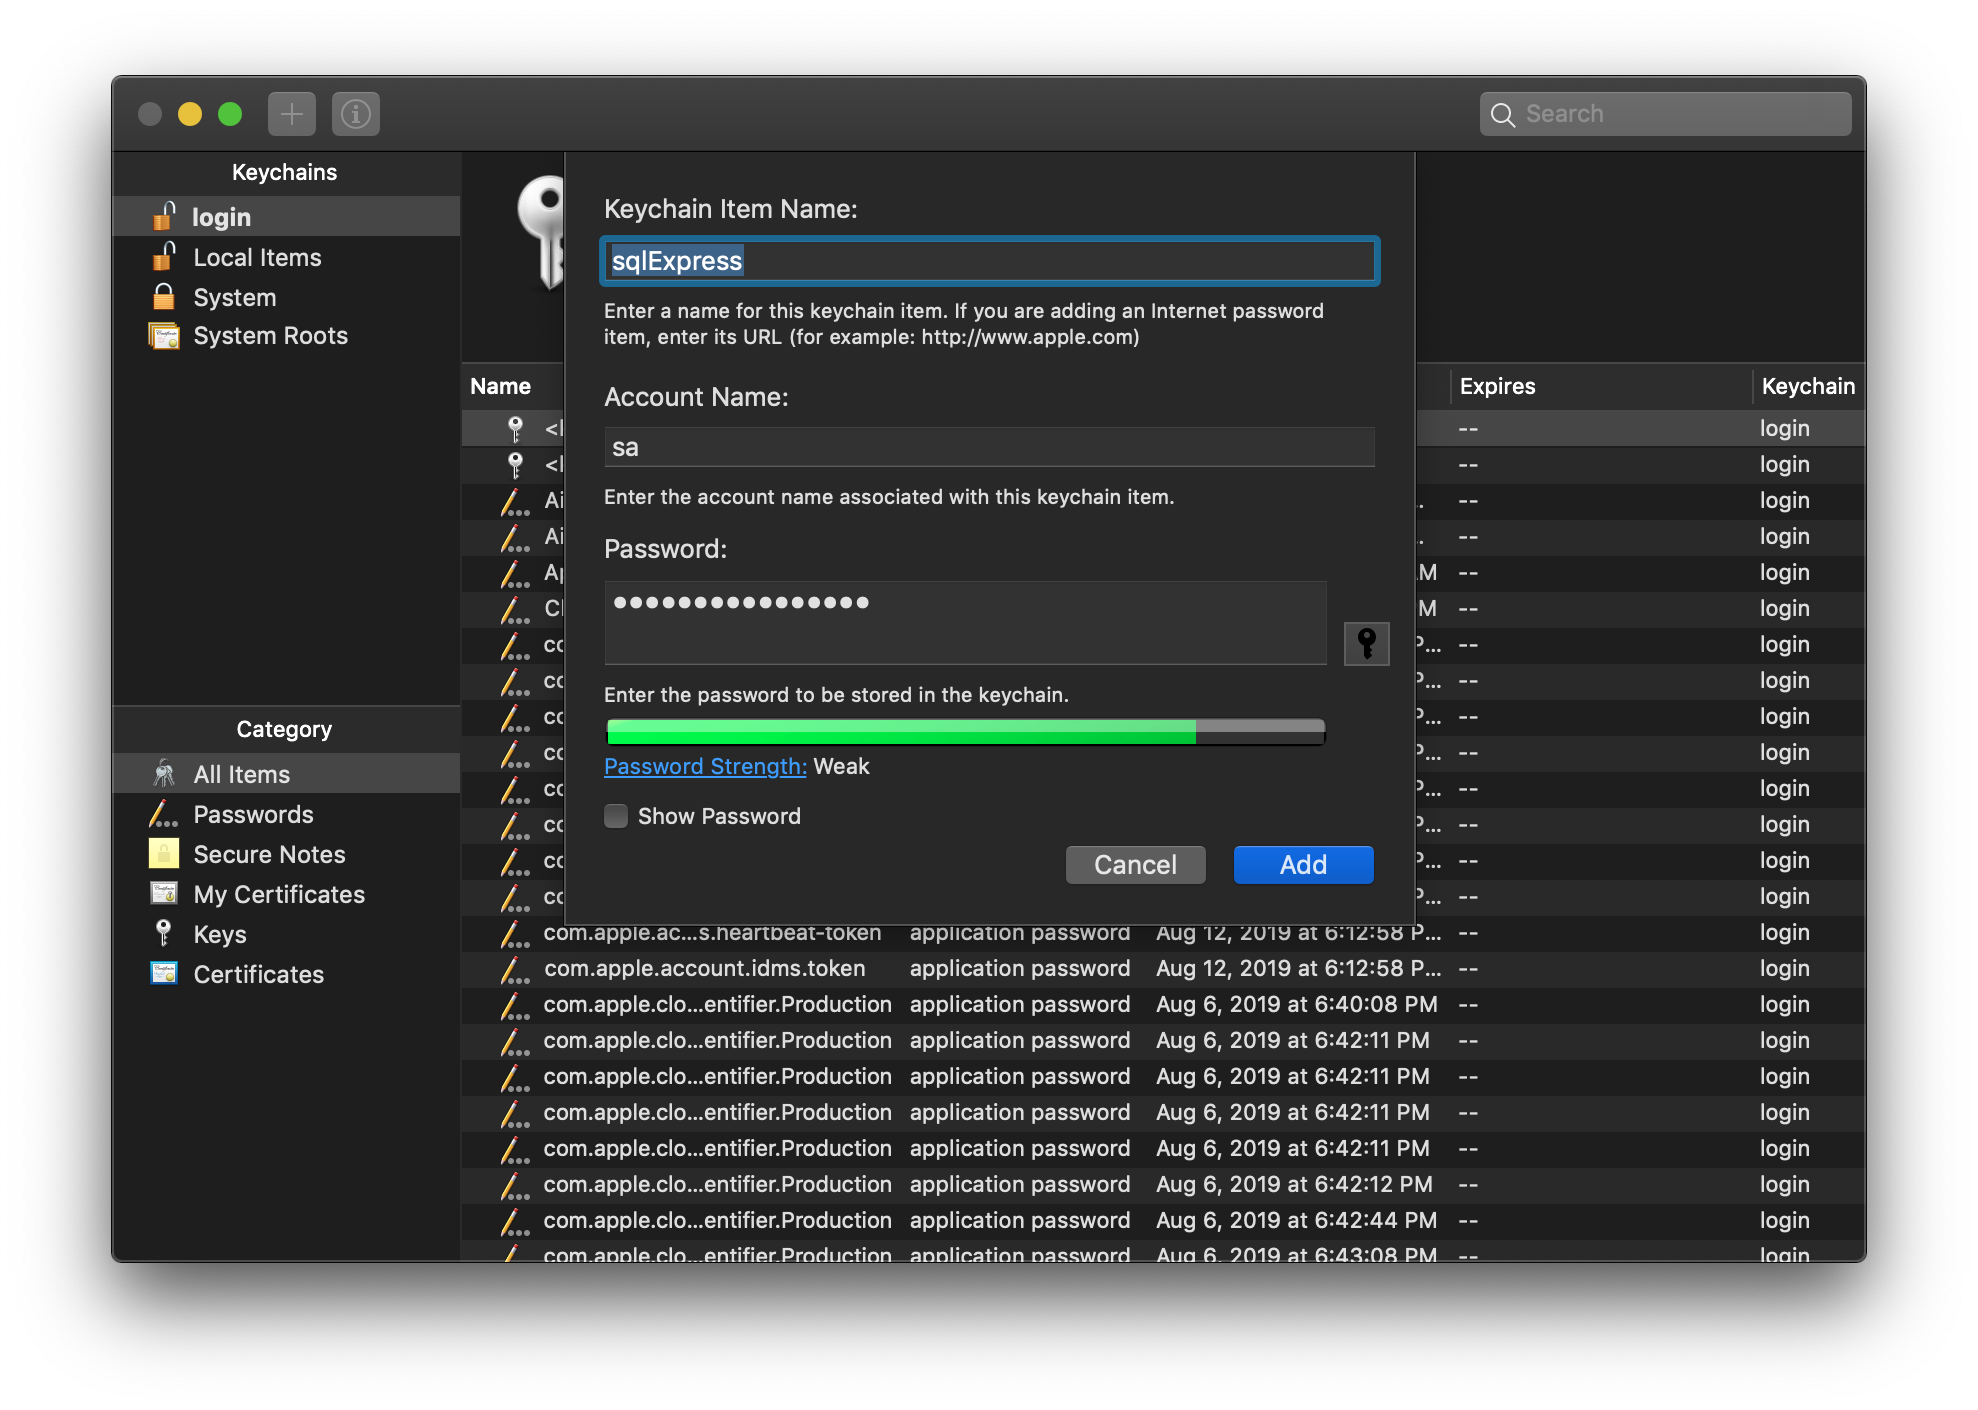
Add Credentials to Keychain
The first step is making sure there are valid credentials to be read from the Keychain. The Keychain Access app can be found in Launchpad. Once open, select the + button in the top left corner. Enter the name of the new entry, in this case sqlExpress, followed by the SQL User Name in the Account Name field and the password in the Password field.
The new entry will now display in the list and can now be referenced in an R script. Note that anytime the SQL password changes, it must be updated here. This can be done by right clicking on the entry and selecting Get Info.
Connect to SQL in R
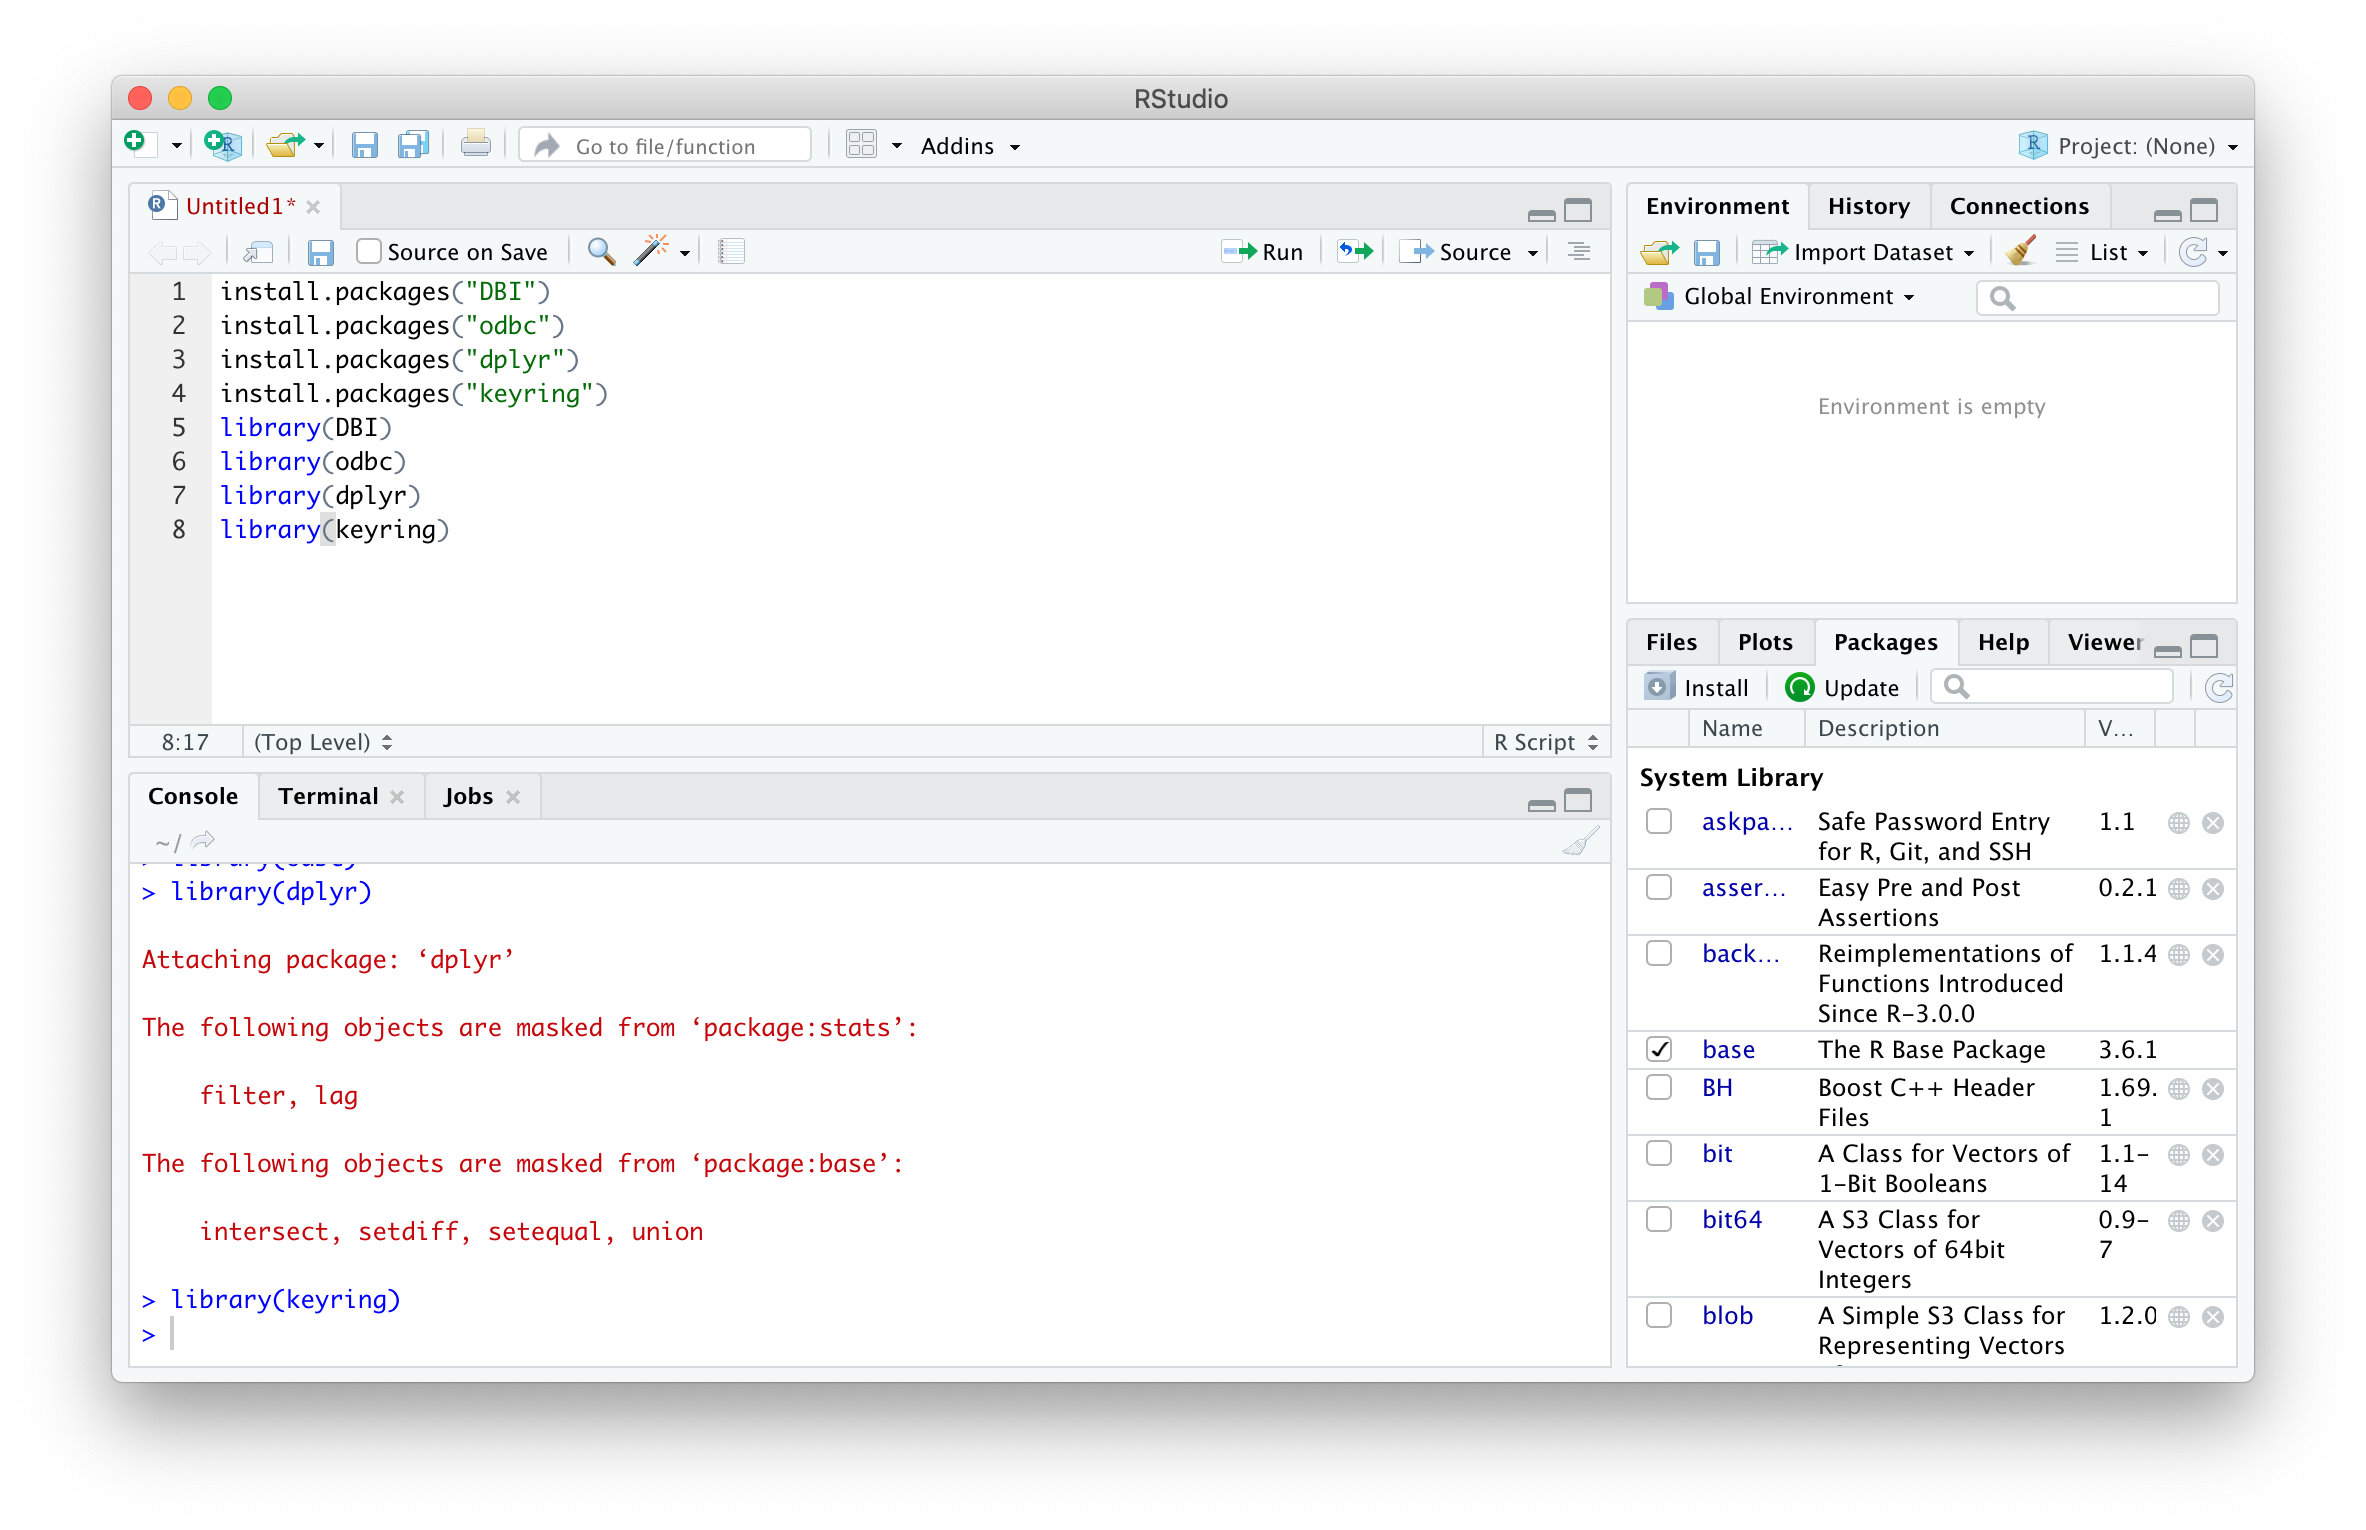
Using the foundations from writing a function to connect to SQL in R, a few commands from the keyring package can be used to reference the credentials created above. The first step is installing and referencing the required packages. Note that installation is only required once per version of R.
# required once per version of R
install.packages("DBI")
install.packages("odbc")
install.packages("dplyr")
install.packages("keyring")
# required each session of R
library(DBI)
library(odbc)
library(dplyr)
library(keyring)
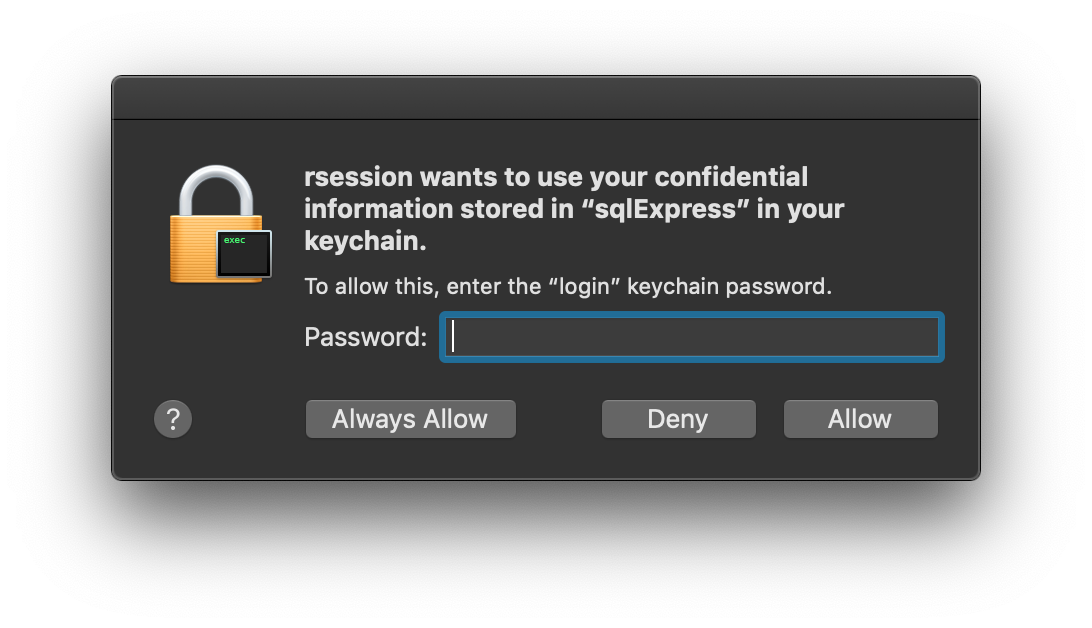
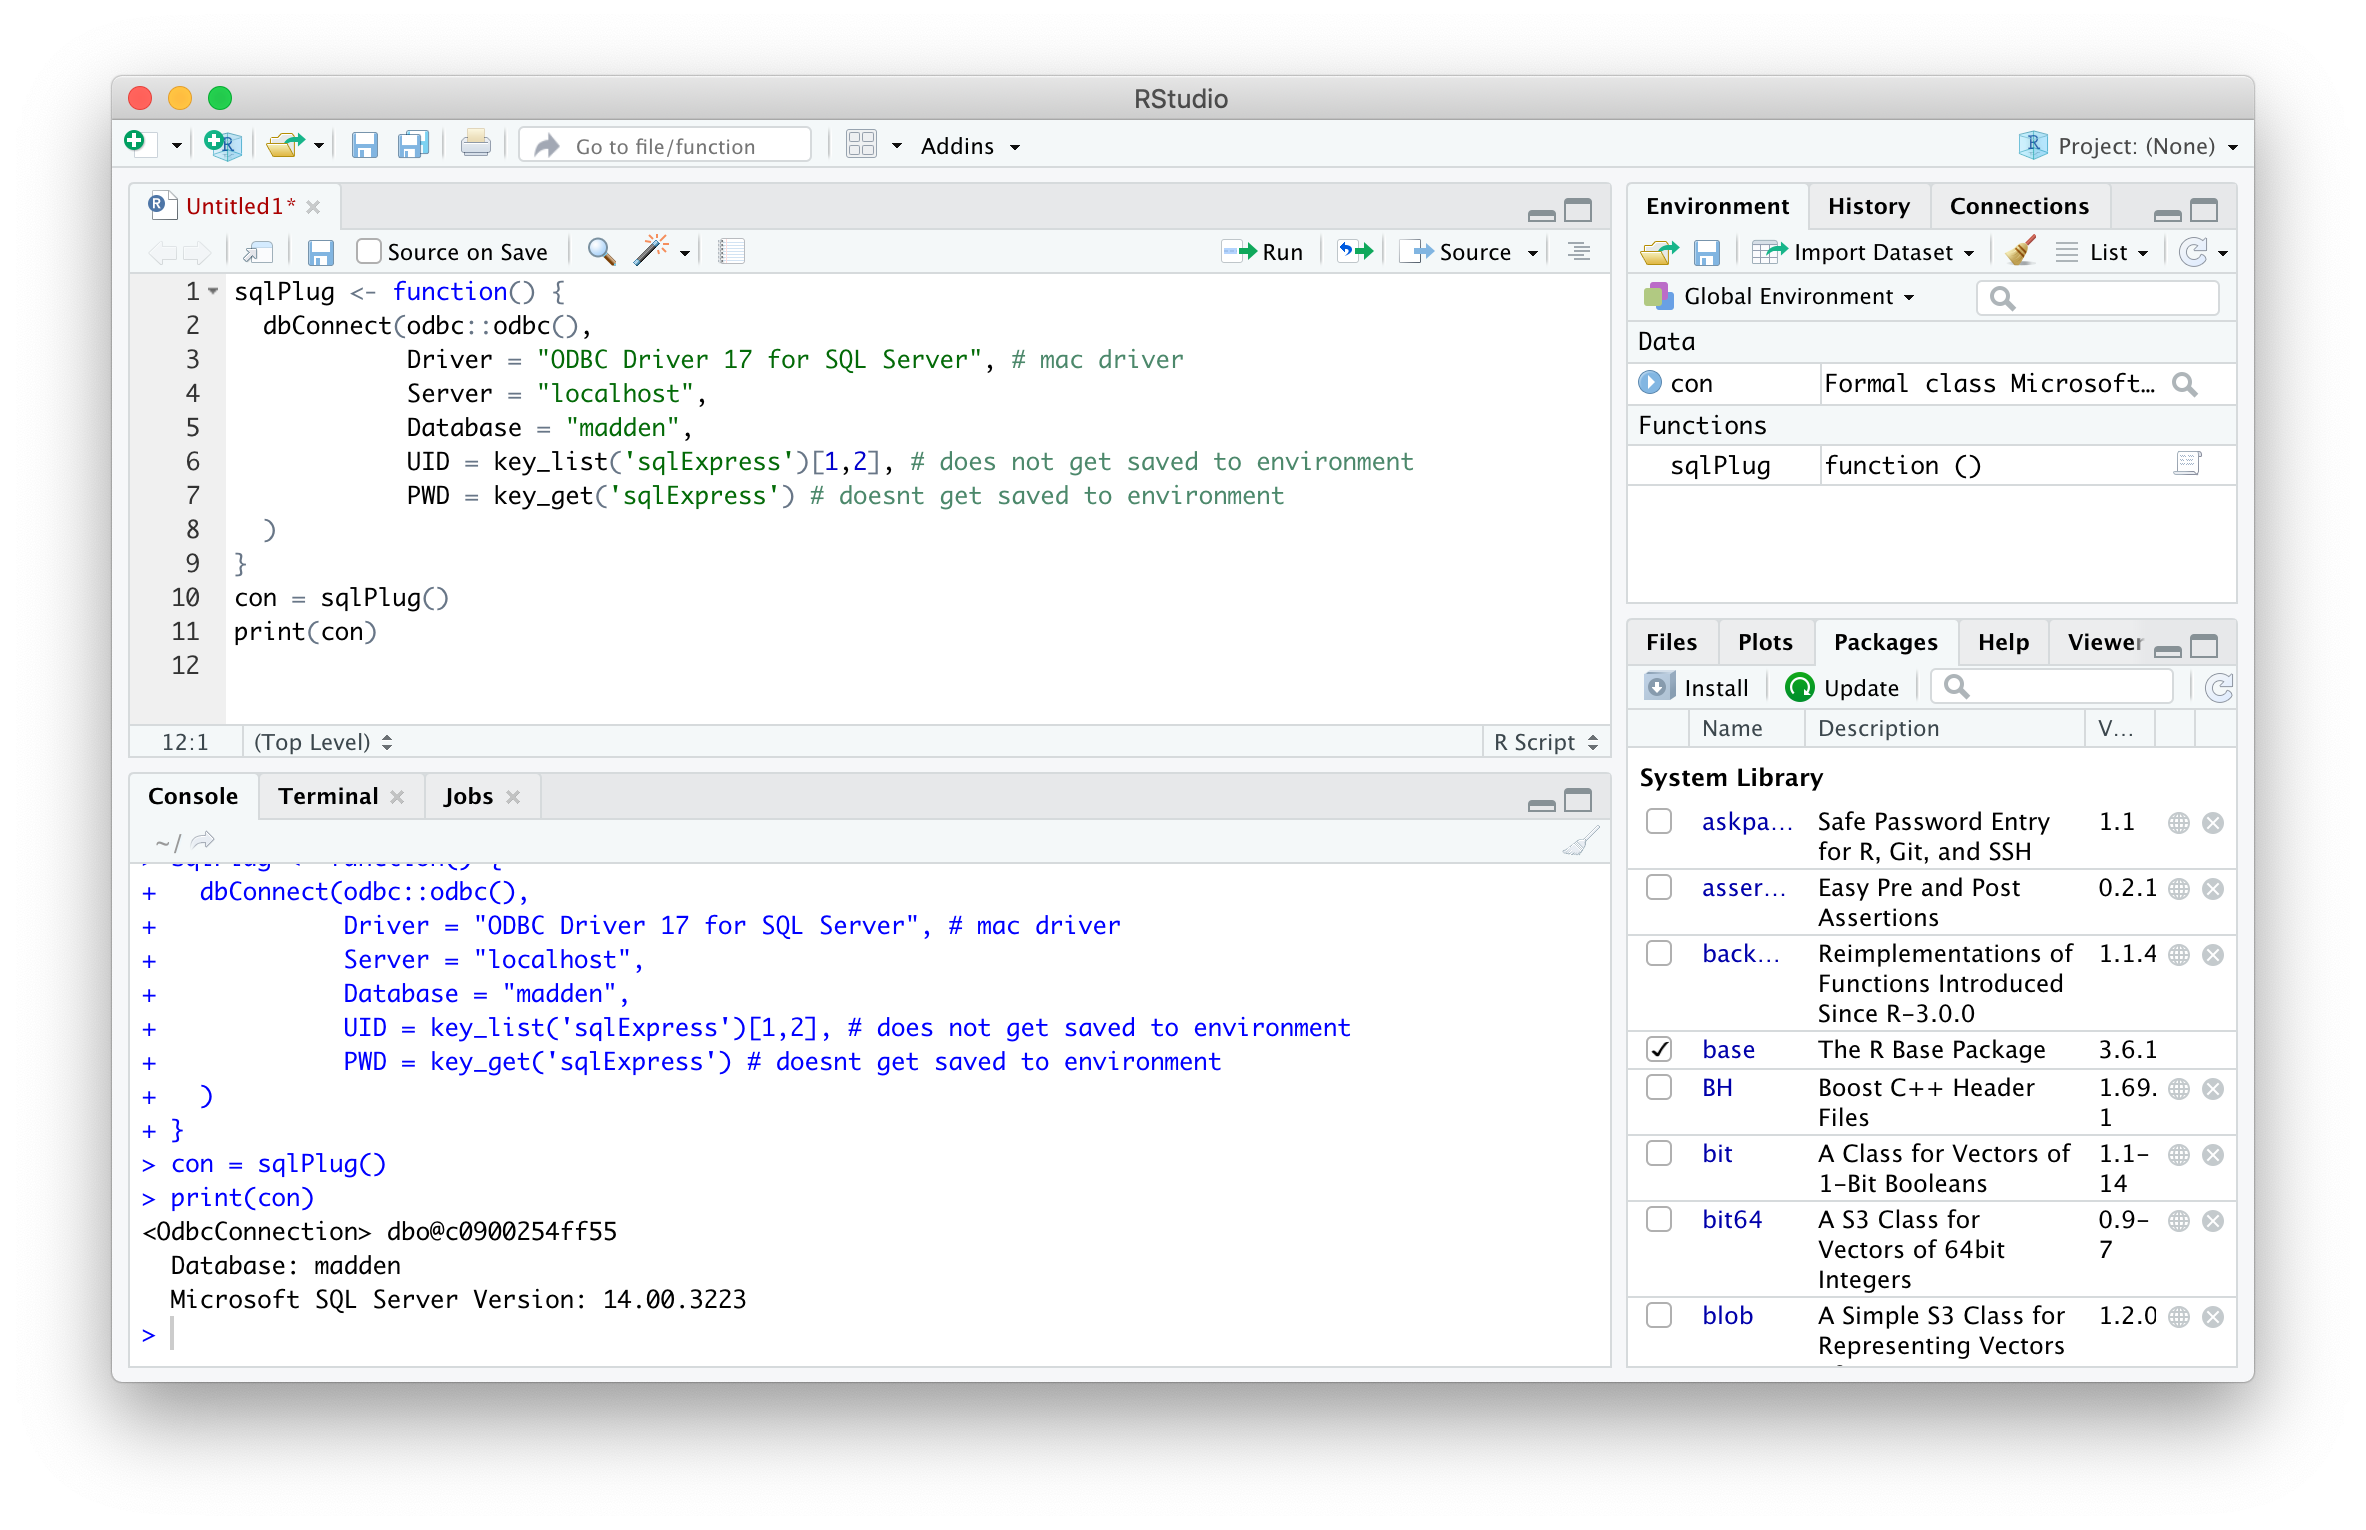
Adding the key_list() and key_get() functions to the SQL connection function allows for automatic connection to a server, in this case localhost. Note that the first time using key_get() function, you must enter your user login password to grant R to the keychain. Select Always Allow to avoid this step in the future.
sqlPlug <- function() {
  dbConnect(odbc::odbc(),
            Driver = "ODBC Driver 17 for SQL Server", # mac driver
            Server = "localhost",
            Database = "madden",
            UID = key_list('sqlExpress')[1,2], # does not get saved to environment
            PWD = key_get('sqlExpress') # doesnt get saved to environment
  )
}
con = sqlPlug() # makes connection
print(con) # prints connection details
g
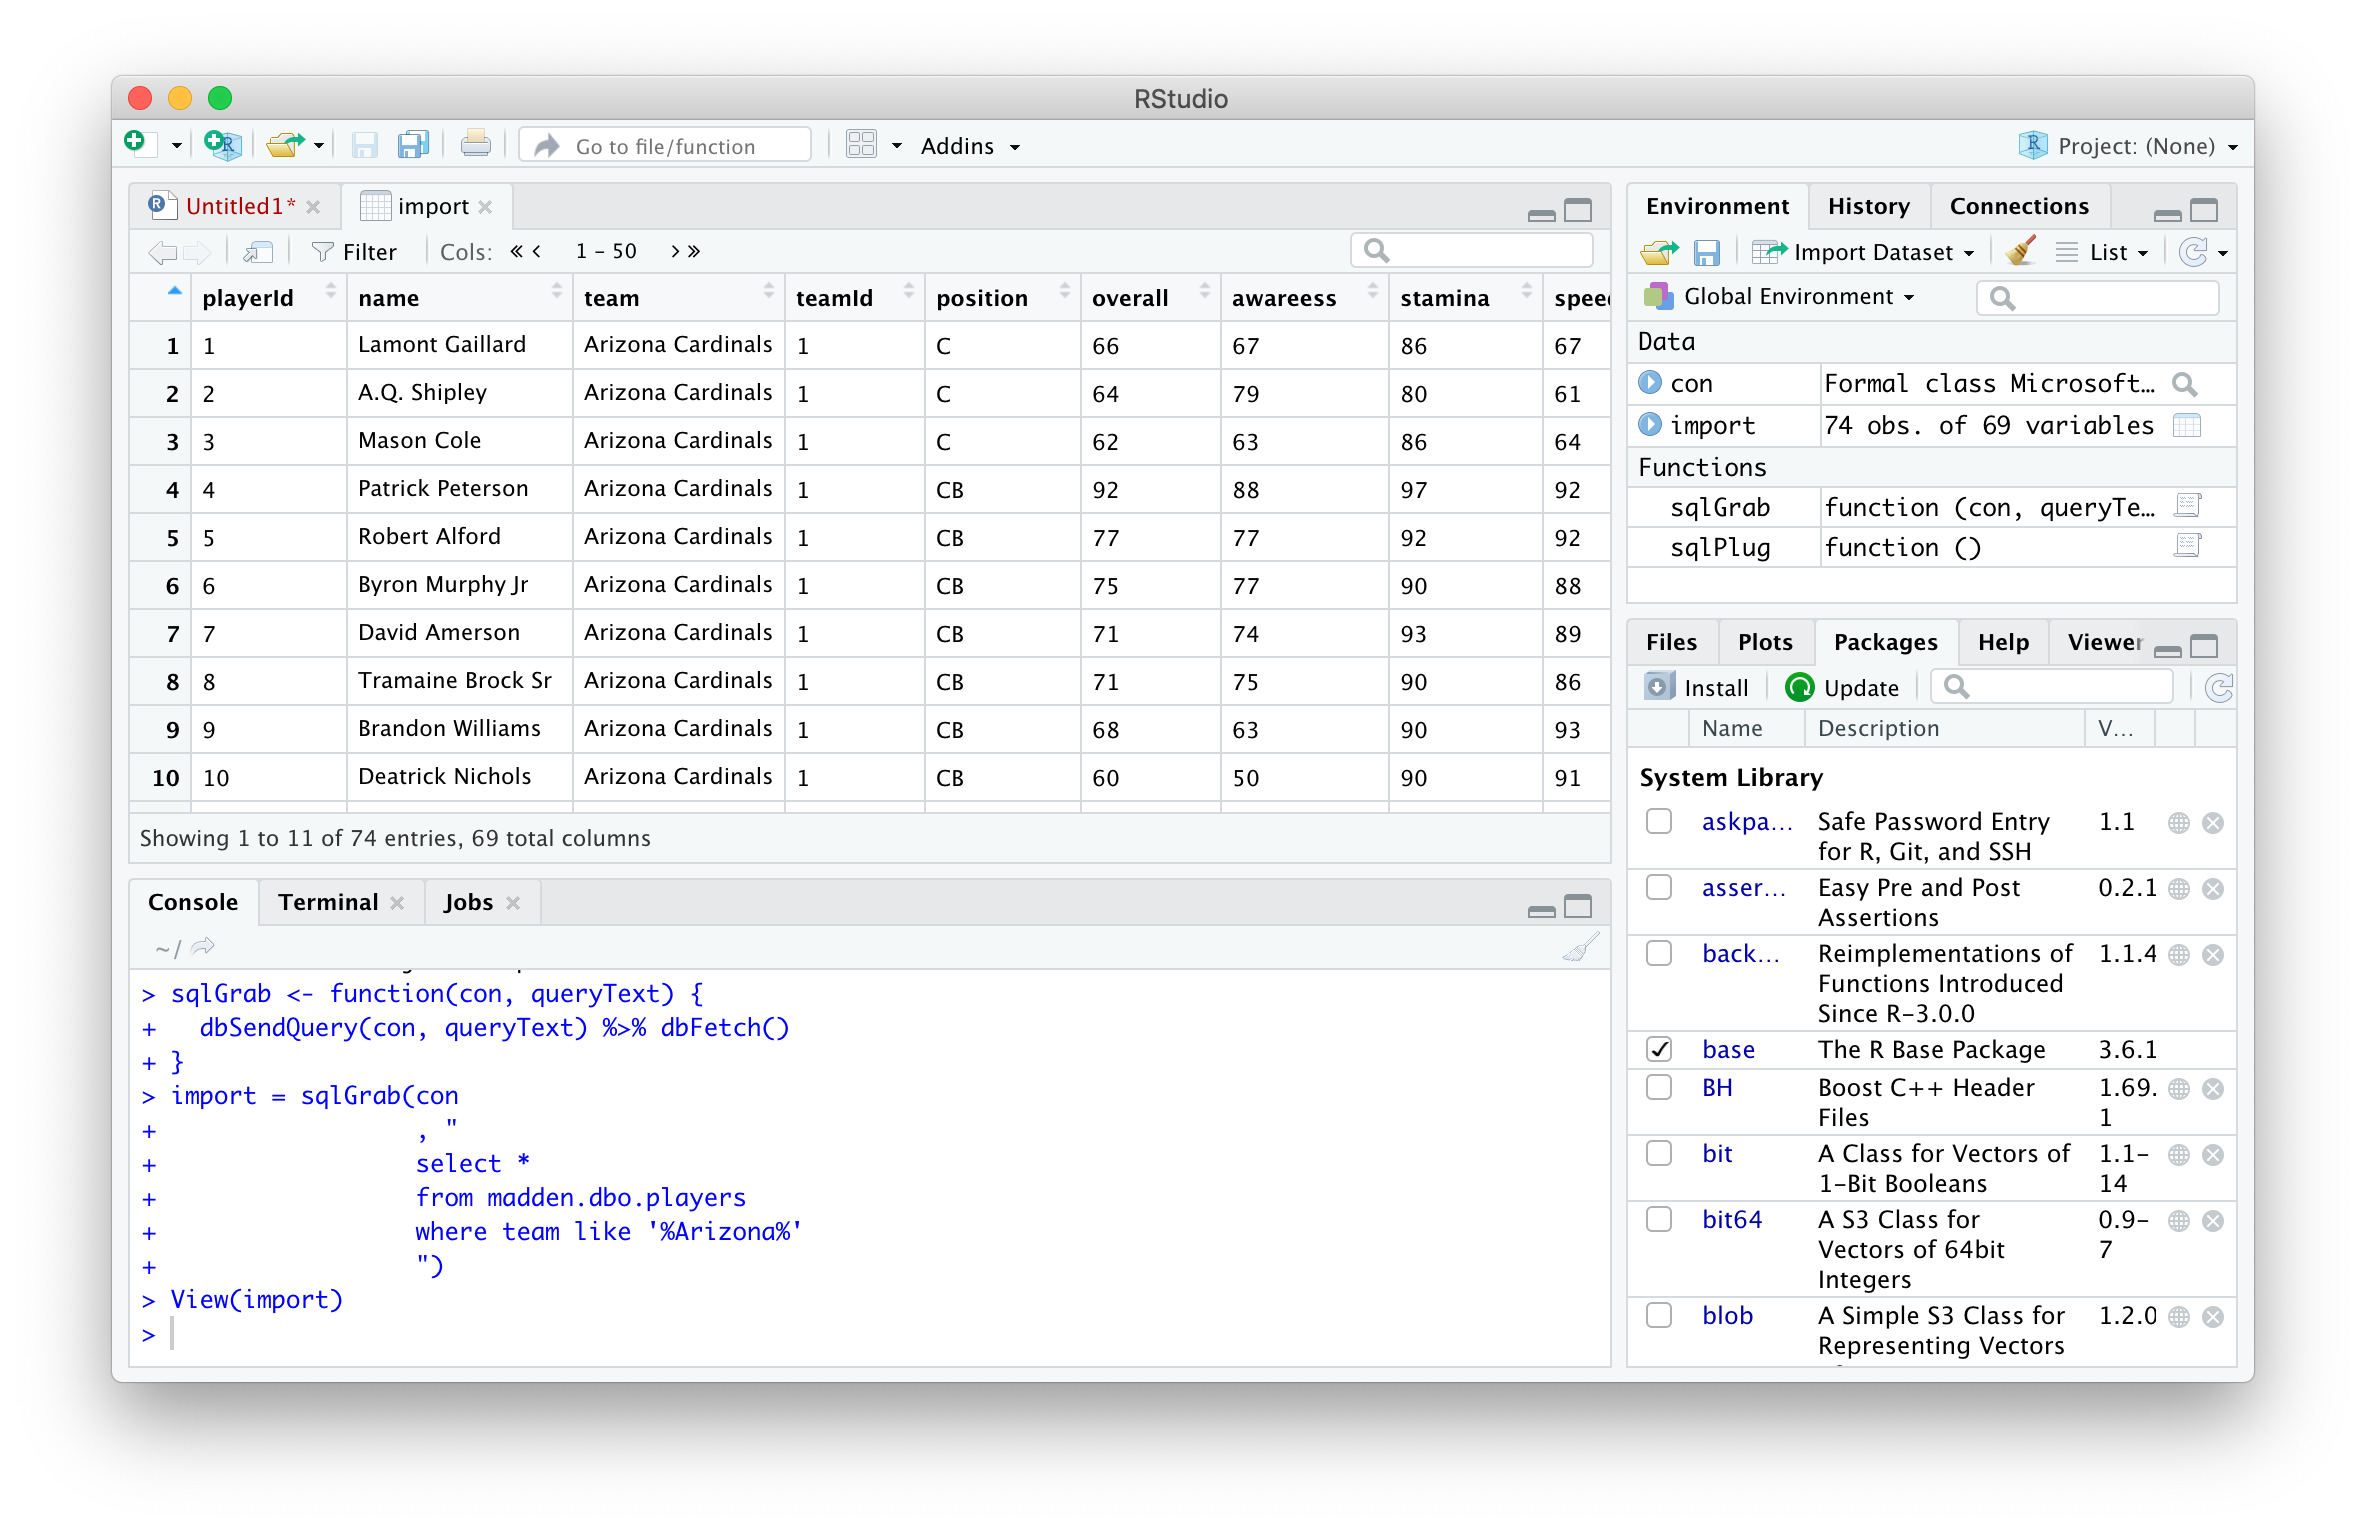
The sqlGrab() function can then be used to import data for further application, but any SQL command can be sent using the DBIpackage.
sqlGrab <- function(con, queryText) {
  dbSendQuery(con, queryText) %>% dbFetch()
}
import = sqlGrab(con
                 , "
                 select *
                 from madden.dbo.players
                 where team like '%Arizona%'
                 ")
View(import)
Special thanks to this Madden player database for the data. It looks like they have a bunch of other sports video game datasets so check it out.
There are many great tools for connecting to Microsoft SQL Server, but most lack convenient and scalable features for importing and exporting data from the server. With the help of R and a few of its packages, loading data from any type of data source to a SQL Server instance.
Get Set Up with R
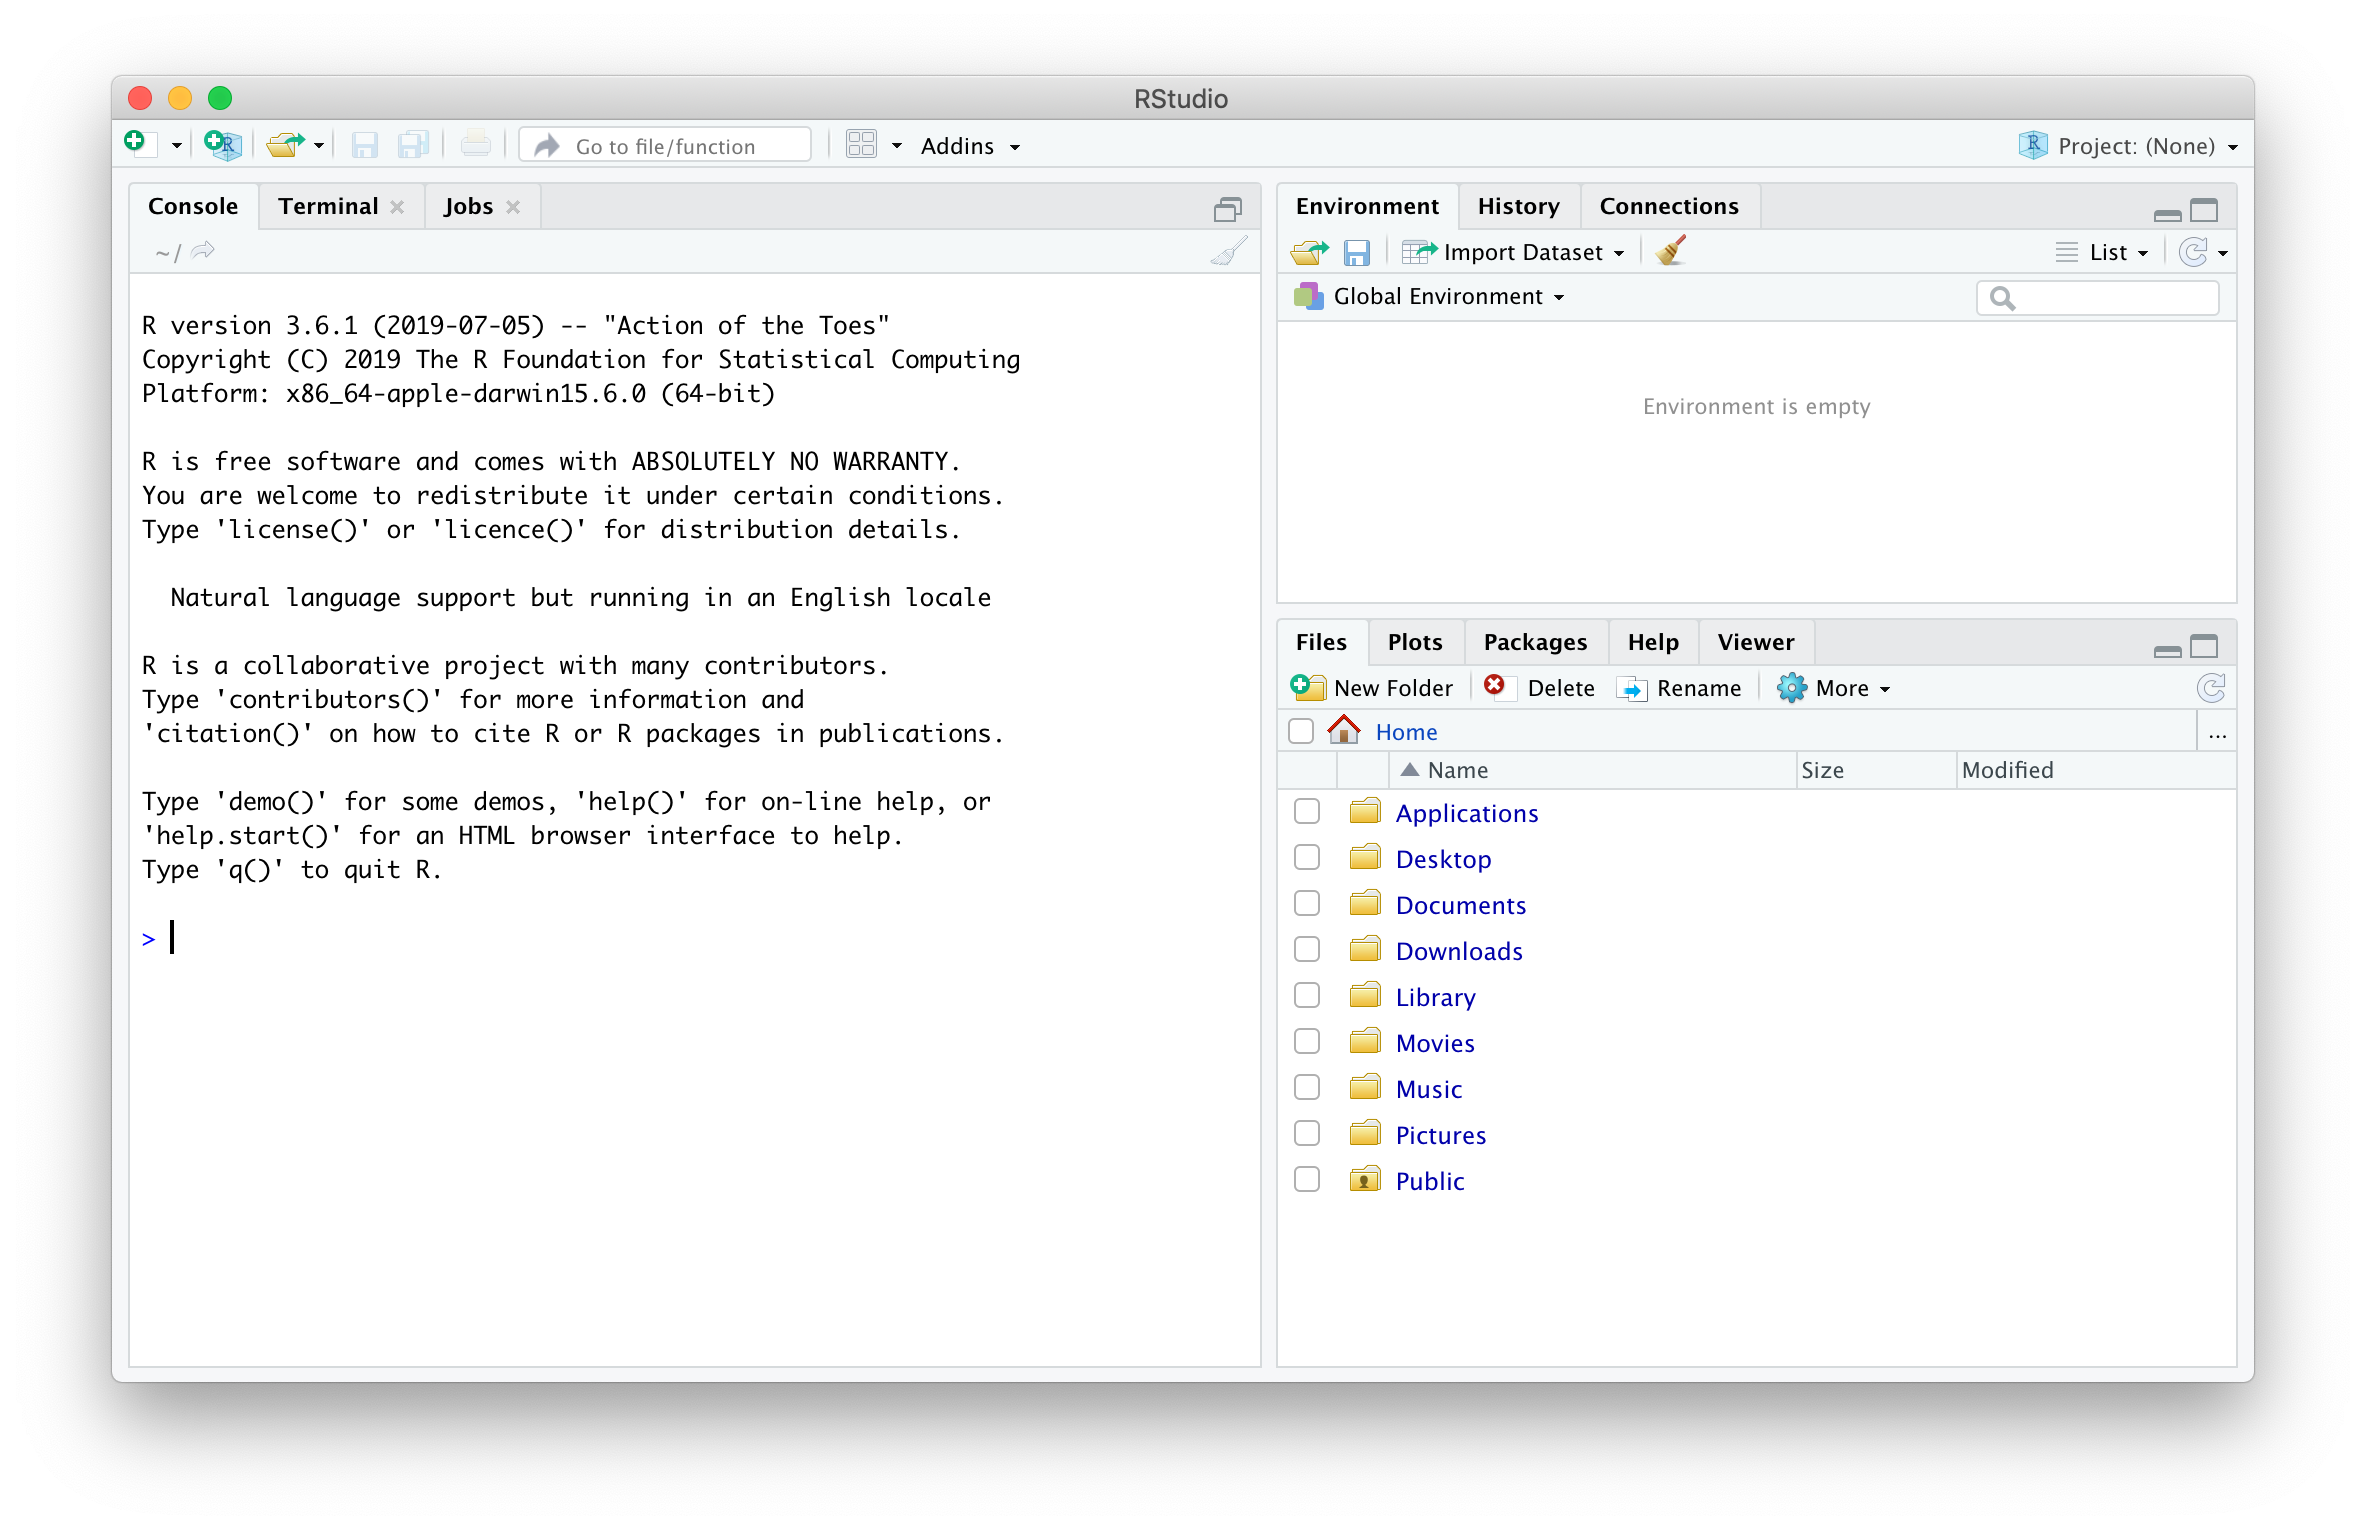
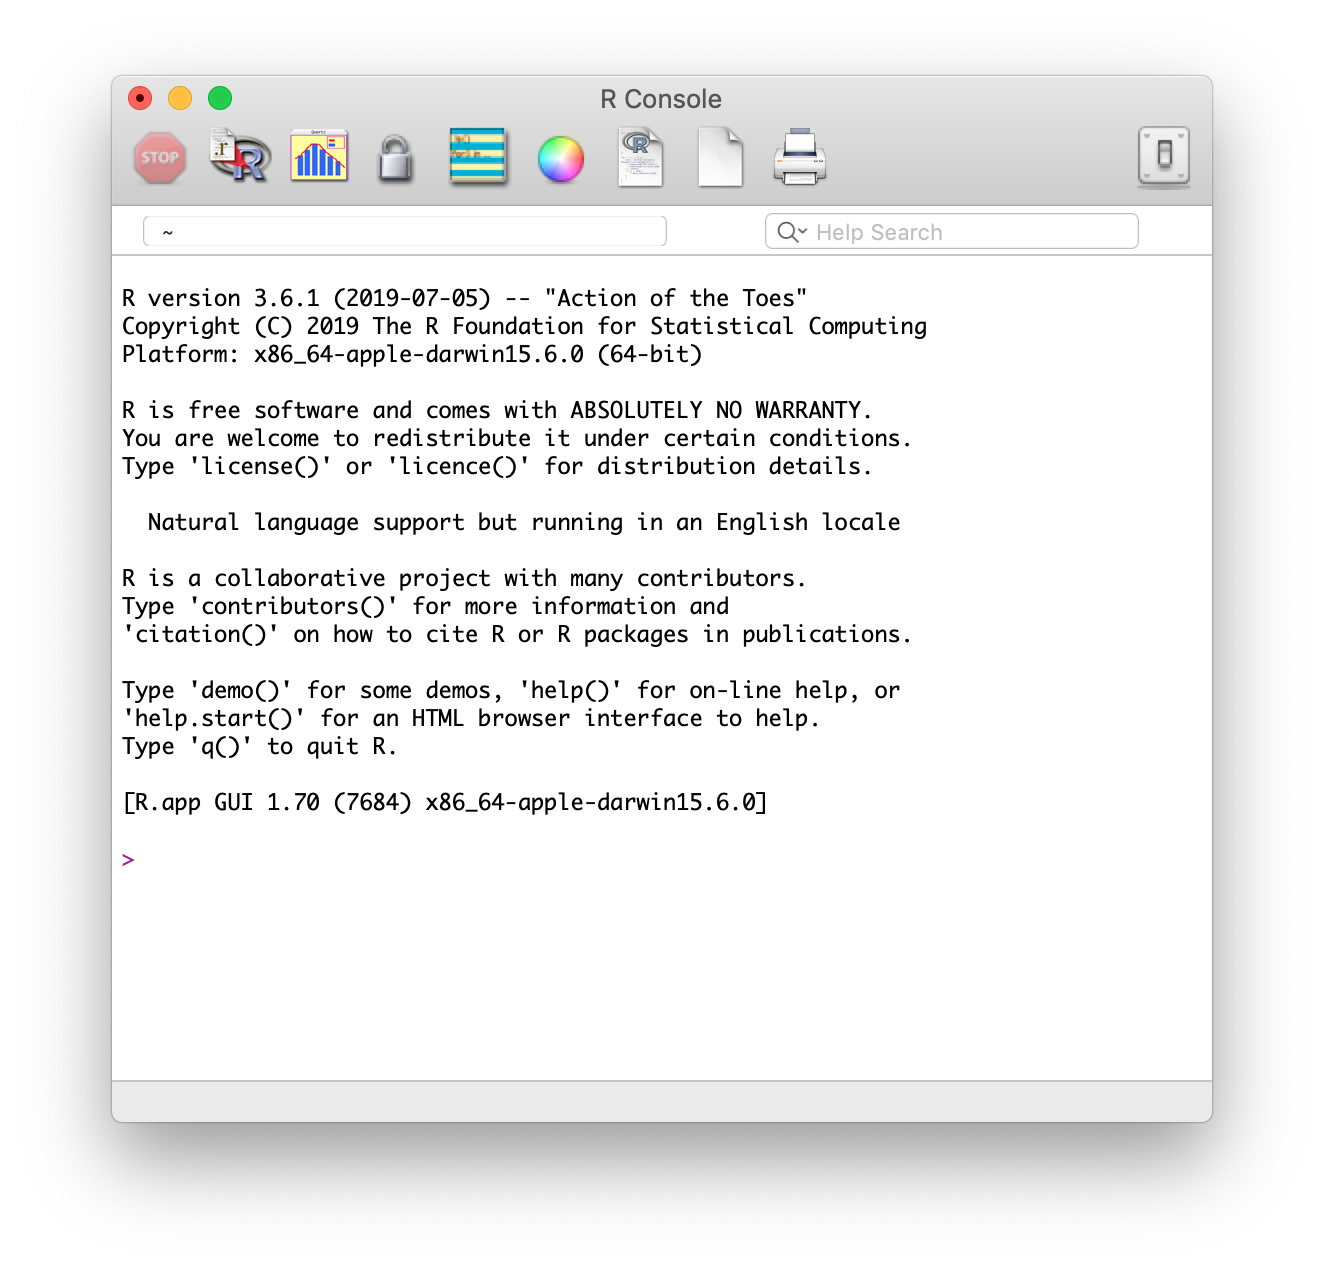
Obviously R is required for this setup, so if it’s not ready installed, the software is available here. RStudio, an interface for R, is also recommended as it’s much more user friendly for writing R code. After installing R (and RStudio) you can open the interface of your choosing and begin writing R code.
RStudio
R
Installin and Callin Packages
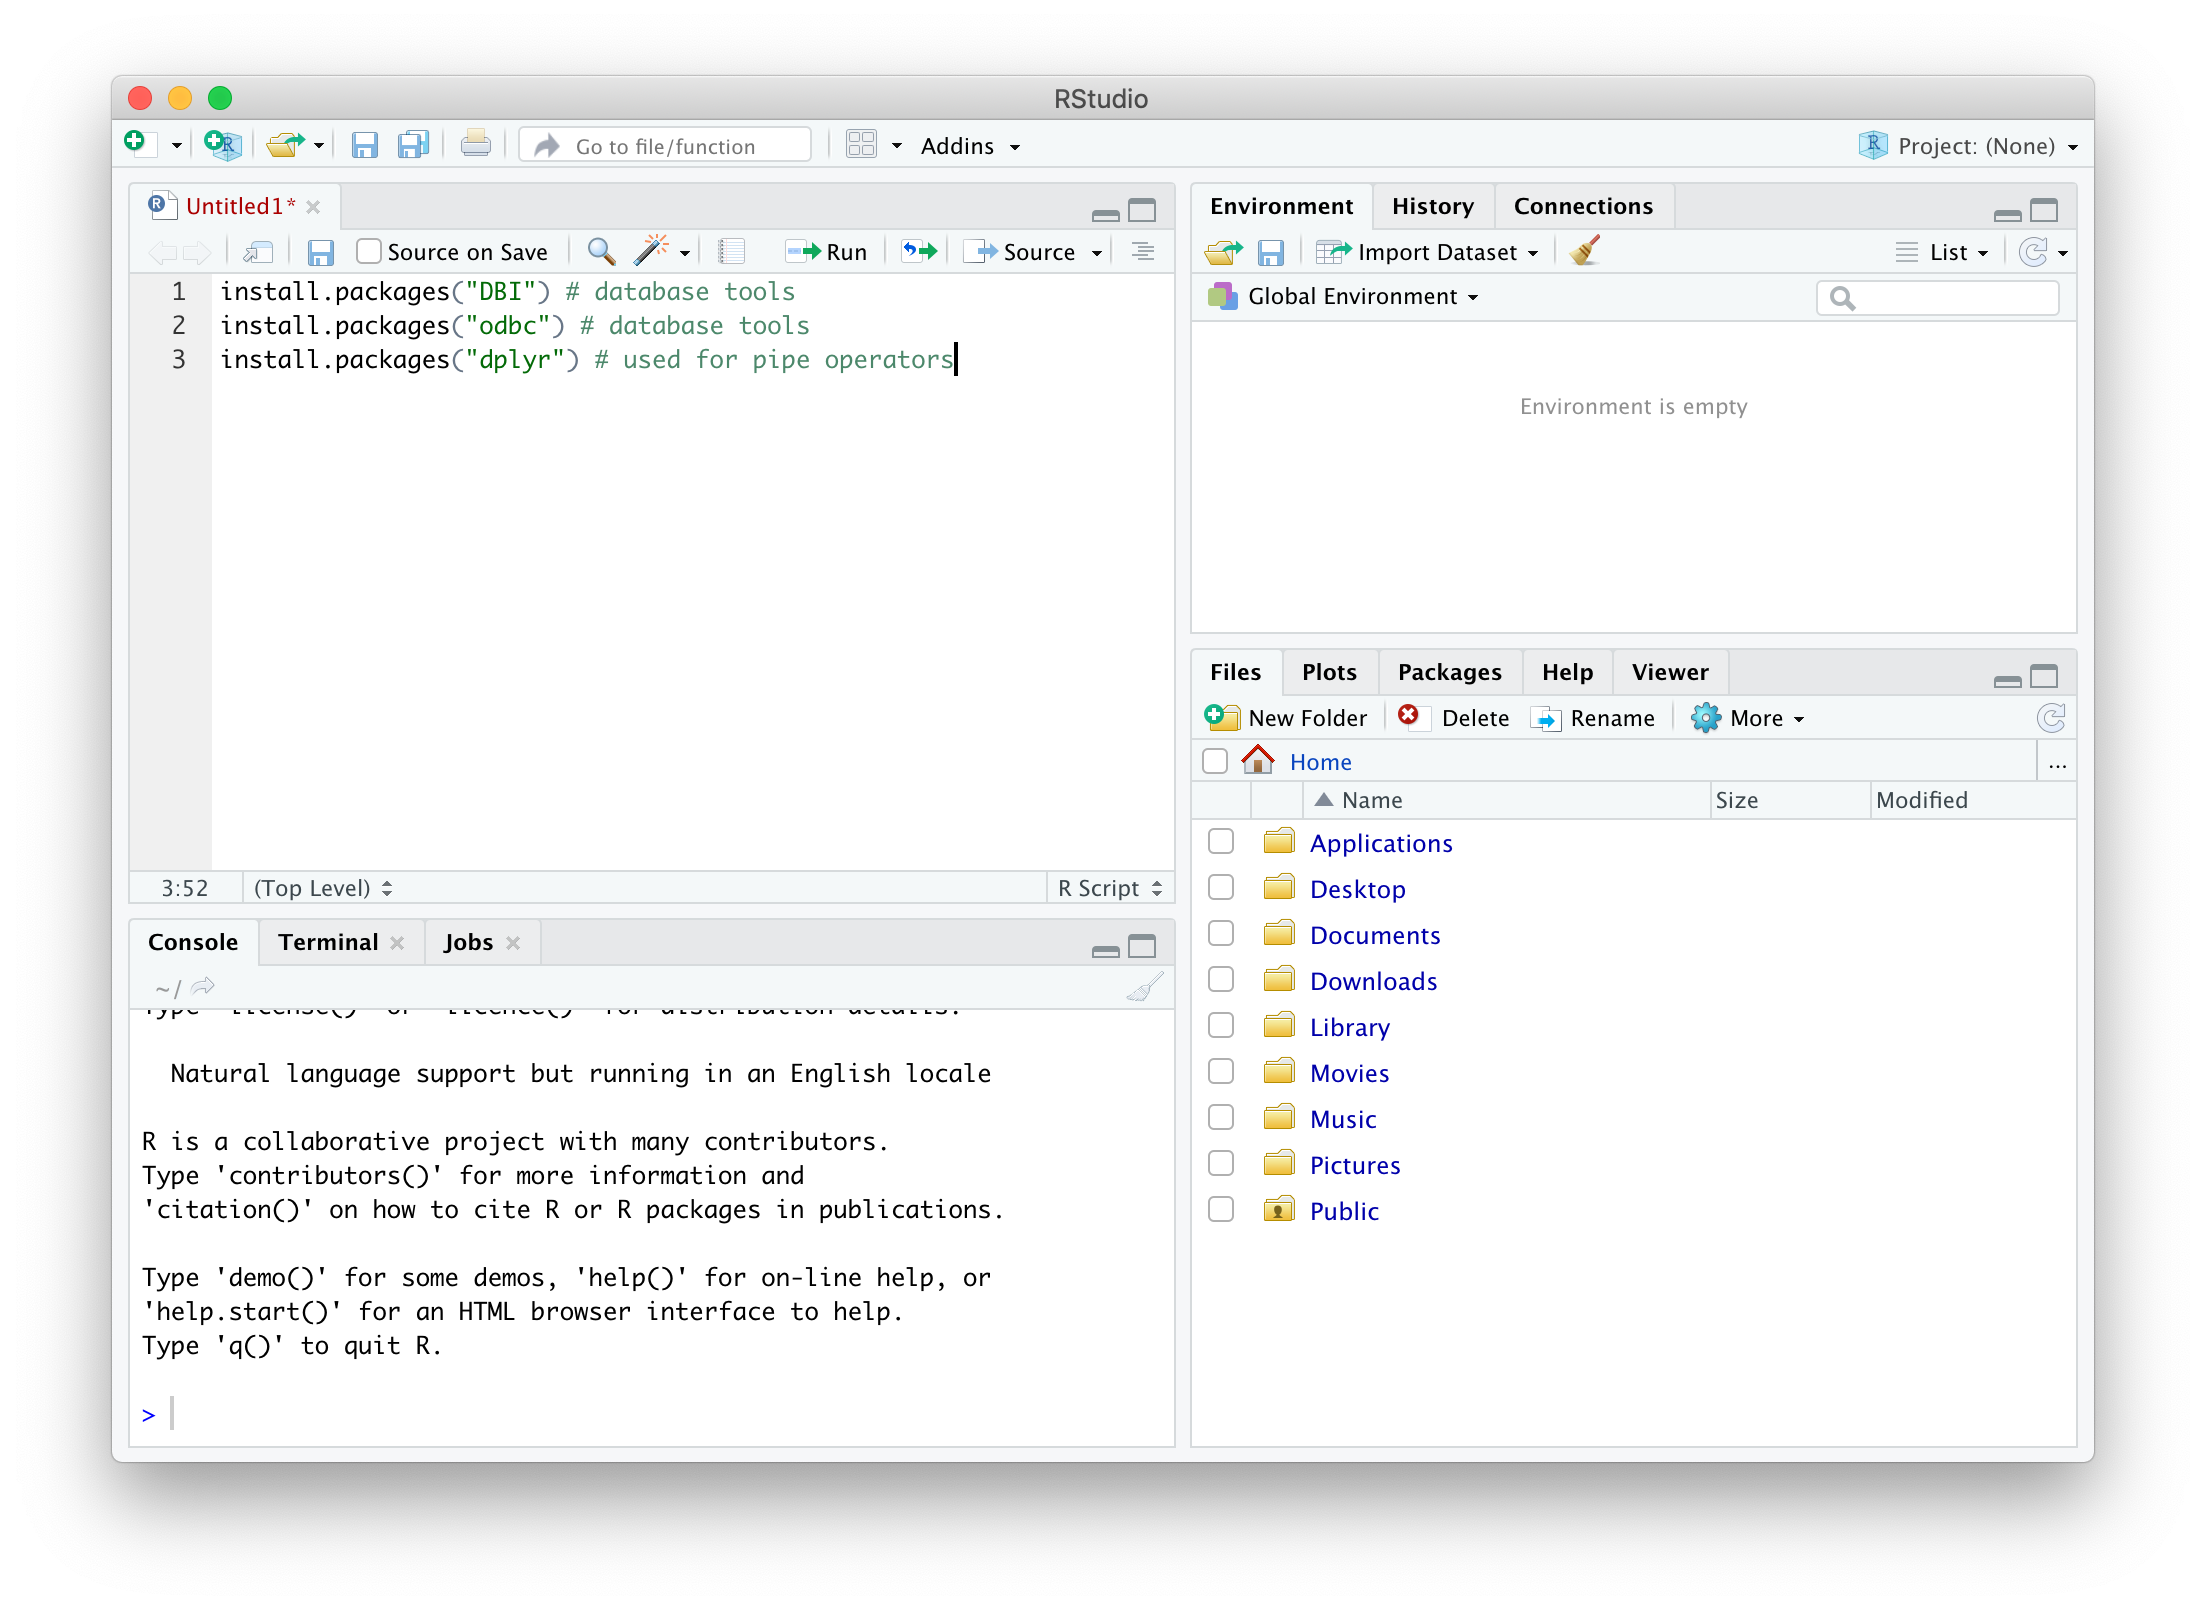
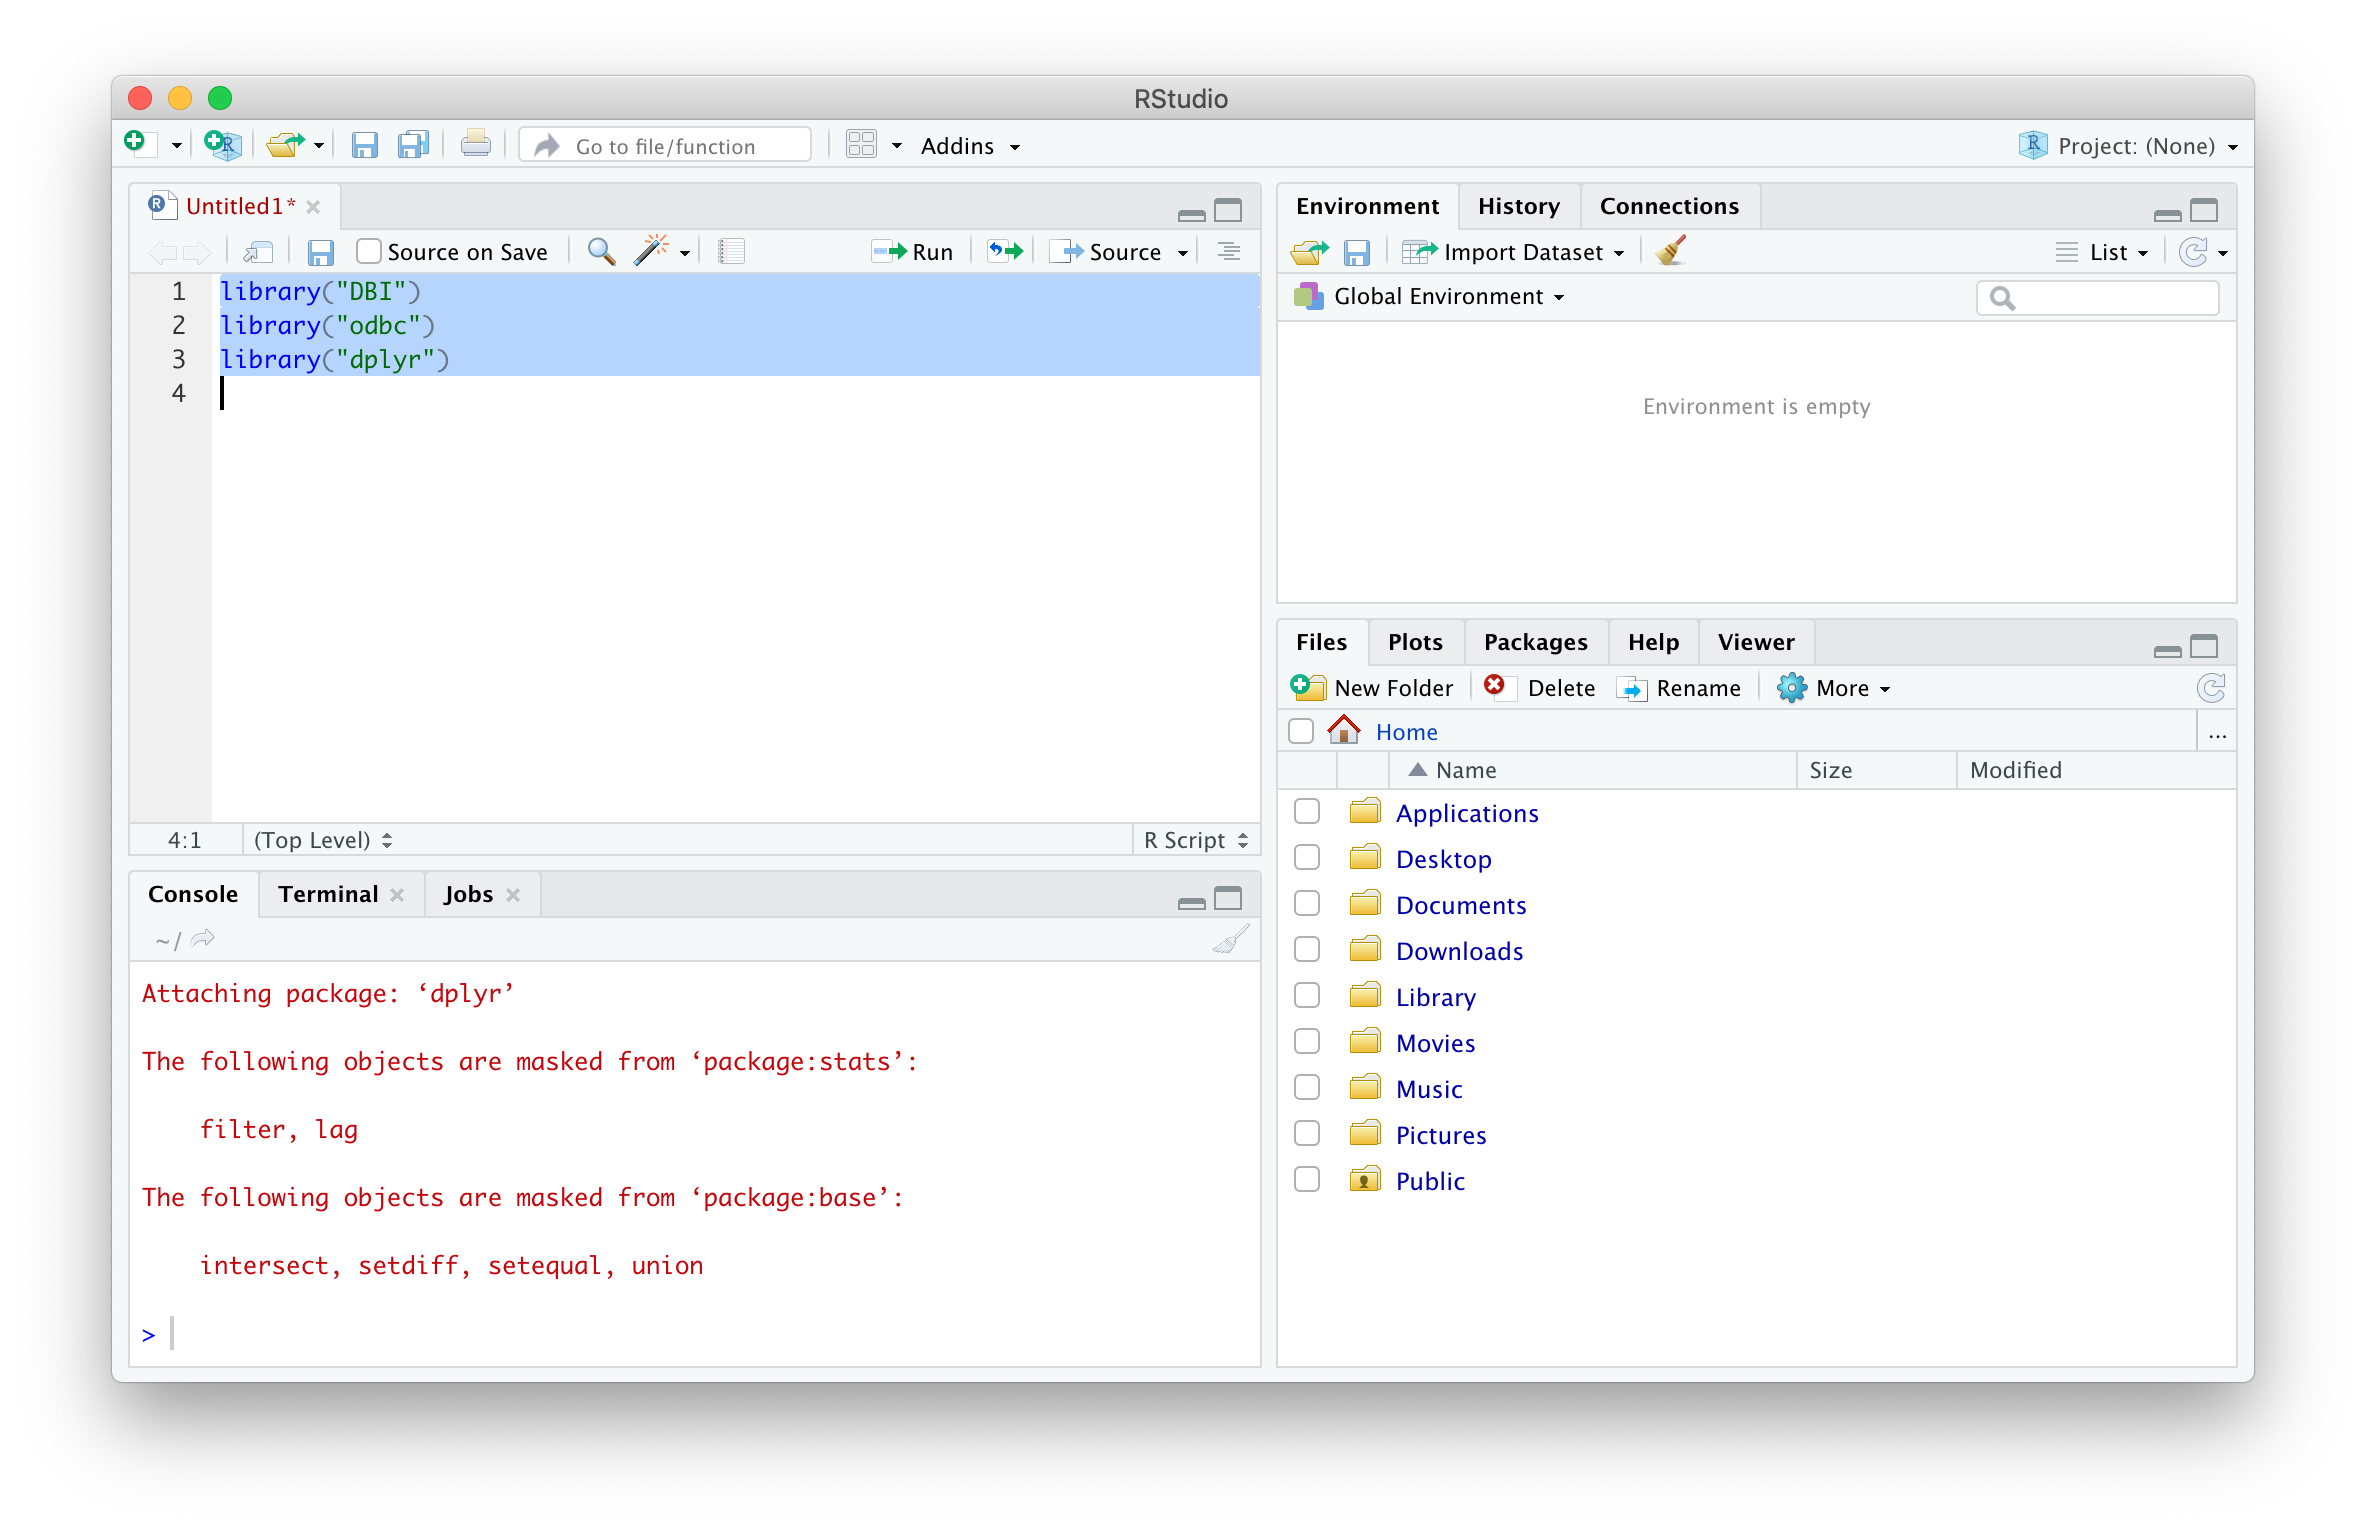
R has a robust base set of commands, but to do some more advanced things, additional packages are need. Packages are generally available through an R repository that can be connected to for easy downloads through a few commands. In order to connect to SQL, a few packages must be installed on the computer. The install.packages() command only needs to be used once per computer, while the library() command must be used in each section that the package is required.
install.packages("DBI") # database tools
install.packages("odbc") # database tools
install.packages("dplyr") # used for pipe operators
library("DBI") # database tools
library("odbc") # database tools
library("dplyr") # used for pipe operators
You should now be all set to start writing code using these packages!
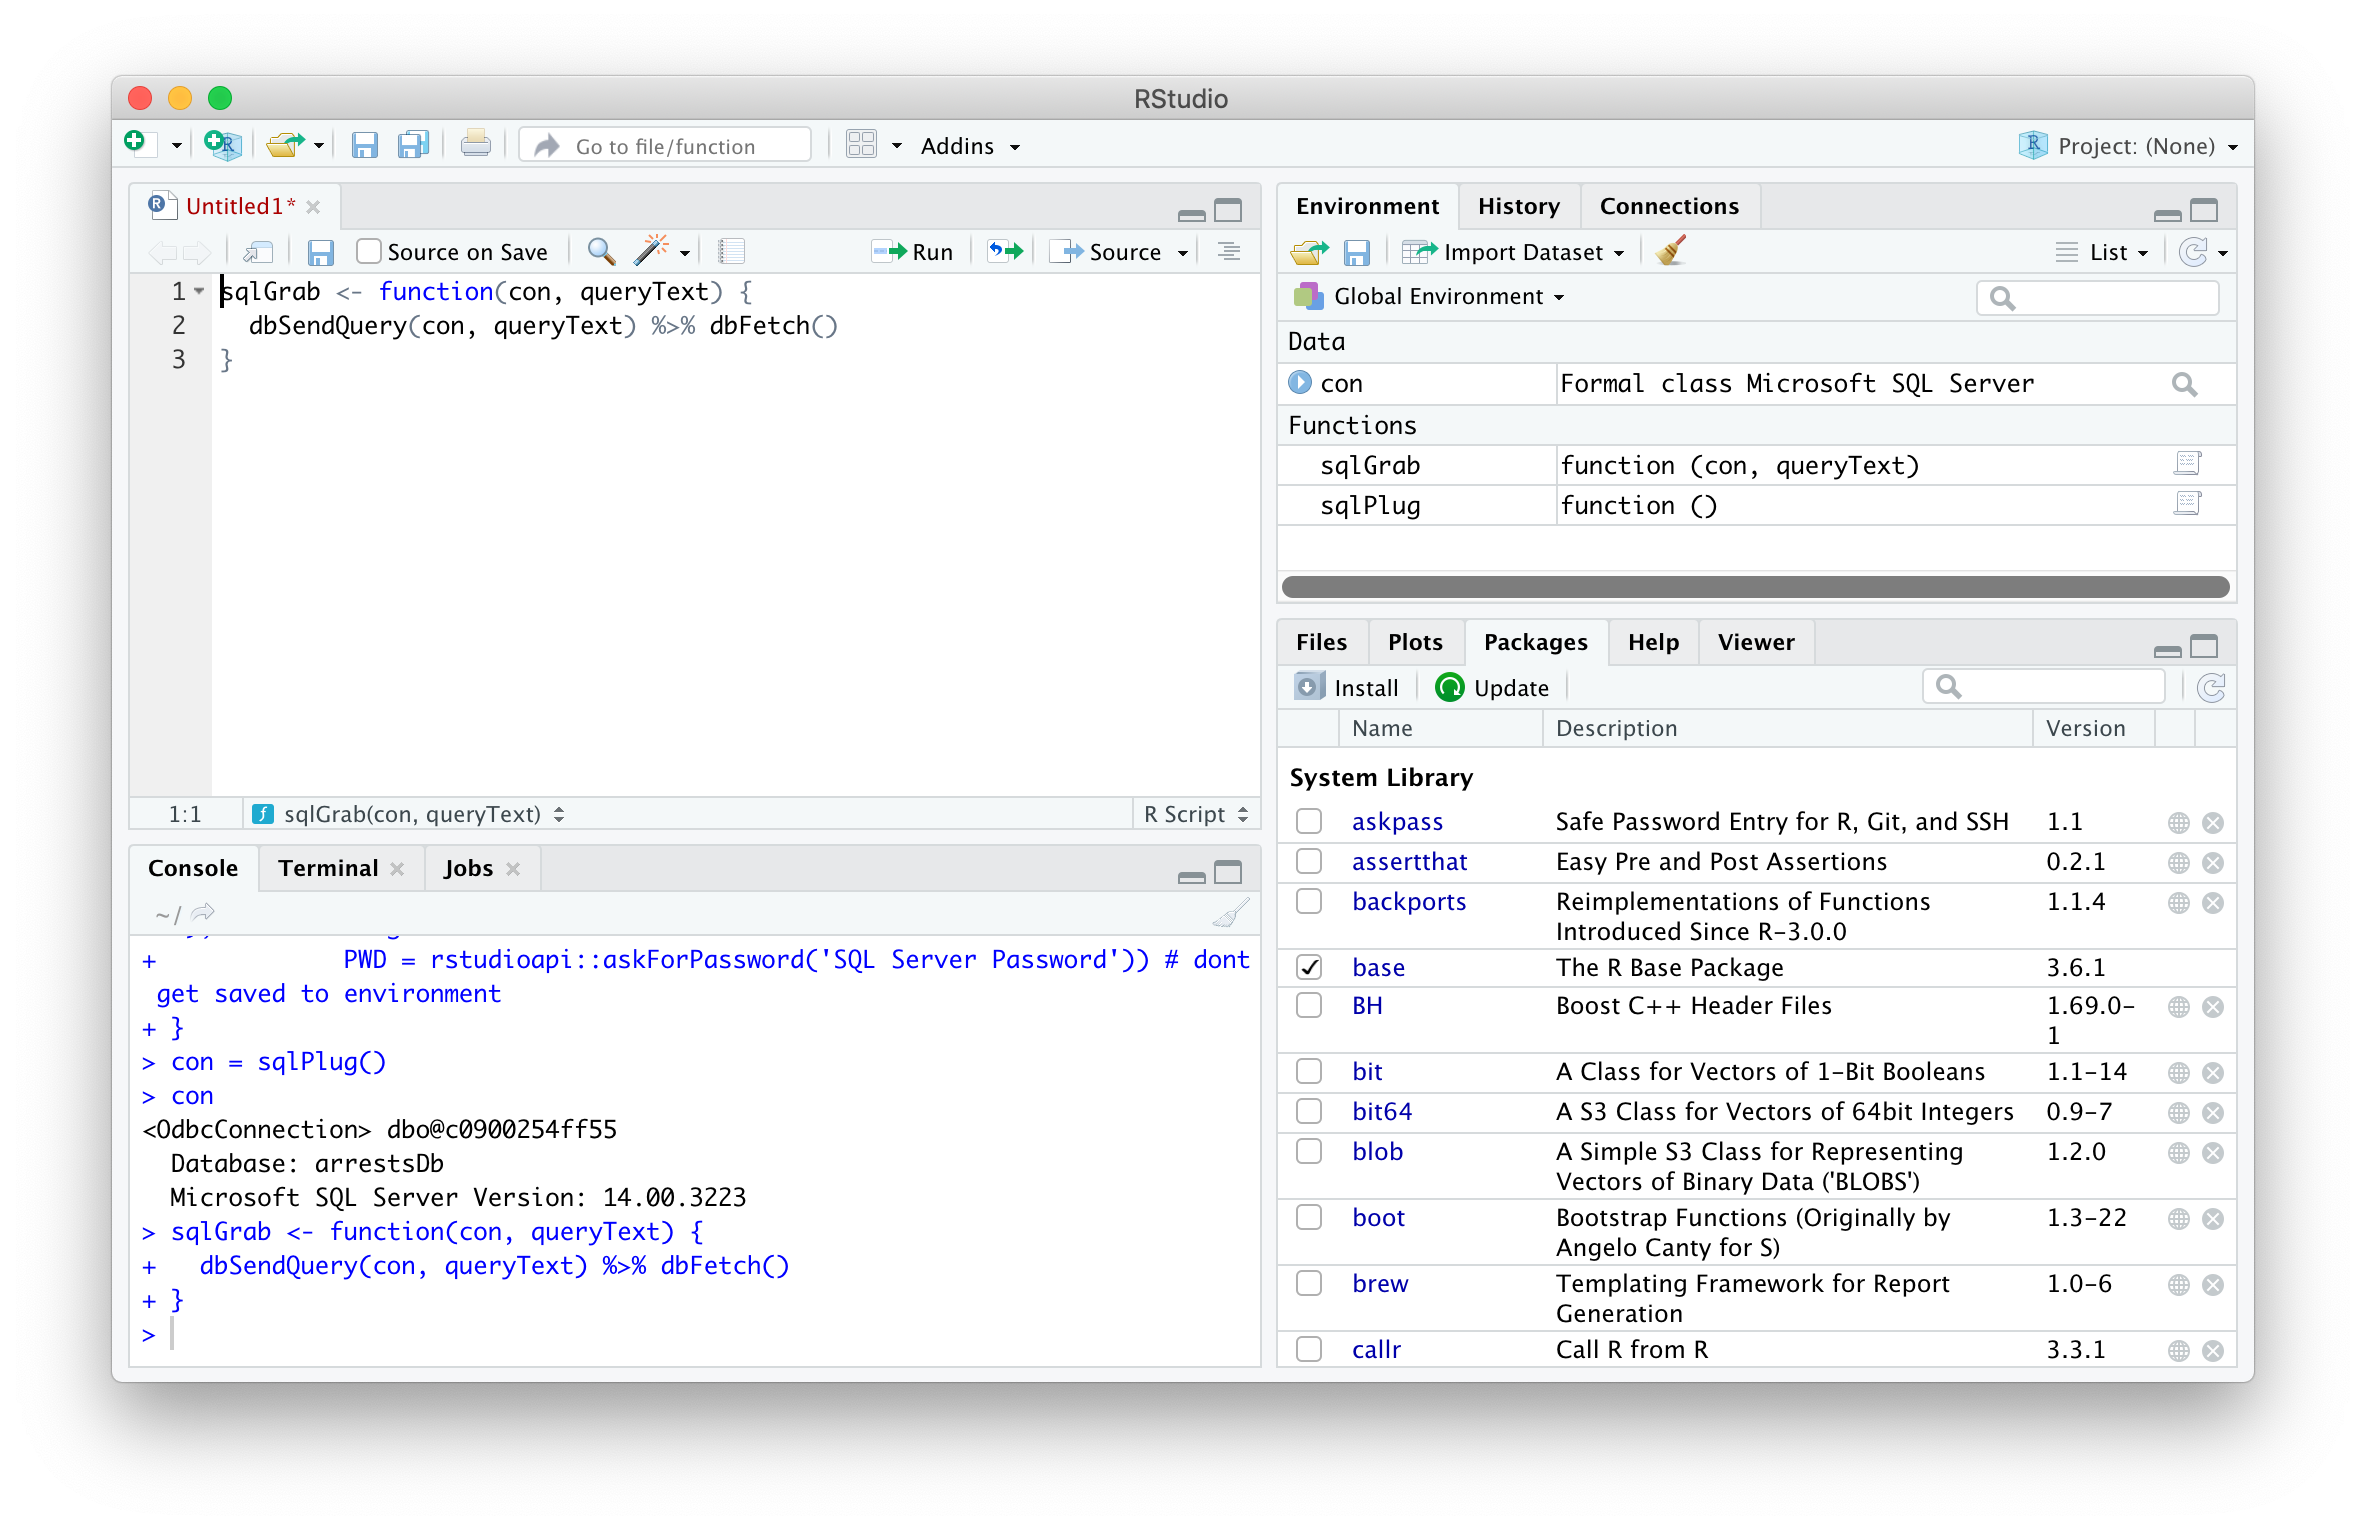
Writing a Function
Functions are one of R’s best tools for repetitive tasks and because you will likely connect to SQL more than once, it is nice to have here. Using some commands from the packages below, a function to connect to SQL can be made, named sqlPlug(), specifically to an existing database named arrestDb. The function is used to create an odbc connection called “con”, which is authenticated using pop up prompts that don’t get saved to the environment, which is important for password security.
sqlPlug <- function() {
  dbConnect(odbc::odbc(),
            Driver = "ODBC Driver 17 for SQL Server", # mac driver
            Server = "localhost",
            Database = "arrestsDb",
            UID = rstudioapi::showPrompt('Login', 'SQL Server User ID', ''), # does not get saved to environment
            PWD = rstudioapi::askForPassword('SQL Server Password')) # dont get saved to environment
}
con = sqlPlug()
If successful, typing con in the console will show the details of the connection:
Pulling from SQL
Now that the connection has been made, any type of SQL command can be sent using syntax from the DBIpackage. One of the advantages of R is being able to export to a file without having to copy / paste or use a wizard. To simplify this task that may be done frequently, a function can be made – in this case, called sqlGrab().
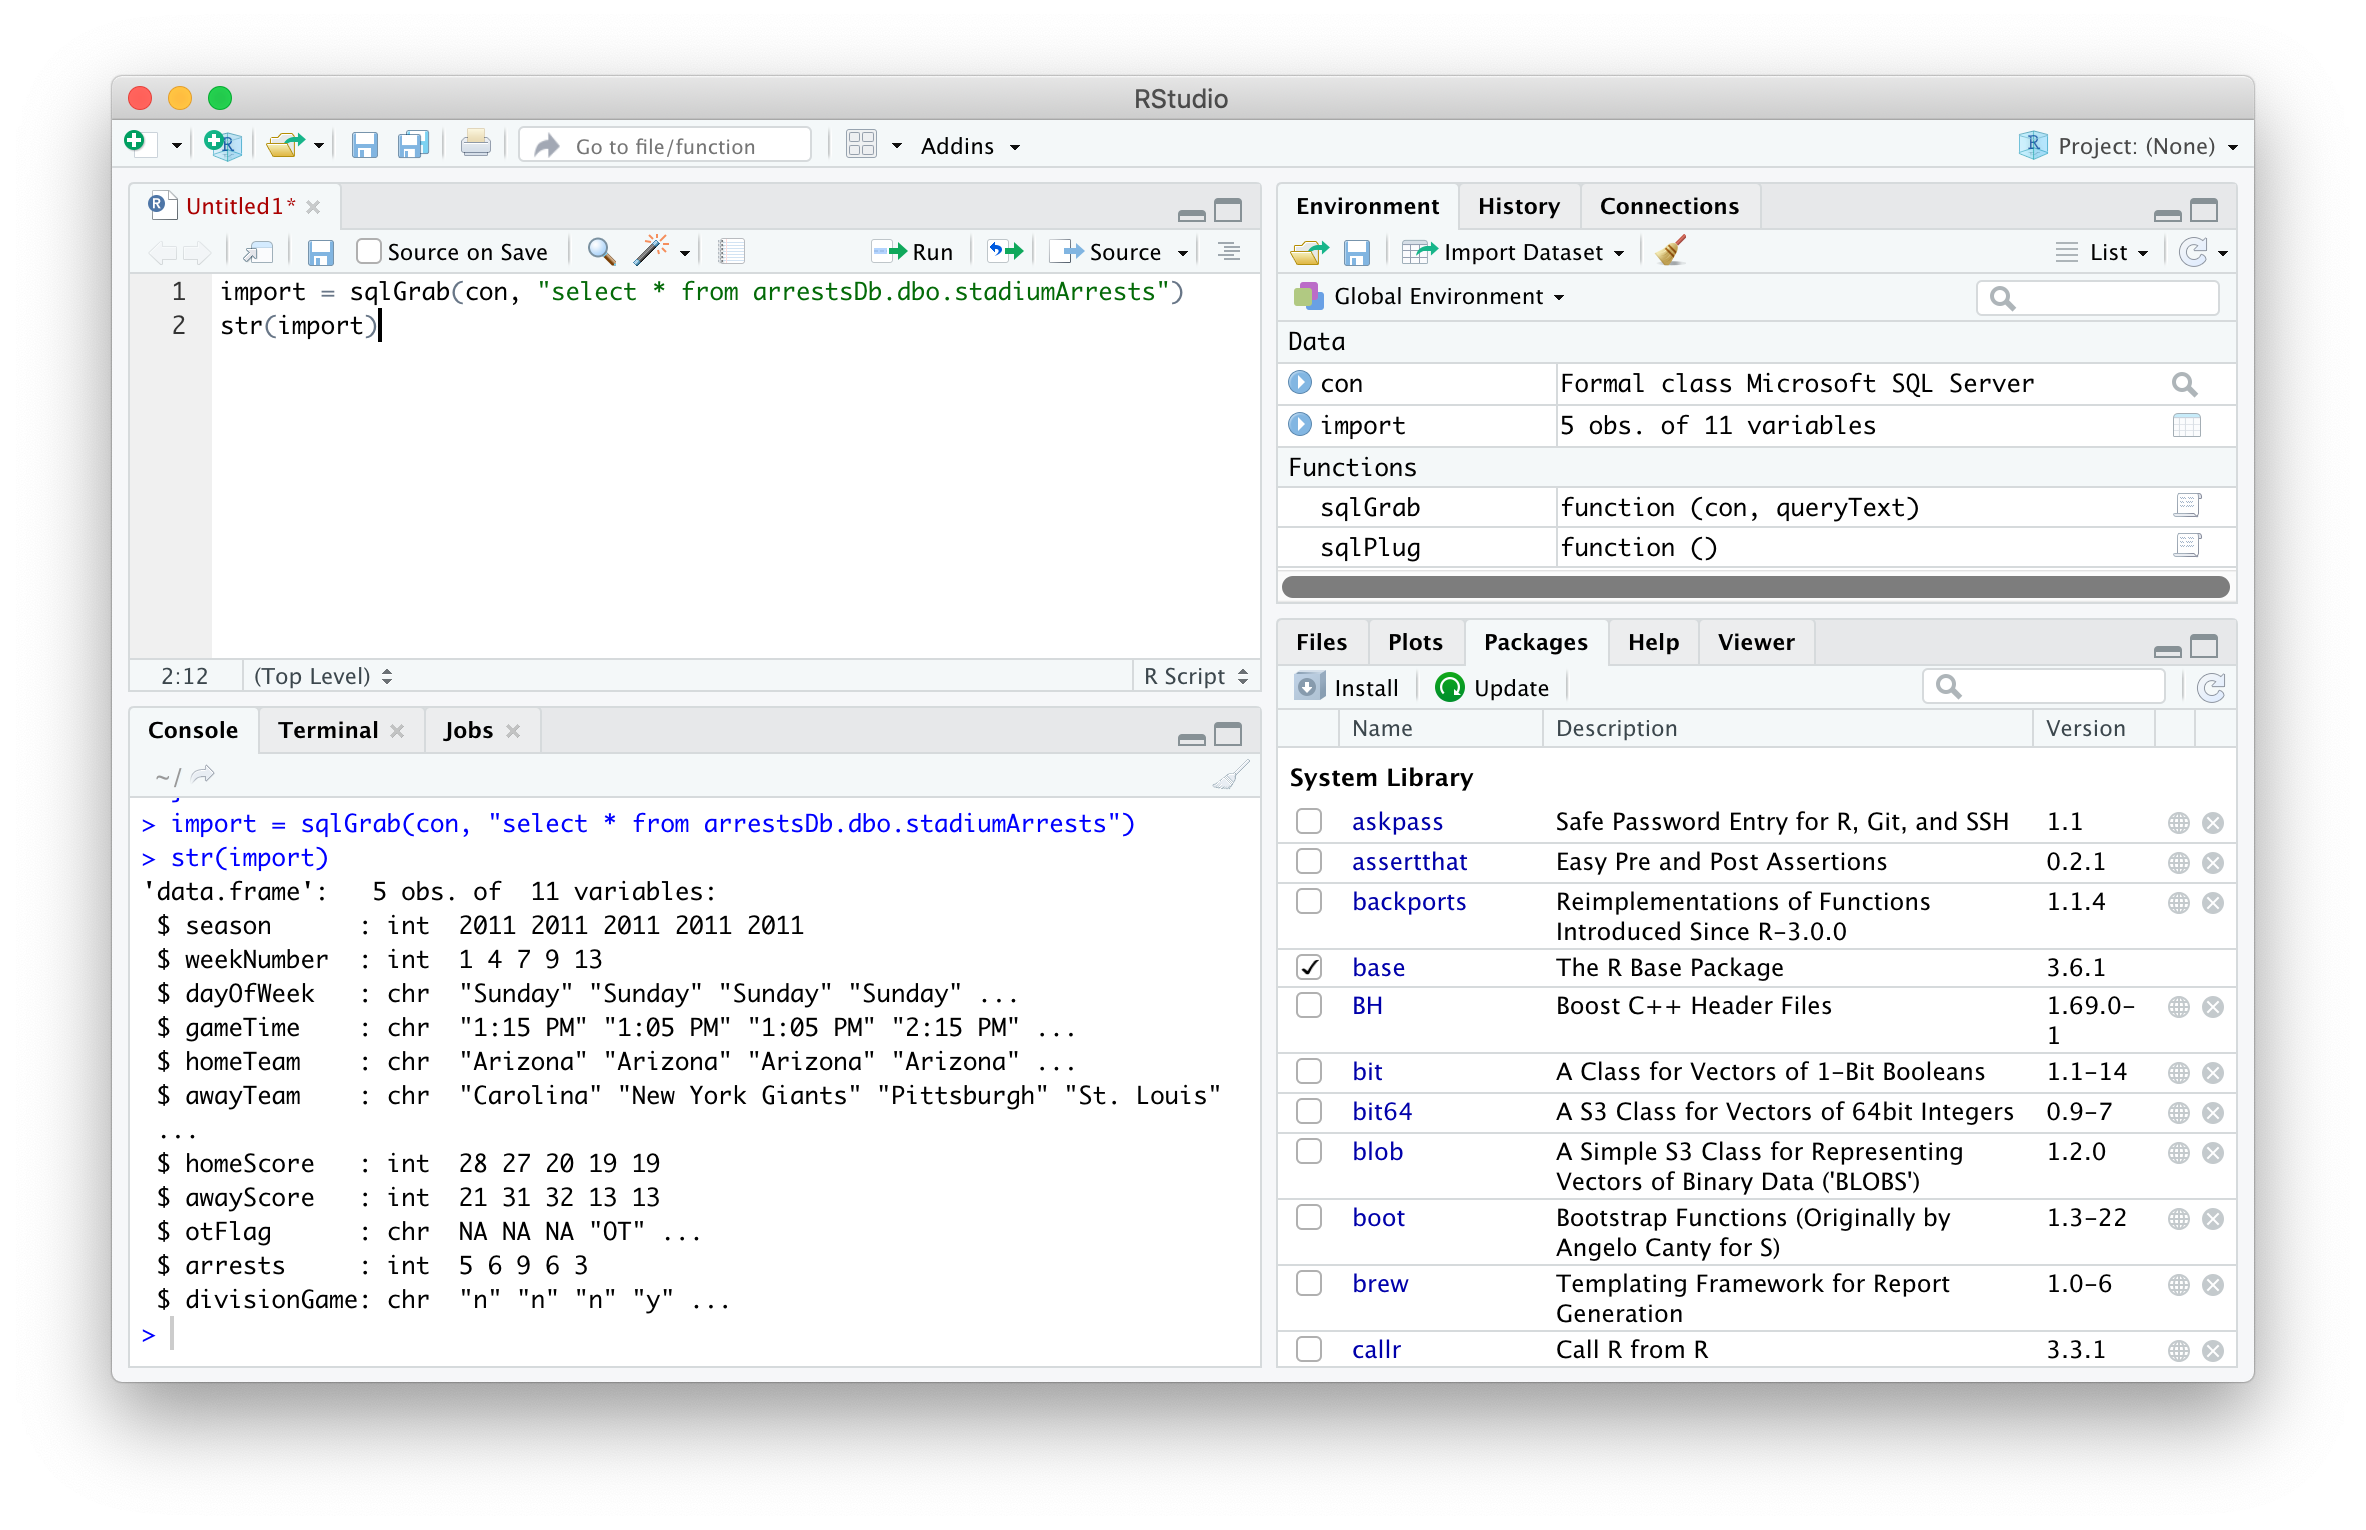
The sqlGrab function sends a query to the serve and saves the results to your R instance. The two arguments of the function are (a) the local host connection called con and (b) the query to pull all results from a table called stadiumArrests. The results of the query will be assigned to data frame named import.
import = sqlGrab(con, "select * from arrestsDb.dbo.stadiumArrests")
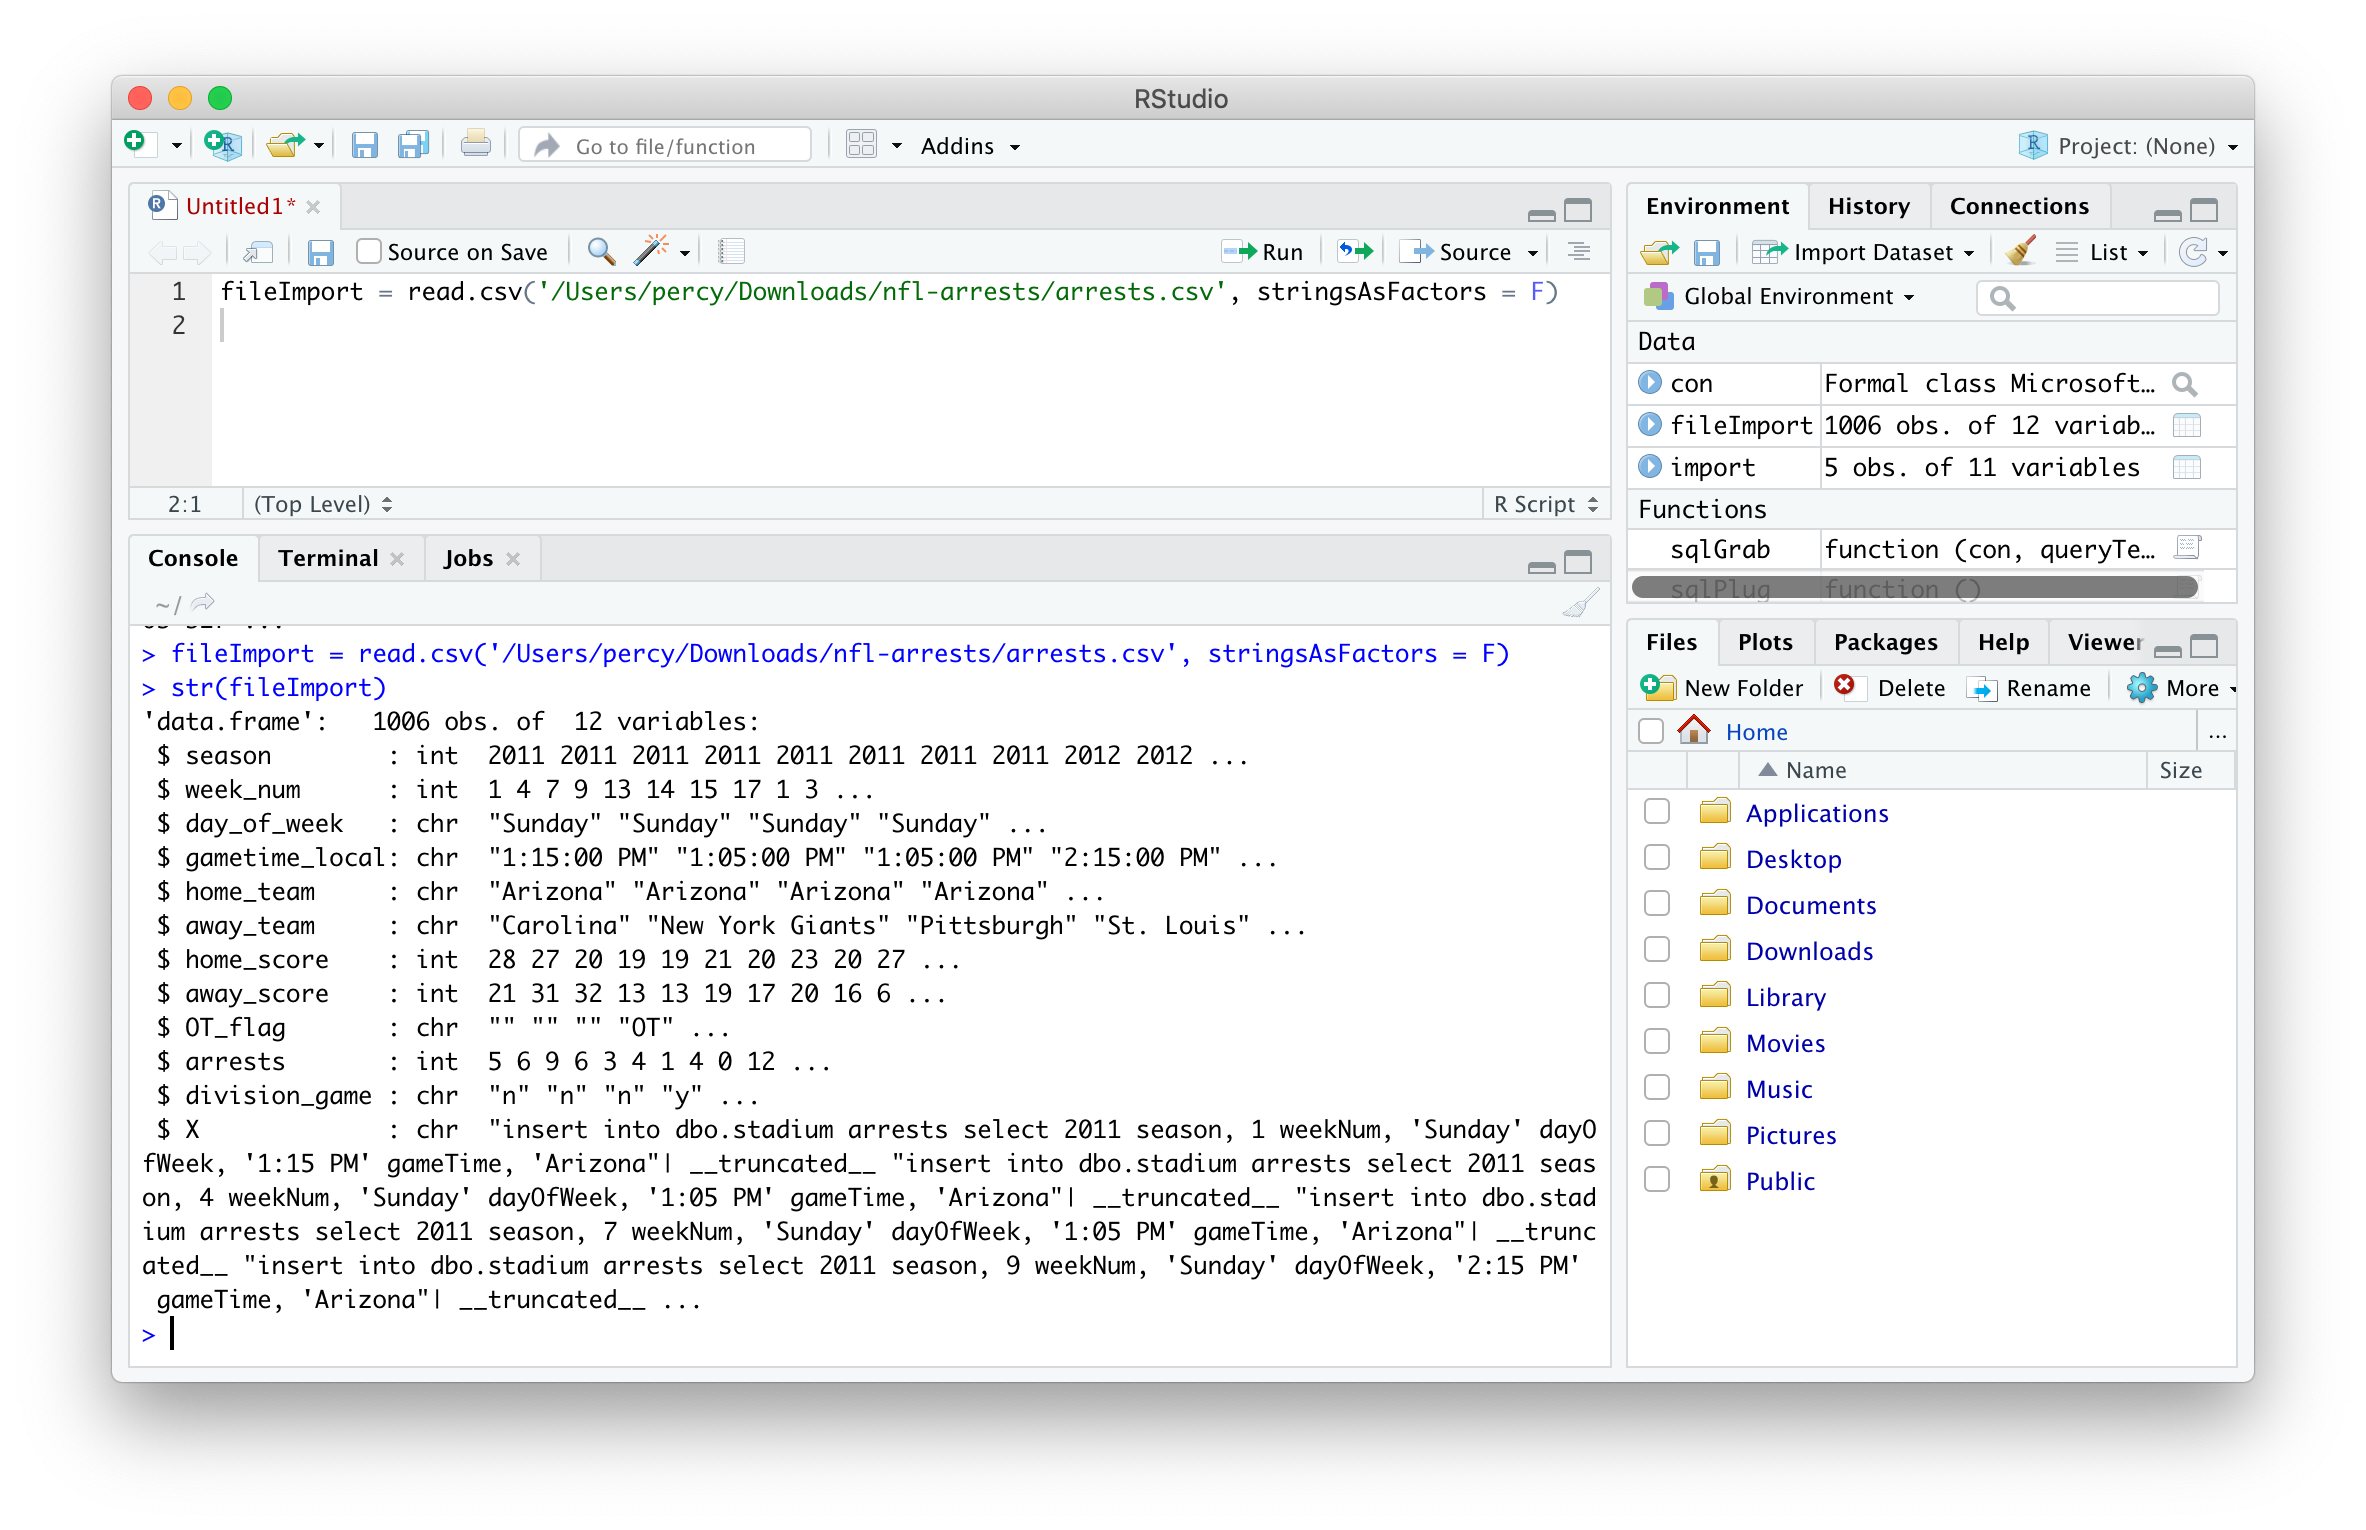
Now that the SQL results are in the R session, they can be easily exported, here to the Downloads folder in CSV format.
write.csv(import, '/Users/percy/Downloads/sqlExport.csv', row.names = F, na = '')
Pushing to SQL
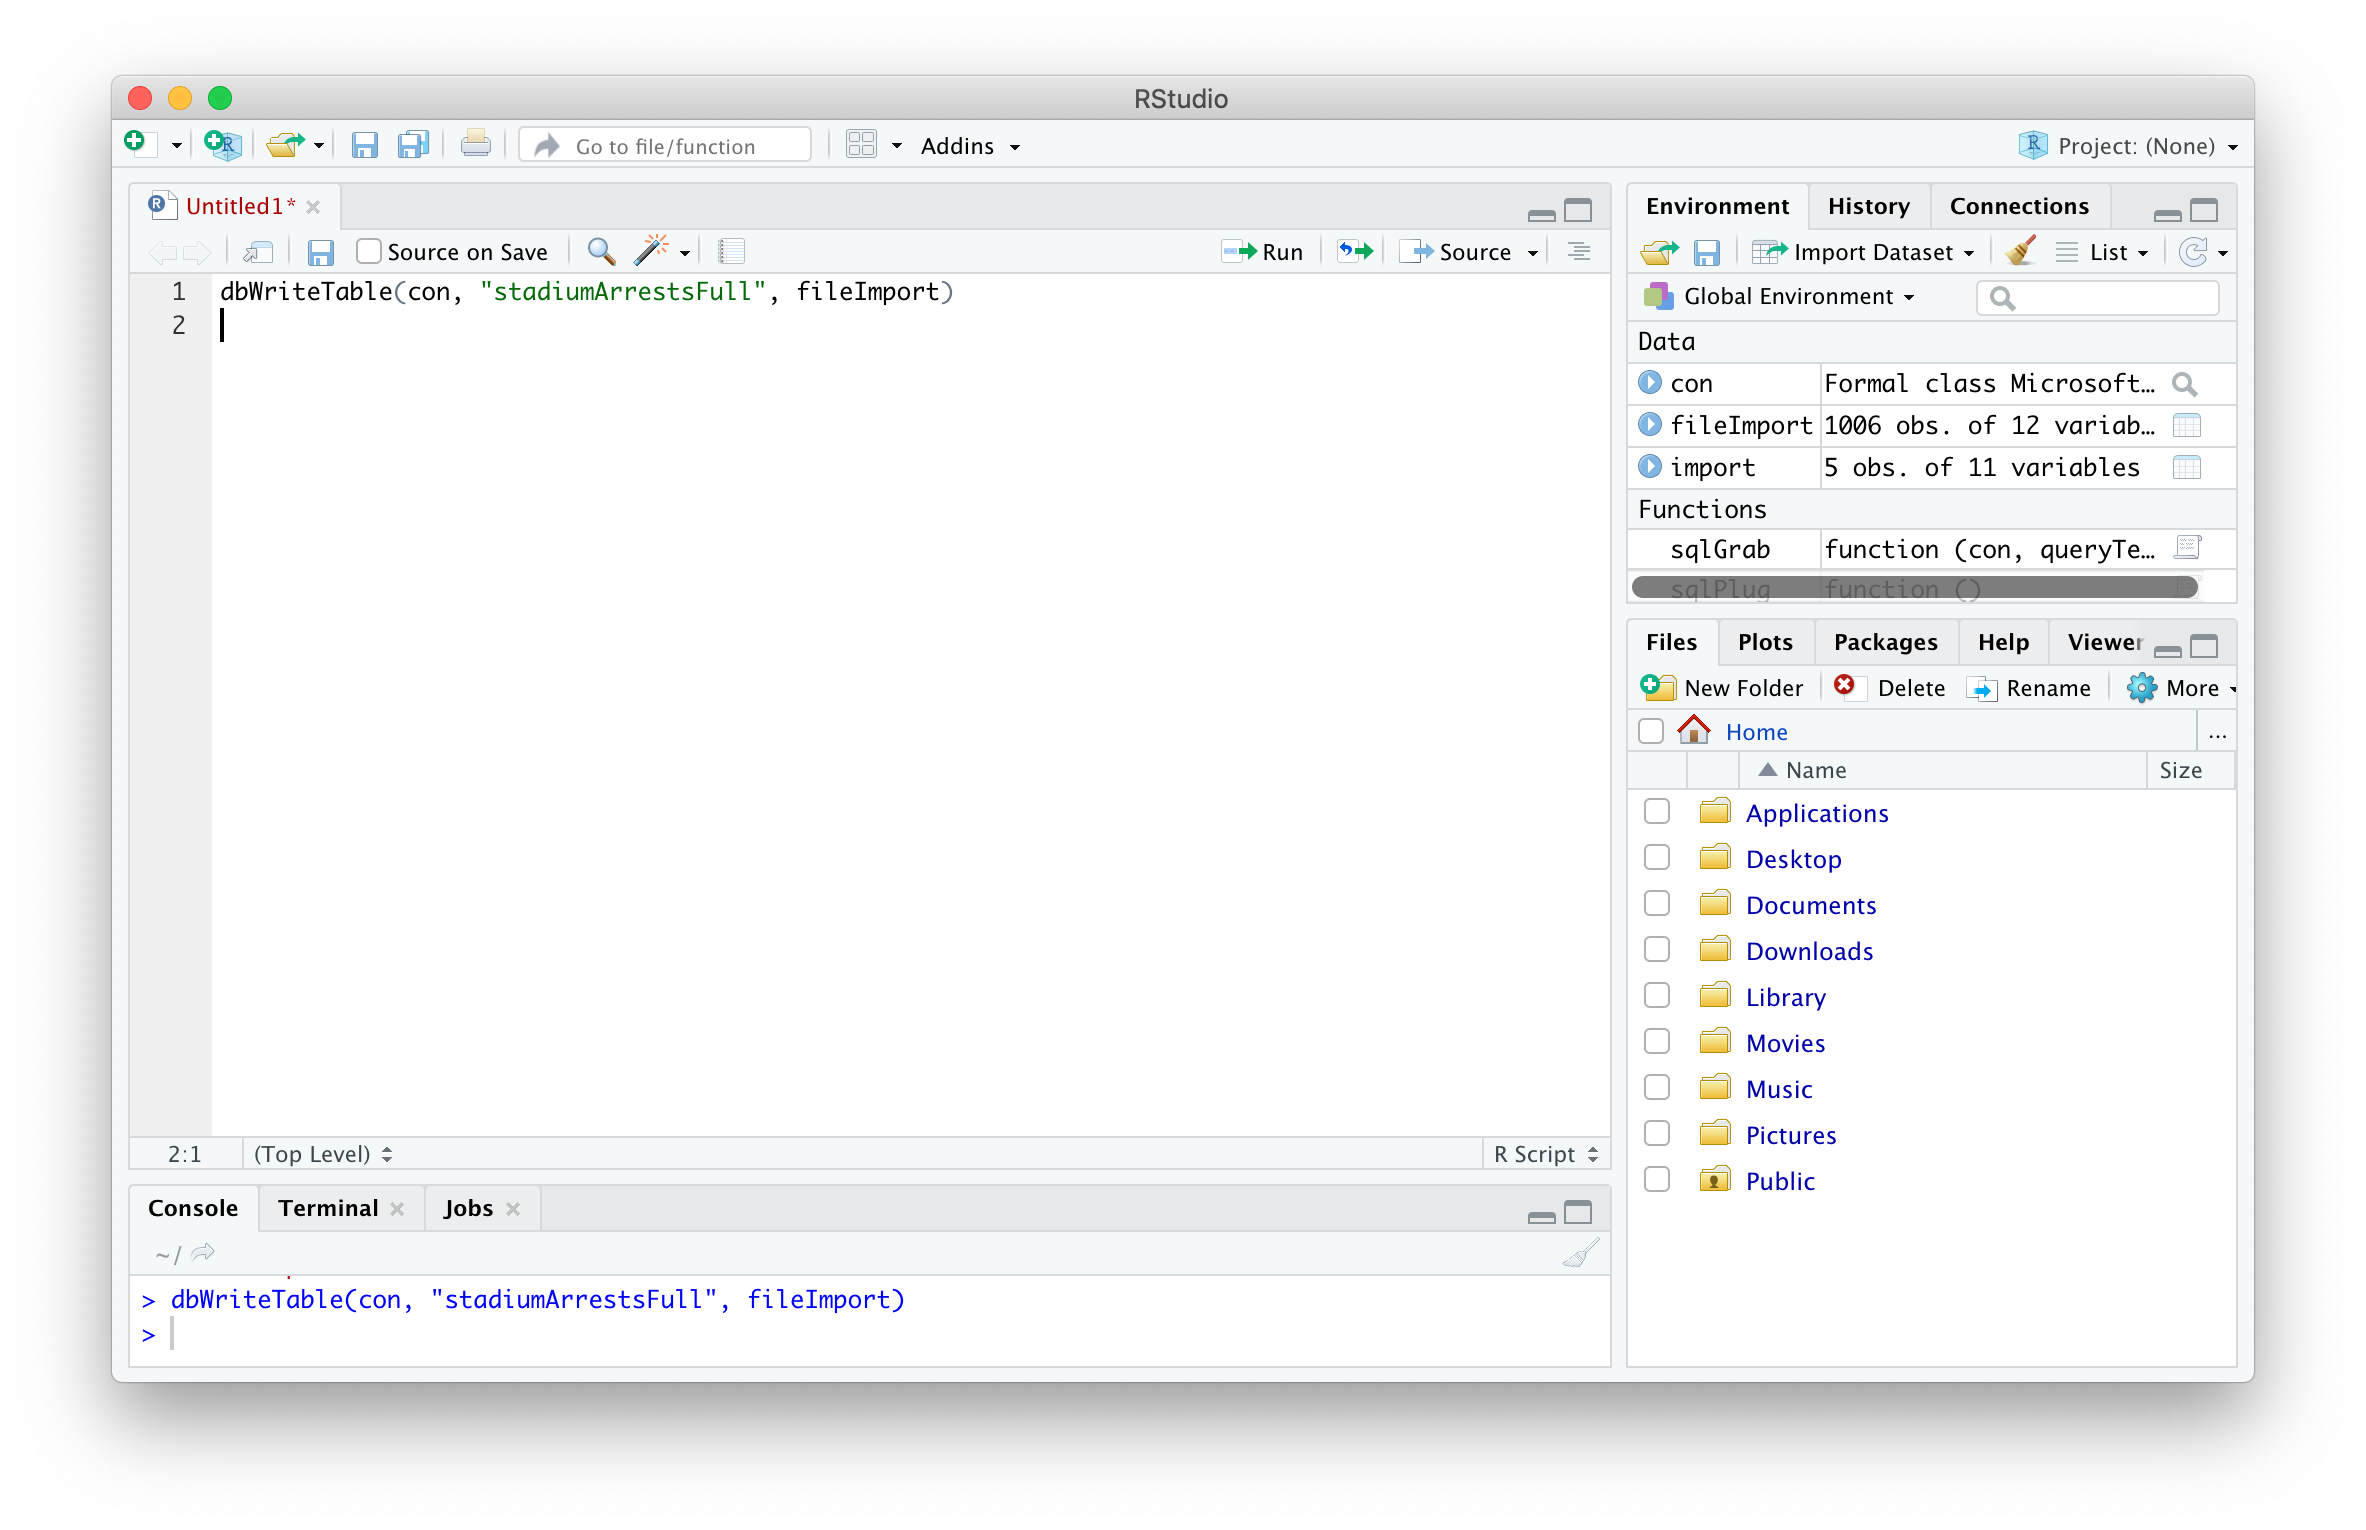
The ability to write tables to a SQL Server database through R is a lifesaver for repetitive file uploads, as well as any file that requires significant cleansing before upload. The below code uses the dbWriteTable() function to create a new table from a CSV dataset.
The dbWriteTable() function is used to specify the SQL Server database connection, the name of the table to be created in that database and the data written to that table.
Many businesses use Microsoft SQL Server…even more utilize Macs. For those projects that you don’t want to push to a production server, Microsoft SQL Server Express is a wonderful tool that can be leveraged right from your local Mac using Docker and Microsoft Azure Data Studio.
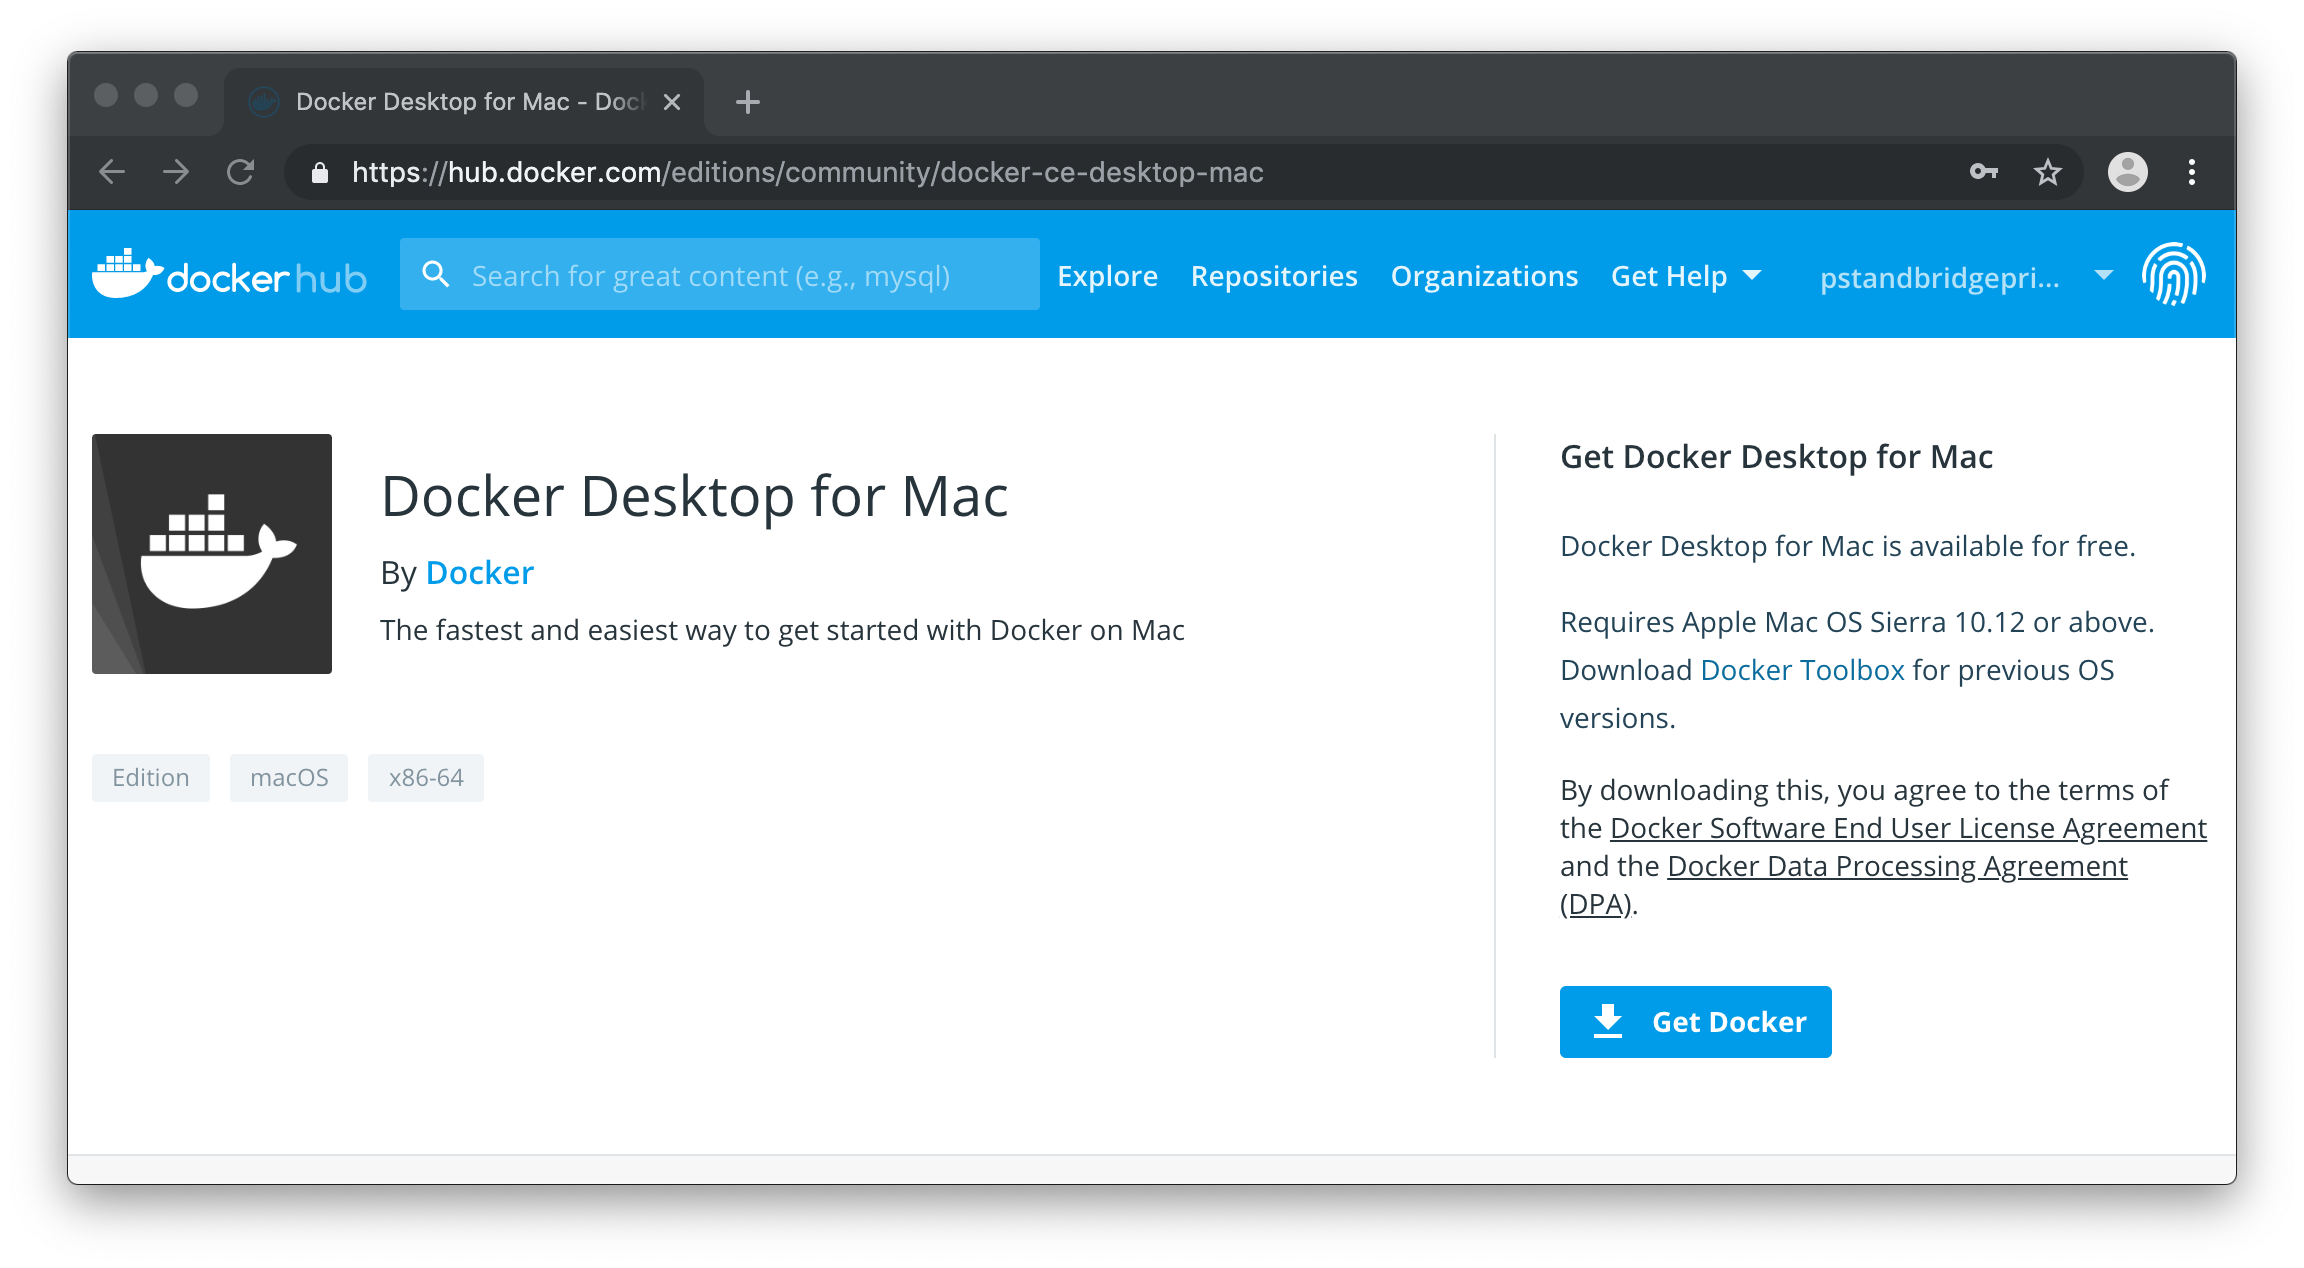
Download Docker for Mac
Docker is available for download here. This will allow SQL Server Express to be set up using Terminal. Select “Download from Docker Hub” to begin installation. You will be prompted to sign in or create a free Docker account before the download begins. Once completed, select “Get Docker”.
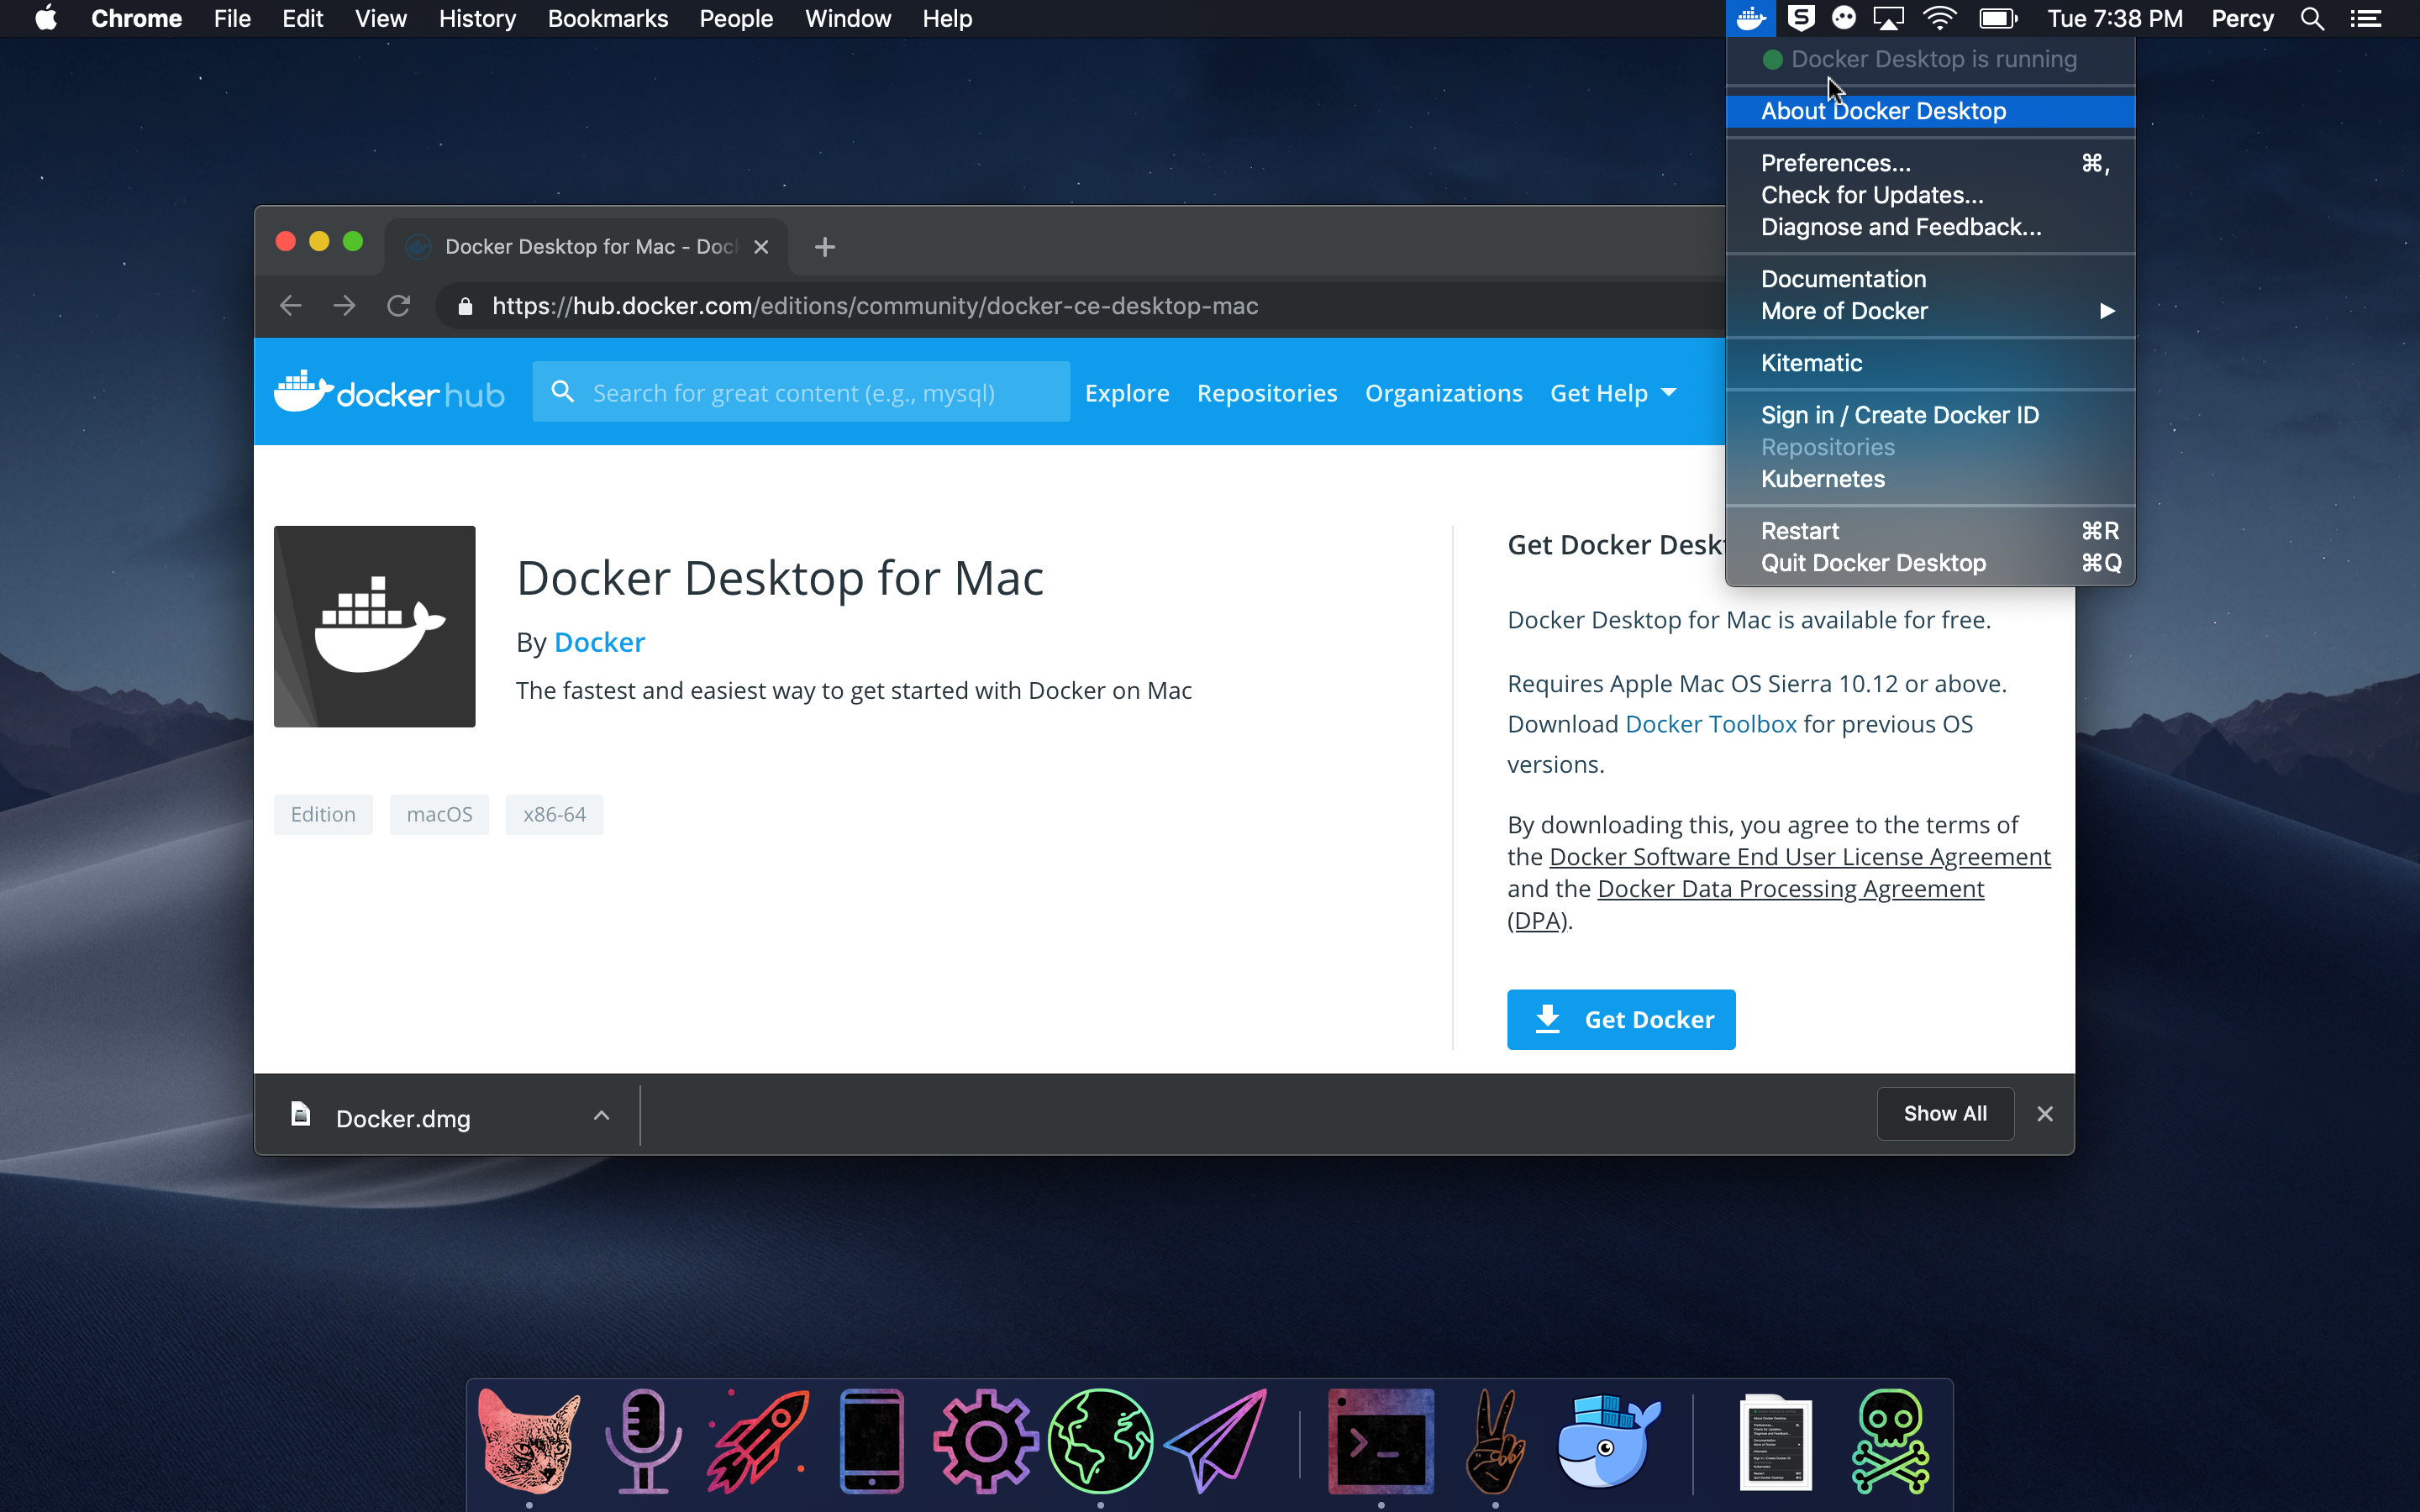
Once downloaded, open the “dmg” file and complete installation. Once installed, Docker will be in your applications folder. Open it and you will notice that the Docker icon is now showing up in the Status menu in the right corner of your screen.
Docker is now available on your machine! It’s now time to use it to configure SQL Server Express.
Set up SQL Server using Terminal
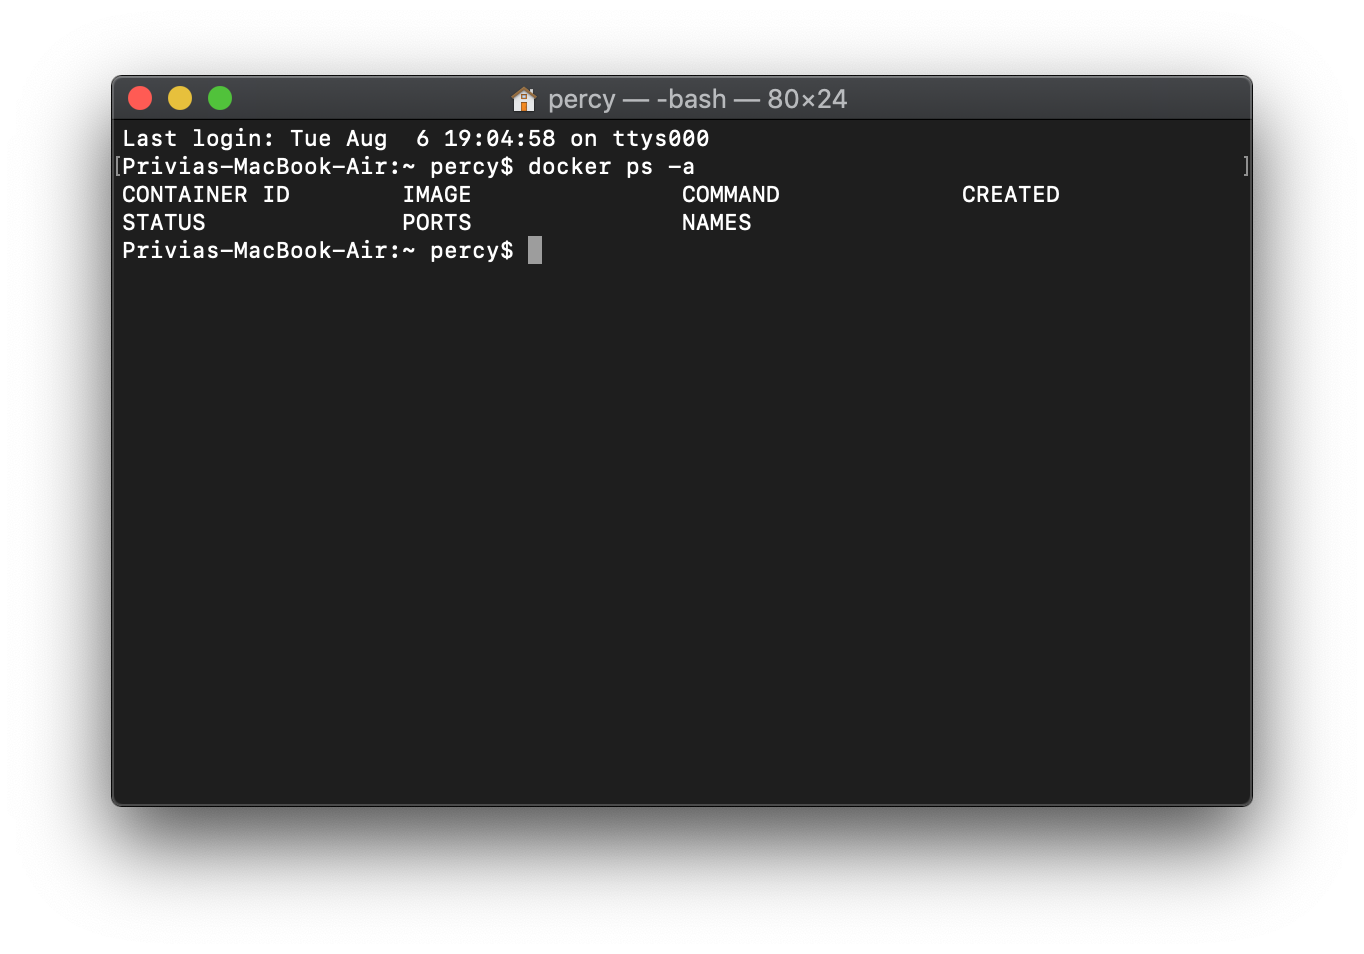
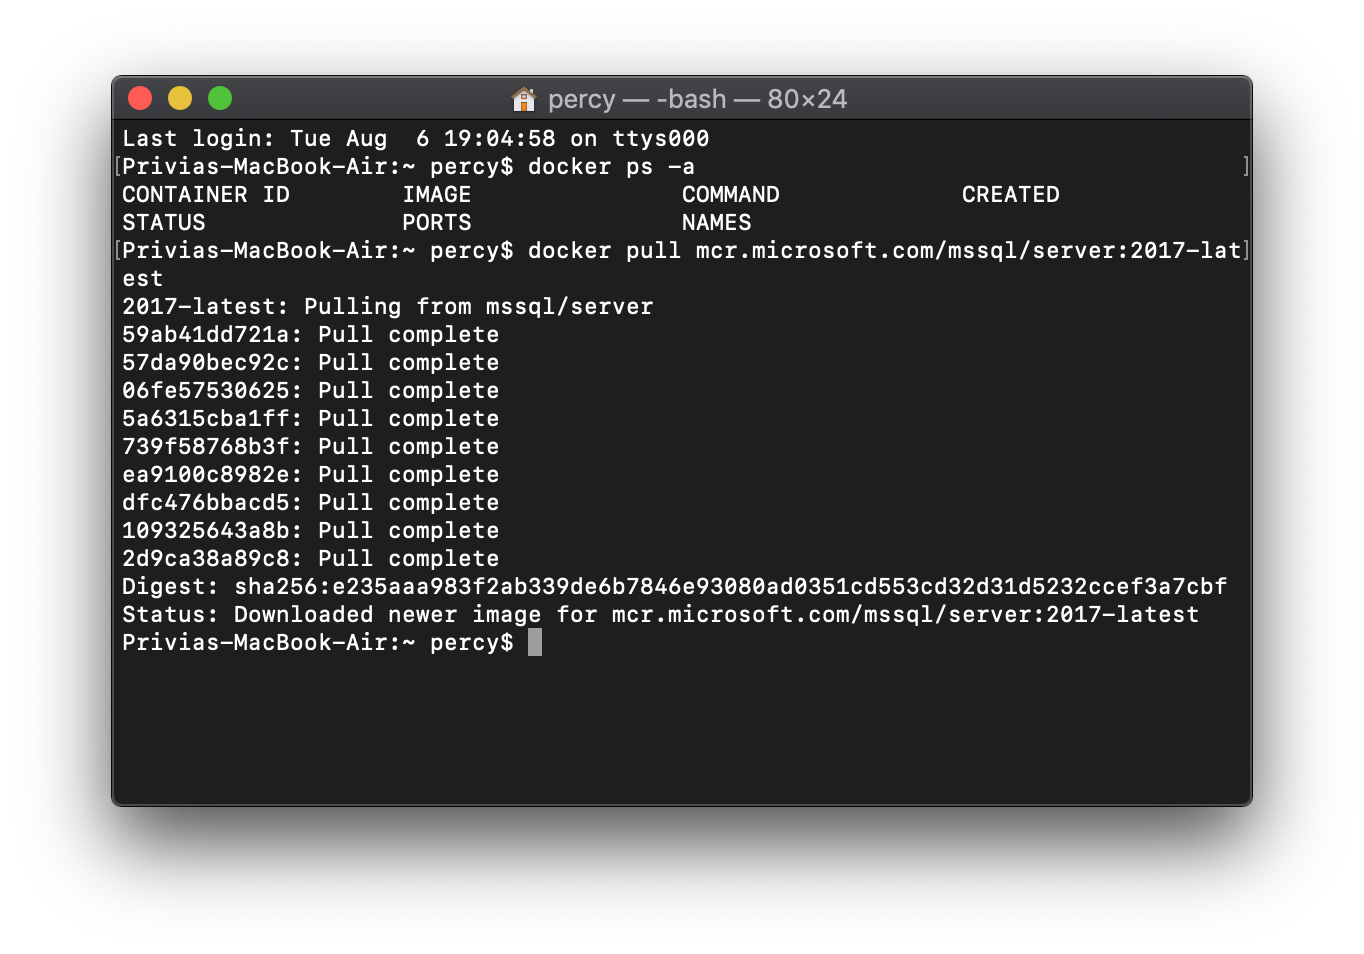
First, we will make sure that Docker is running and view any existing containers. This can be done by running the following command in the Mac Terminal app, which essentially tells the machine to list all open containers:
docker ps -a
Because Docker was just downloaded, there should not be any results:
First, pull the container image from Microsoft Container Registry:
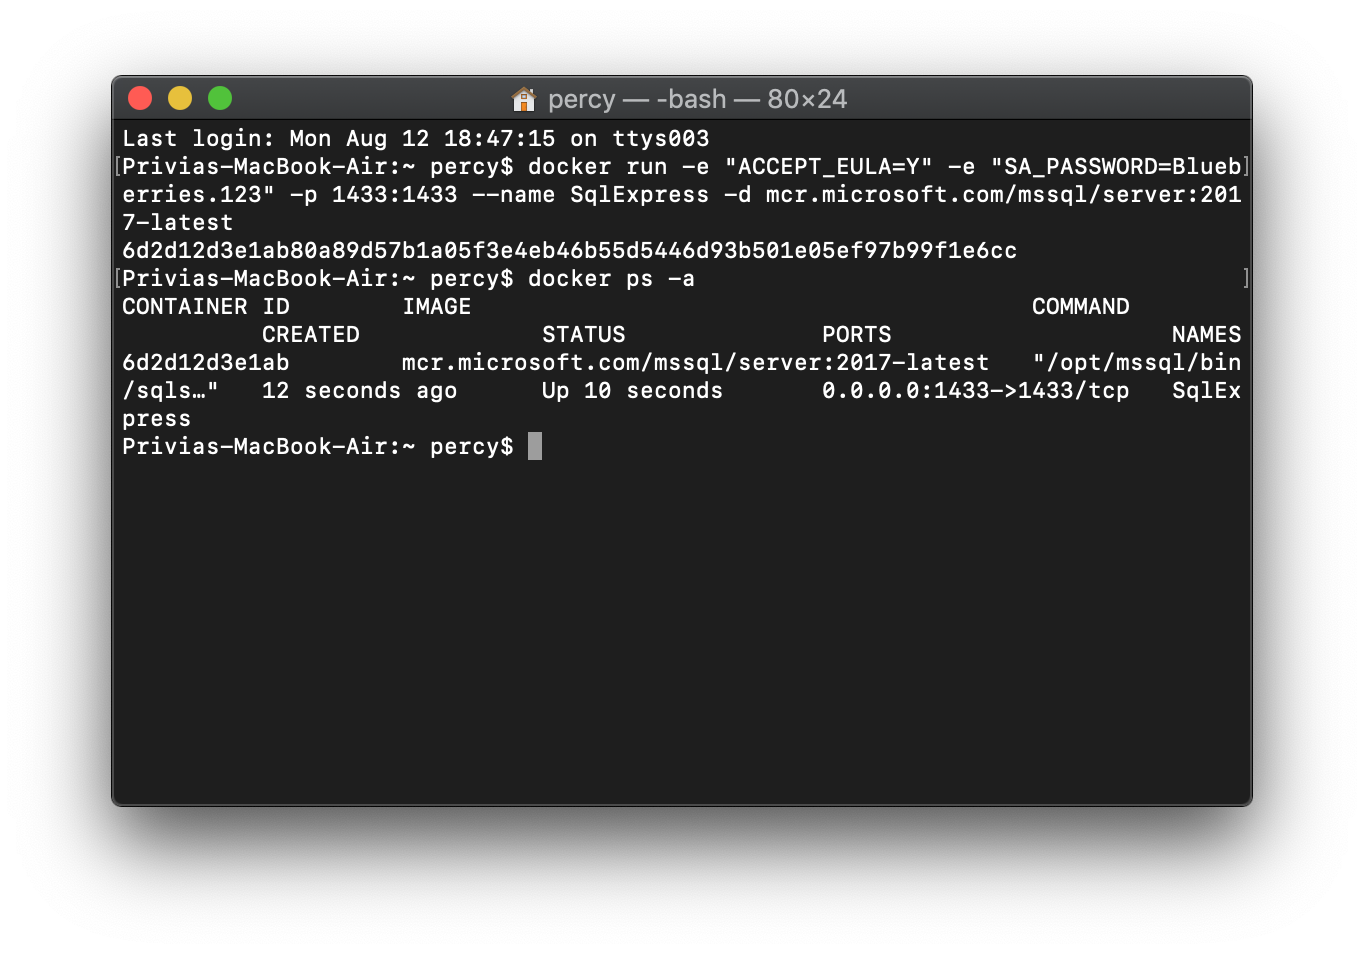
Use following command to create a SQL container and set the password for the system administrator, which will be you as the computer user. Here, we will name the SQL container “SqlExpress” and set the password to “Blueberries.123”. Note that your password must follow the Microsoft SQL requirements. Sometimes special characters (“$”, “%”, etc.) require escape characters such as “\”, so I generally stay away from them in the command prompt, but if you do use them keep this in mind.
After listing all open containers, the SqlExpress containers displays with a status of “Up”. If the container ever displays a status of “Exited” you will need to start before you can run SQL commands (see Start Docker Container below for details).
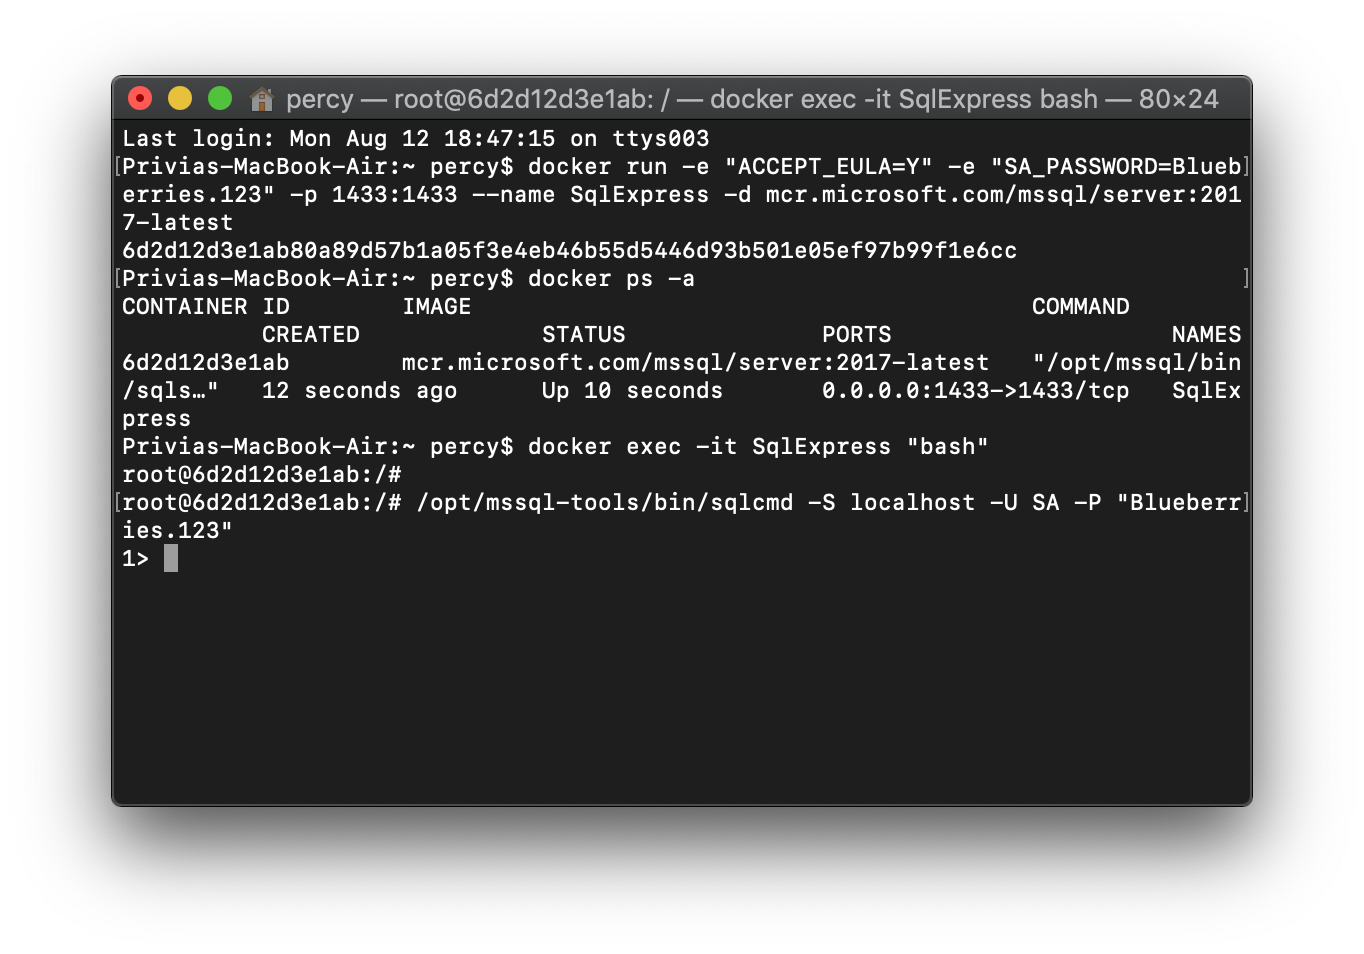
Access and Query the Server
Begin by creating a bash shell with SqlExpress. Then, log in using the System Administrator credentials, the username being SA and the password being the one that was created in the steps above:
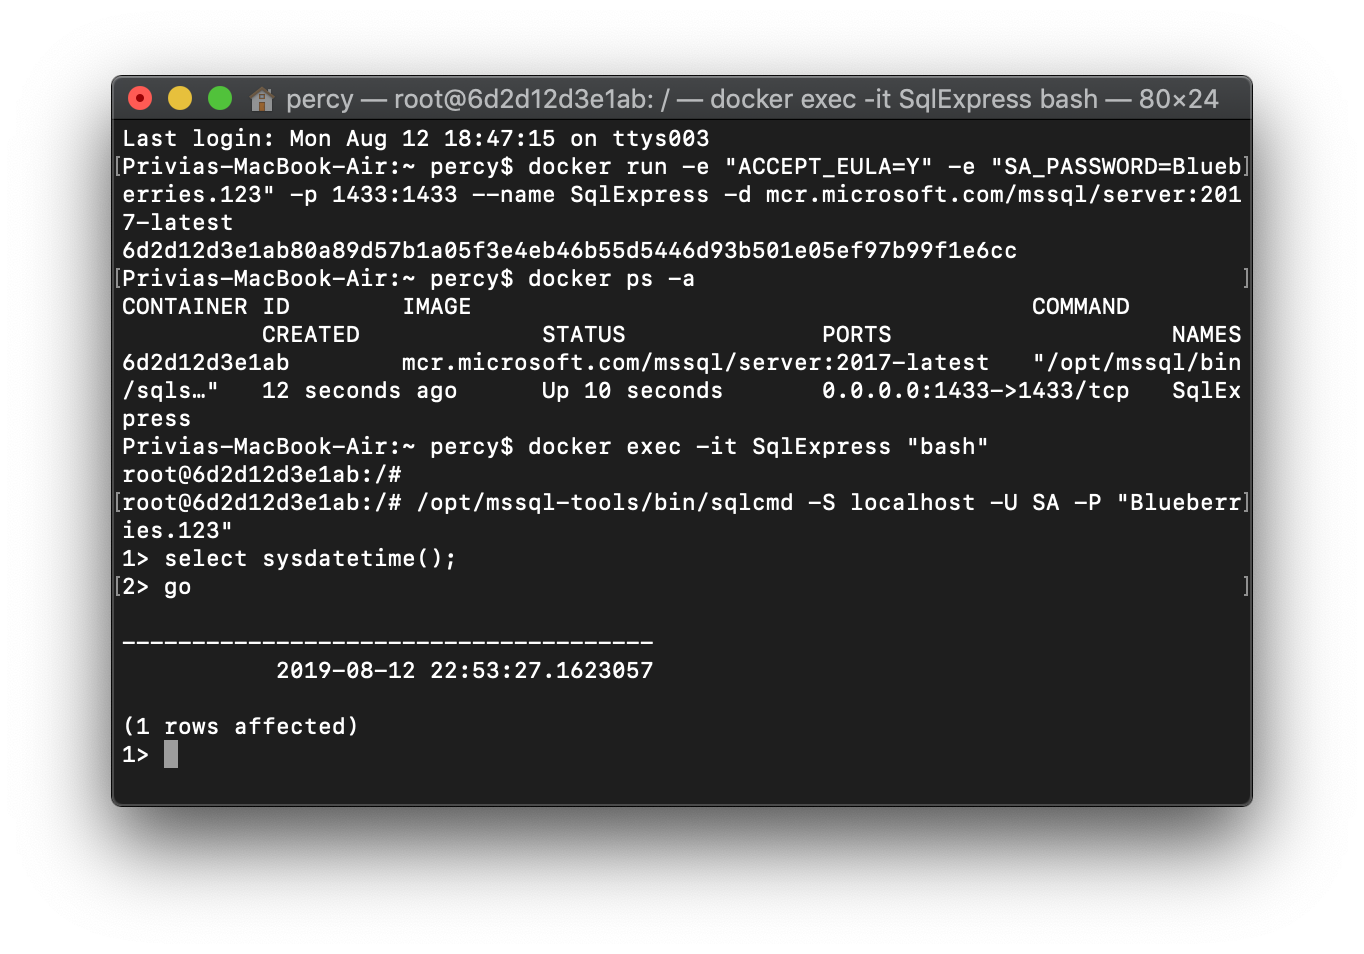
SQL commands can now be executed from this container:
select sysdatetime();
go
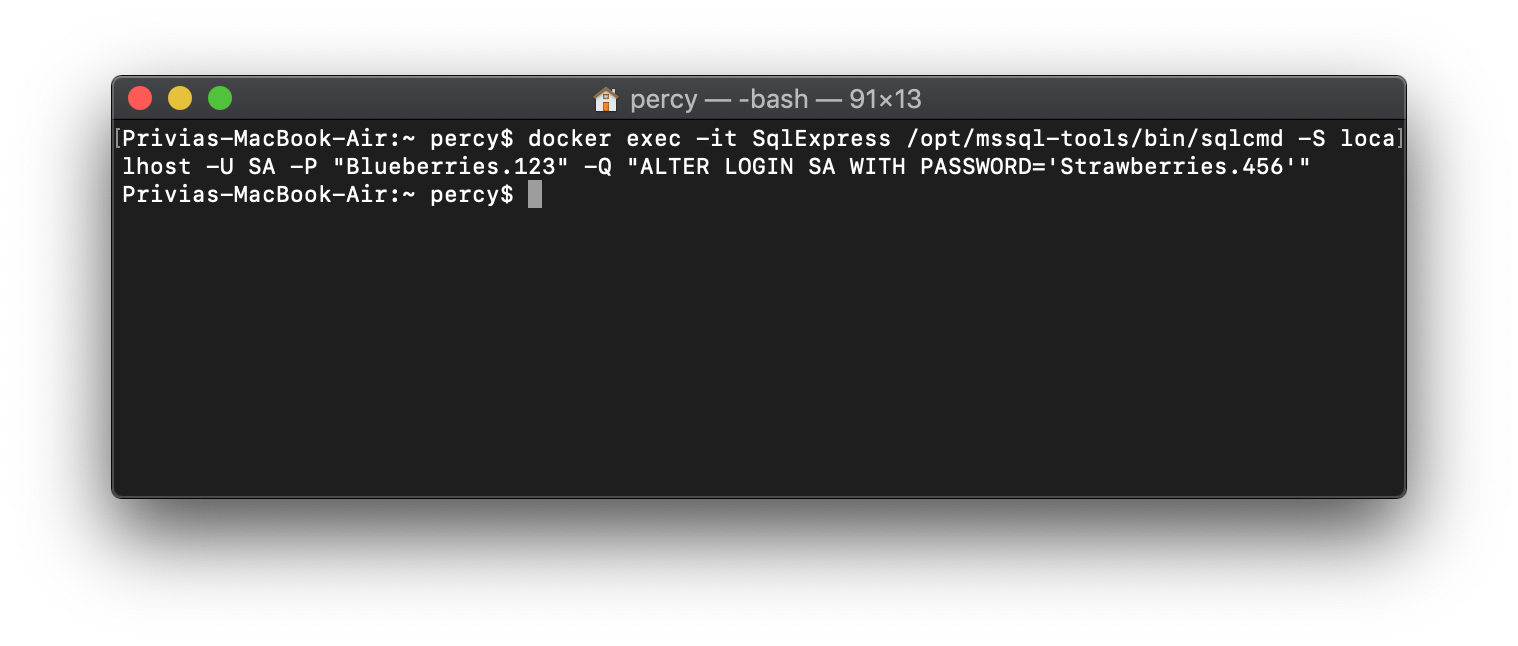
Change Password
To change the password, simply login as the administrator and enter the new password, in this case “Strawberries.456”.
docker exec -it SqlExpress /opt/mssql-tools/bin/sqlcmd -S localhost -U SA -P "Blueberries.123" -Q "ALTER LOGIN SA WITH PASSWORD='Strawberries.456'"
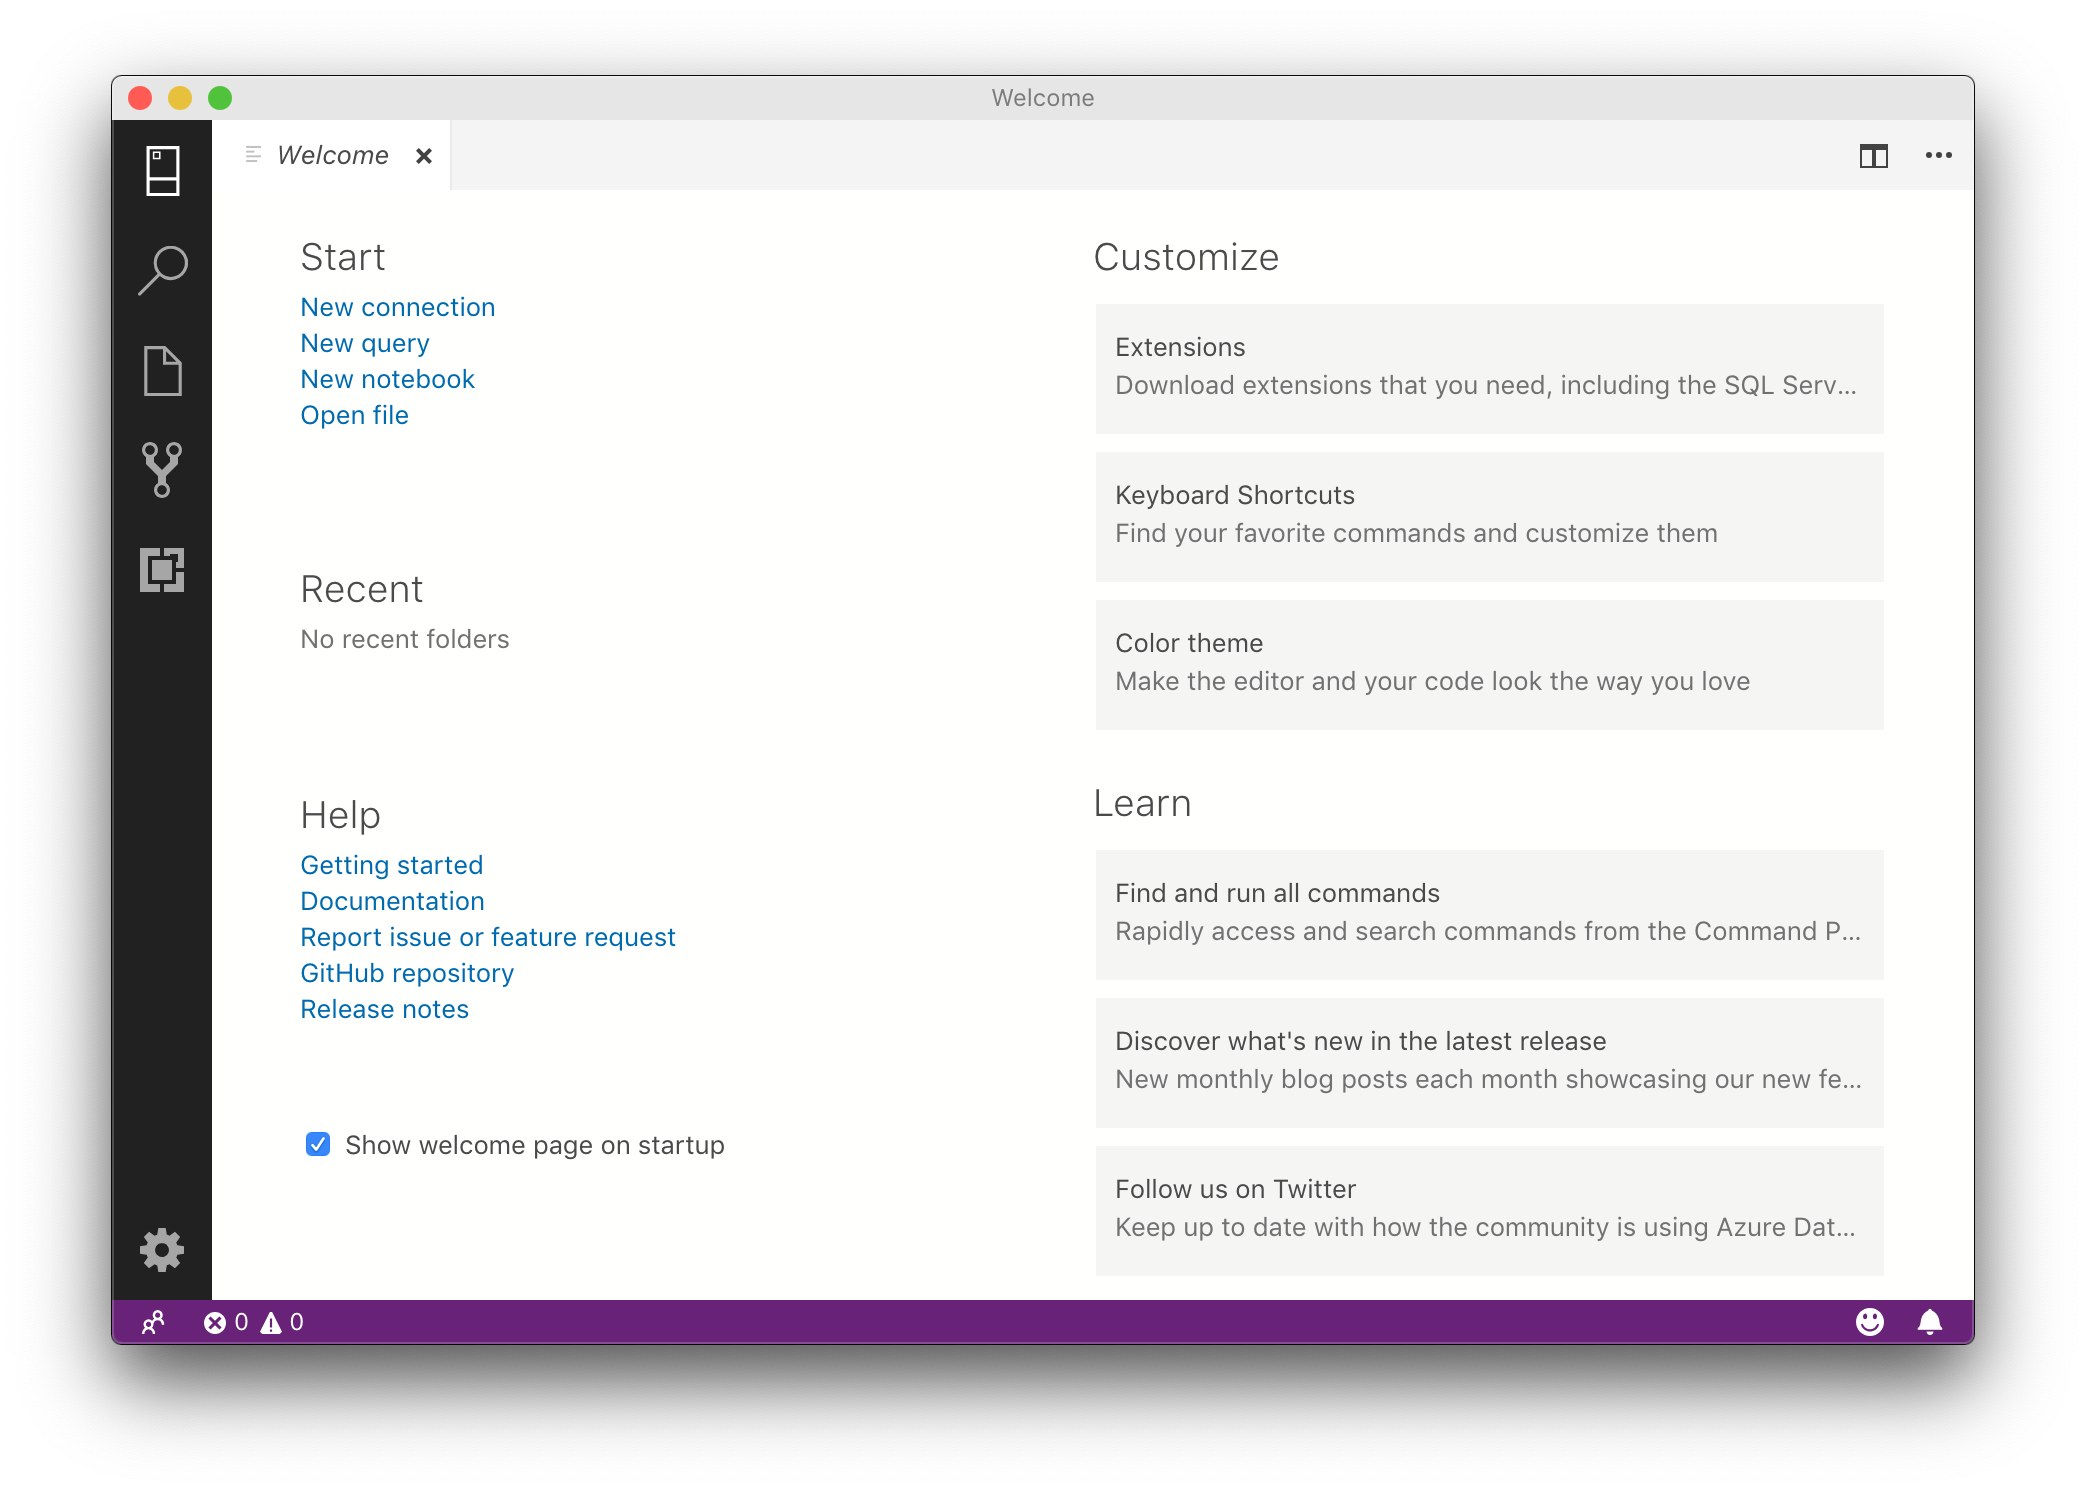
Download Microsoft Azure Data Studio
You probably don’t want to be running your SQL code from the command prompt as it’s not very user friendly. A great free option is Microsoft Azure Data Studio, which is an interface to execute SQL commands and view results, among other capabilities. Download the Mac installer and open the application when installation is complete. A welcome page will display:
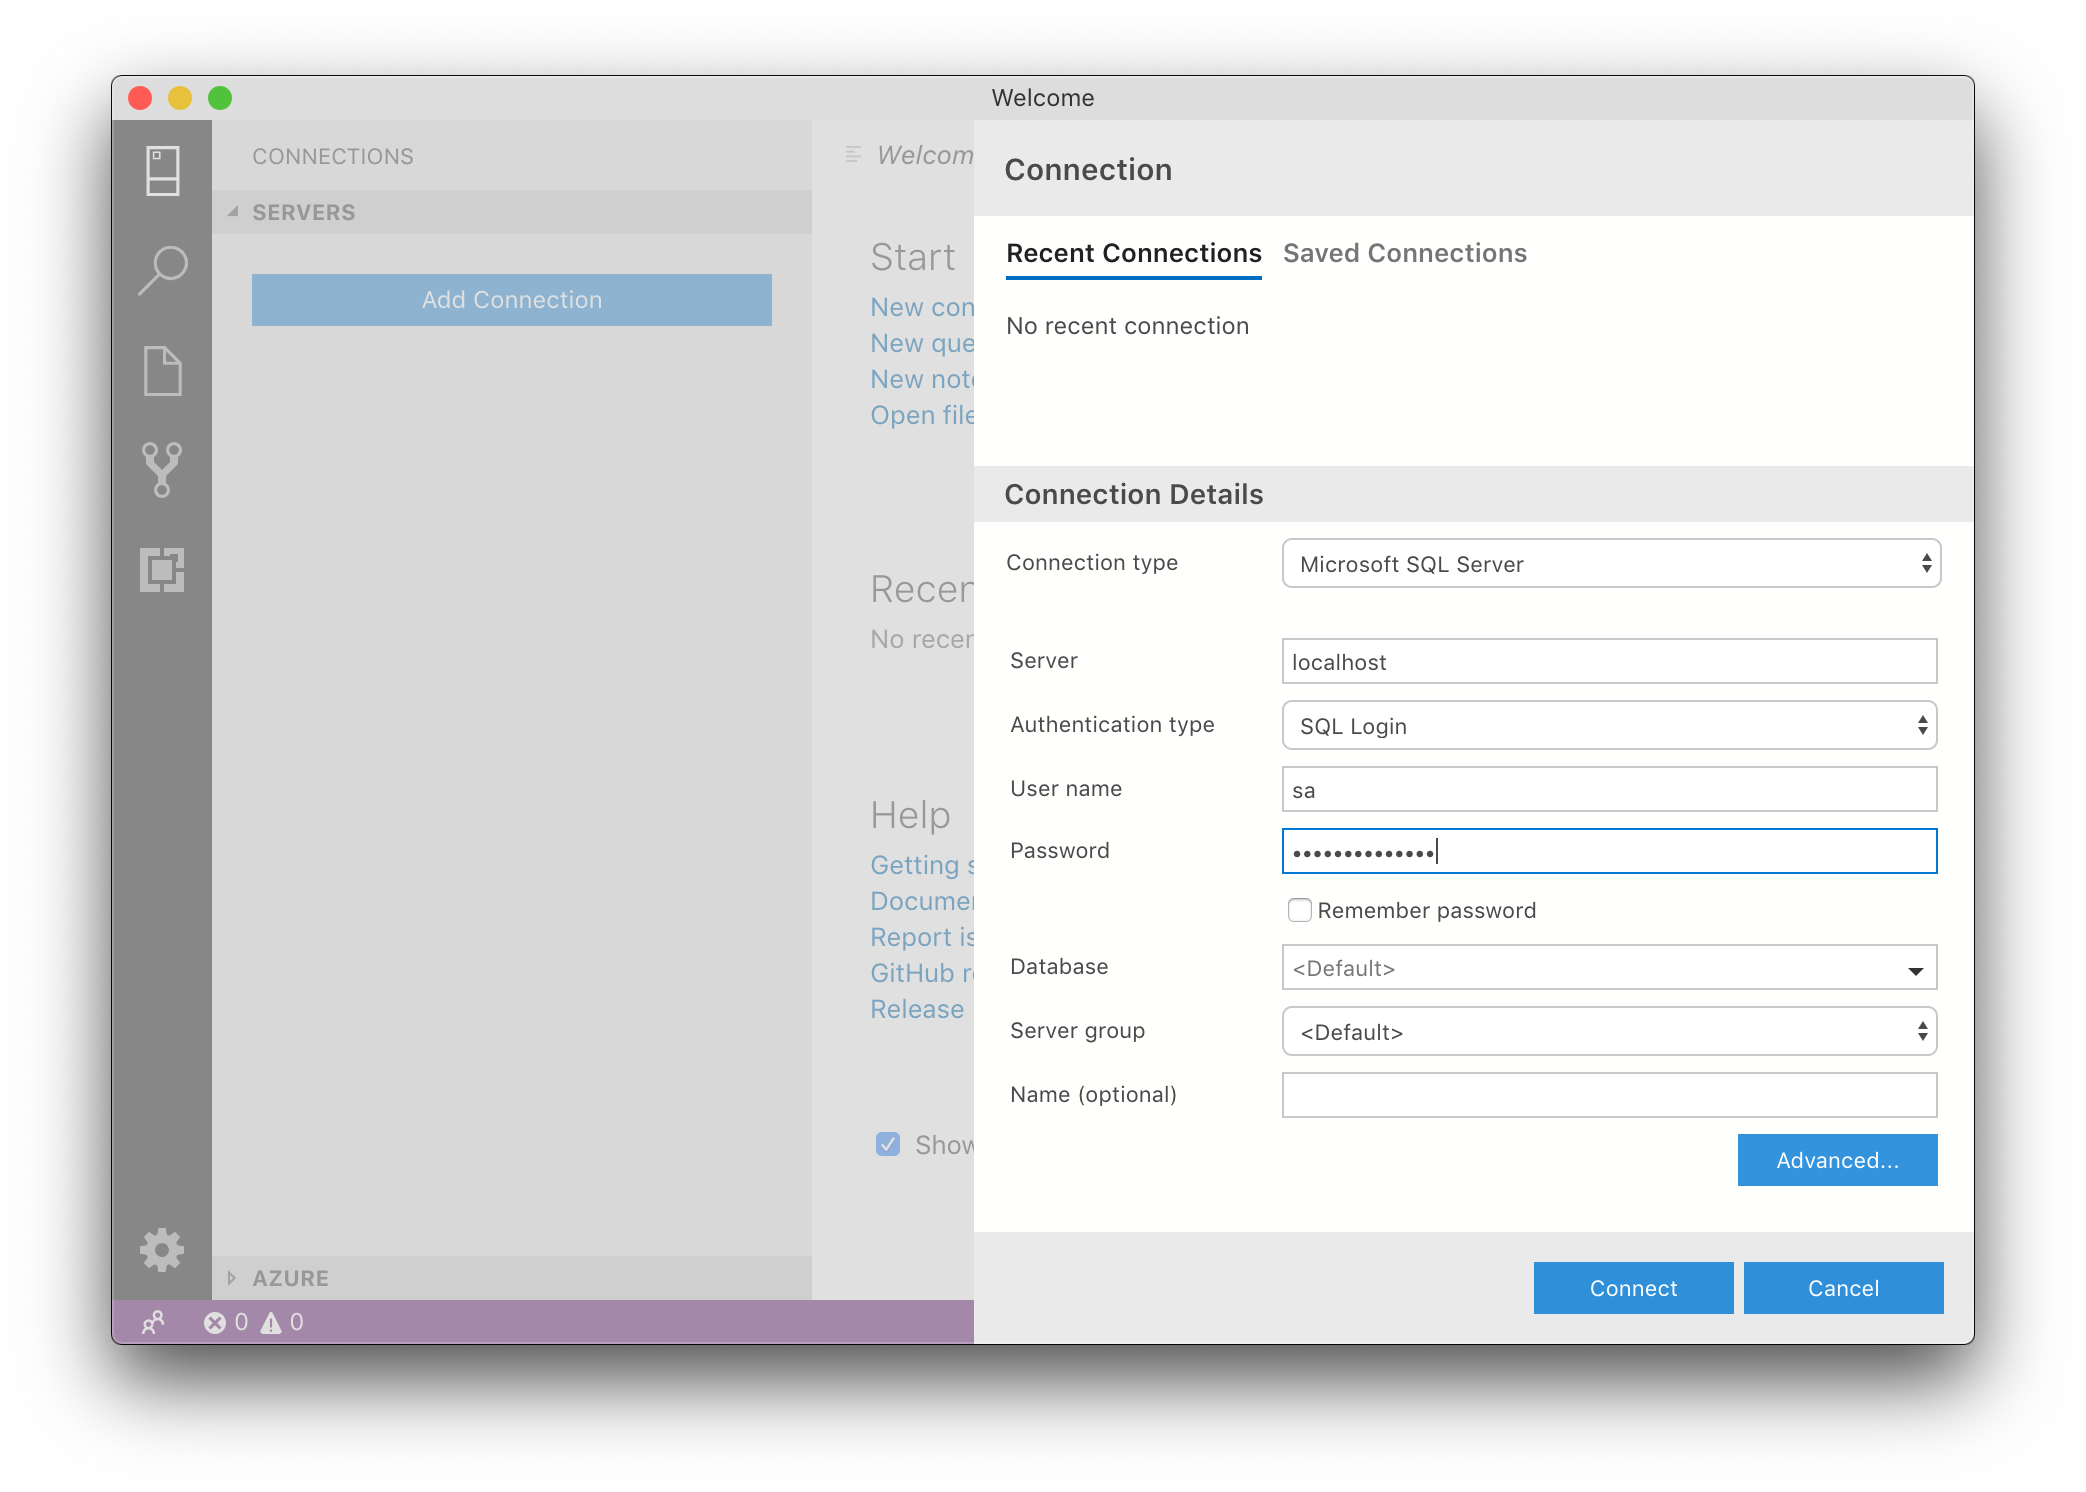
In the top left corner, select the “New Connection” icon followed “Add Connection” to connect to the SqlExpress container described above. Enter “localhost” as the Server and the credentials described above:
After connecting, select cmd + N to begin writing and sending SQL commands.
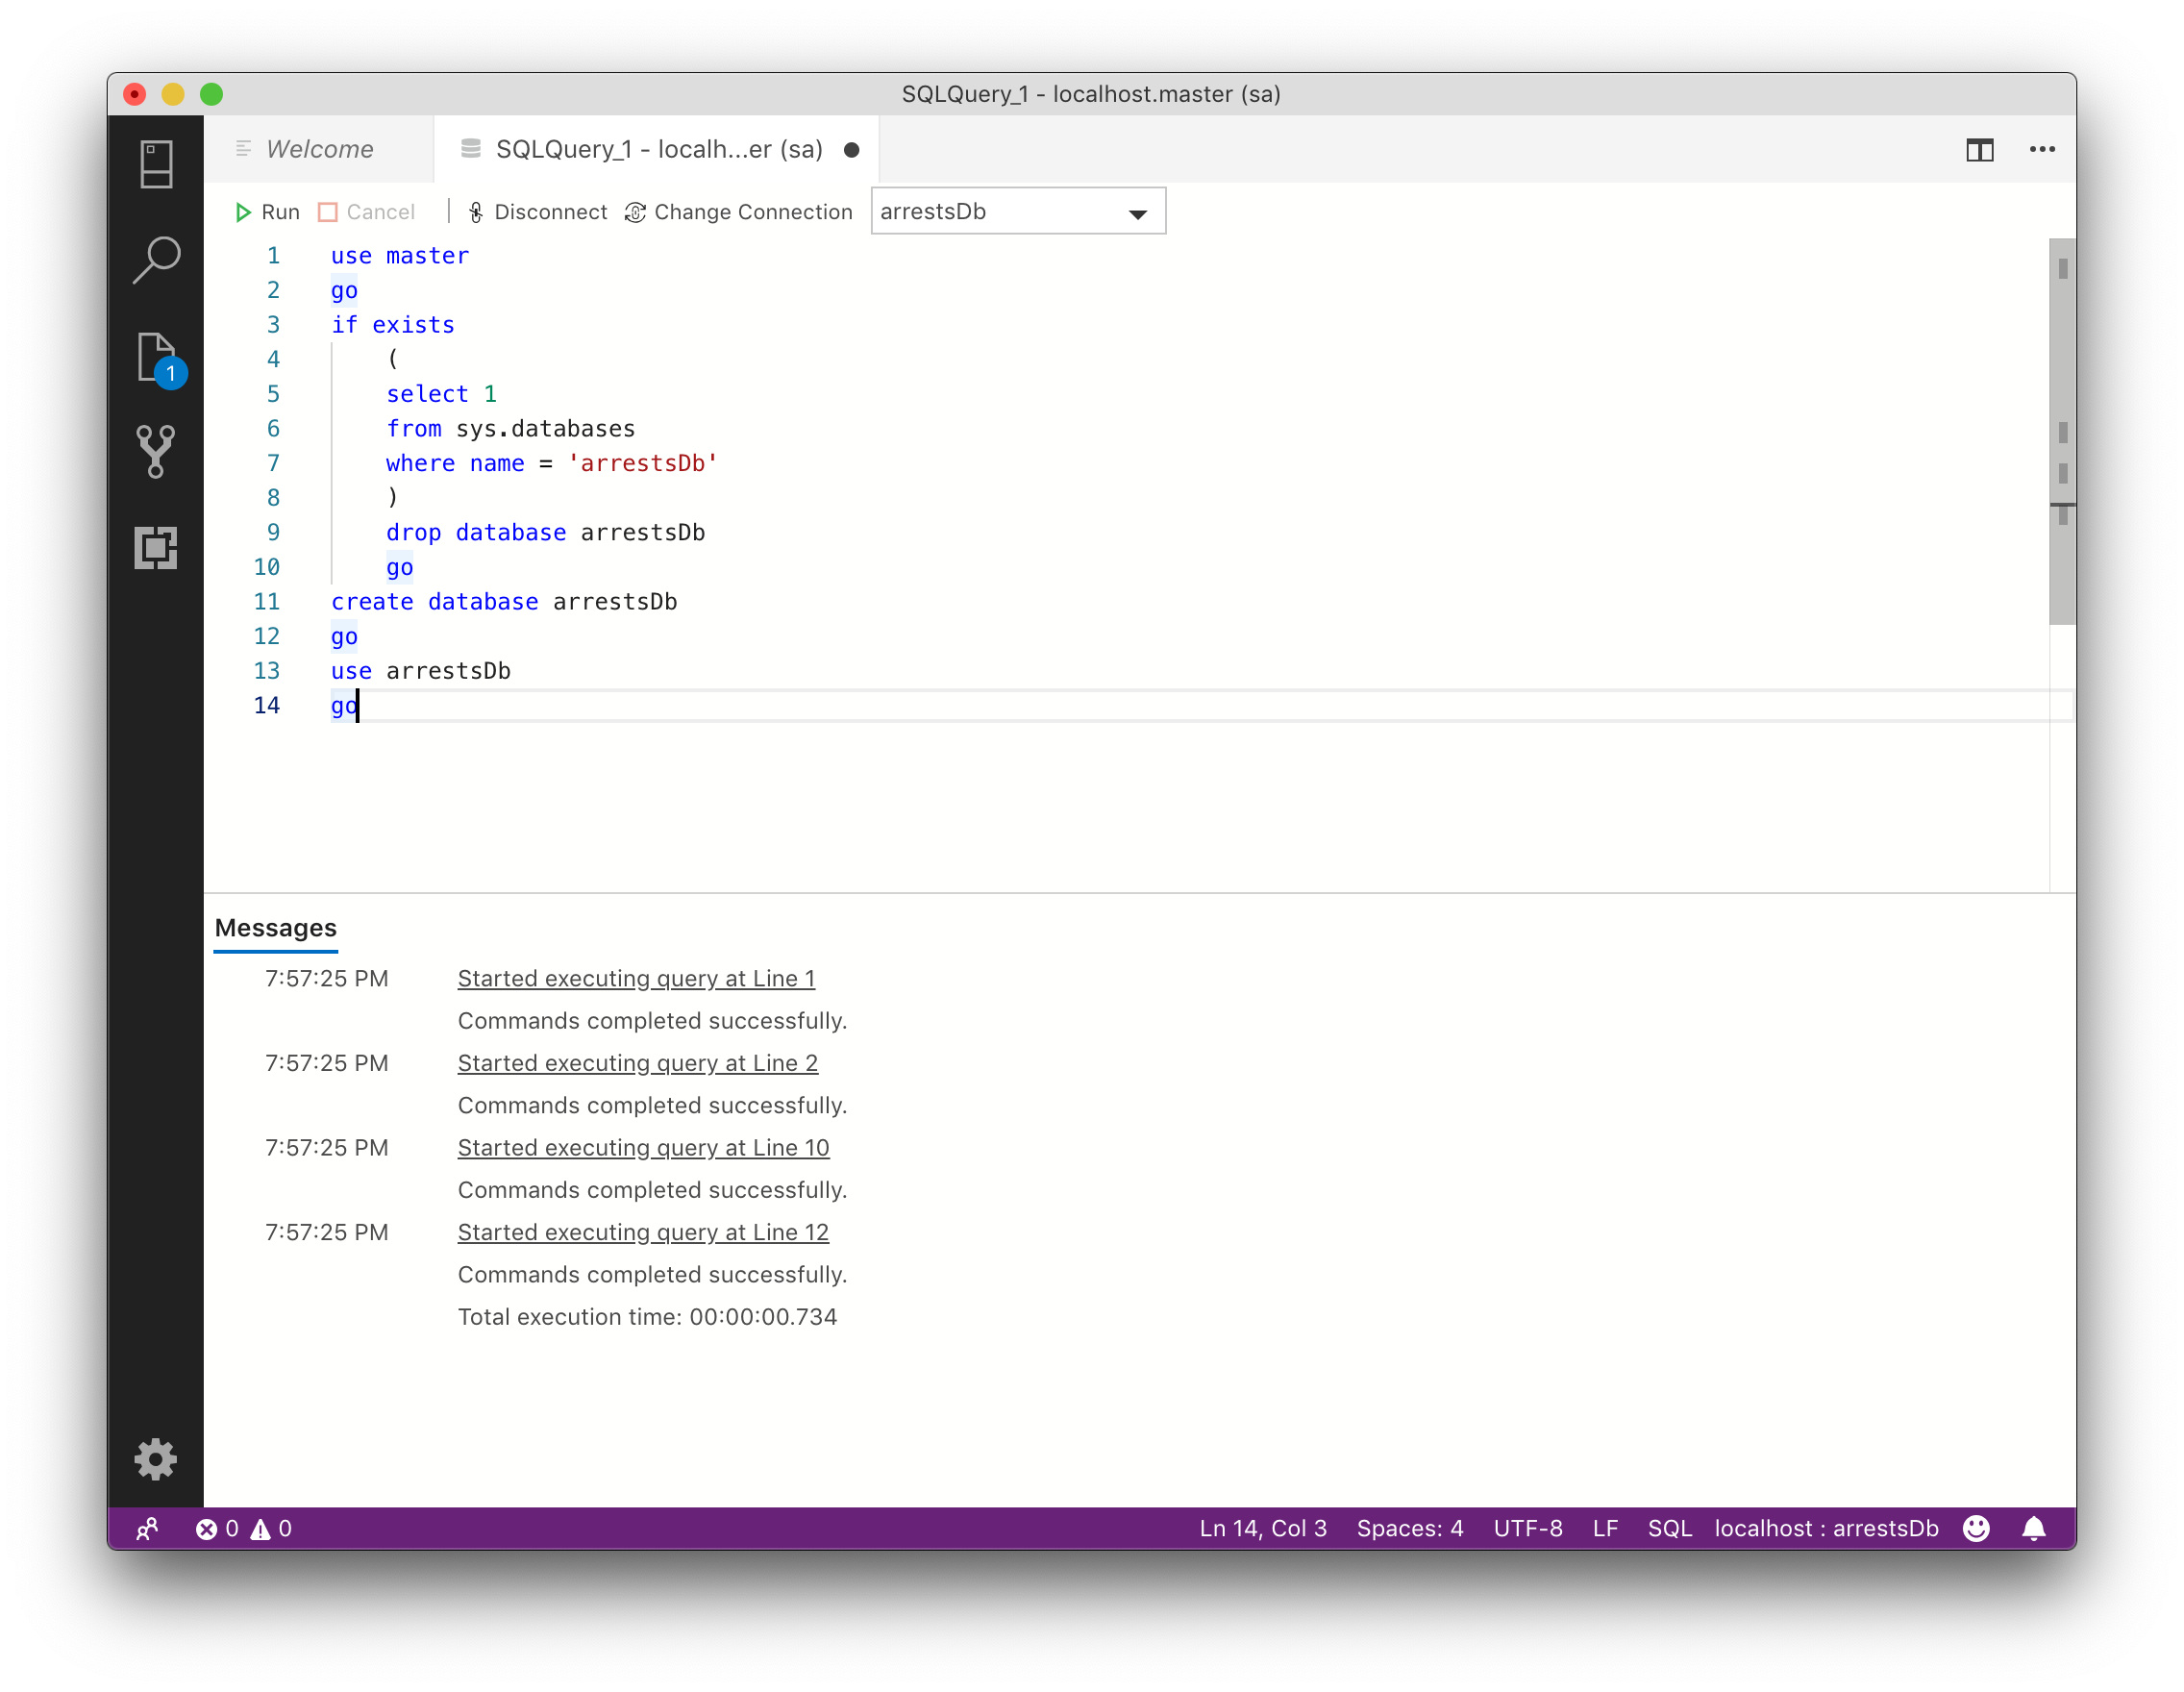
Create Database
Within Azure Data Studio, it’s easy to write and test code. The Washington Post compiled a data set of arrest stats at NFL games, which can be loaded into the localhost server. The first step is to create a database, called here “arrestDb”. Execute the command pressing F5 or selecting Run from the menu.
use master
go
if exists
    (select 1 from sys.databases where name = 'arrestsDb')
    drop database arrestsDb
    go
create database arrestsDb
go
use arrestsDb
go
Create Table
To actually store individual datasets, a table is needed. From the NFL Arrest data, a table is needed. Create one named “stadiumArrests” with these commands. The column types listed after the column names will
CREATE TABLE dbo.stadiumArrests
(season int
    , weekNumber int
    , dayOfWeek varchar(10)
    , gameTime varchar(20)
    , homeTeam varchar(50)
    , awayTeam varchar(50)
    , homeScore int
    , awayScore int
    , otFlag varchar(2)
    , arrests int
    , divisionGame varchar(1)
)
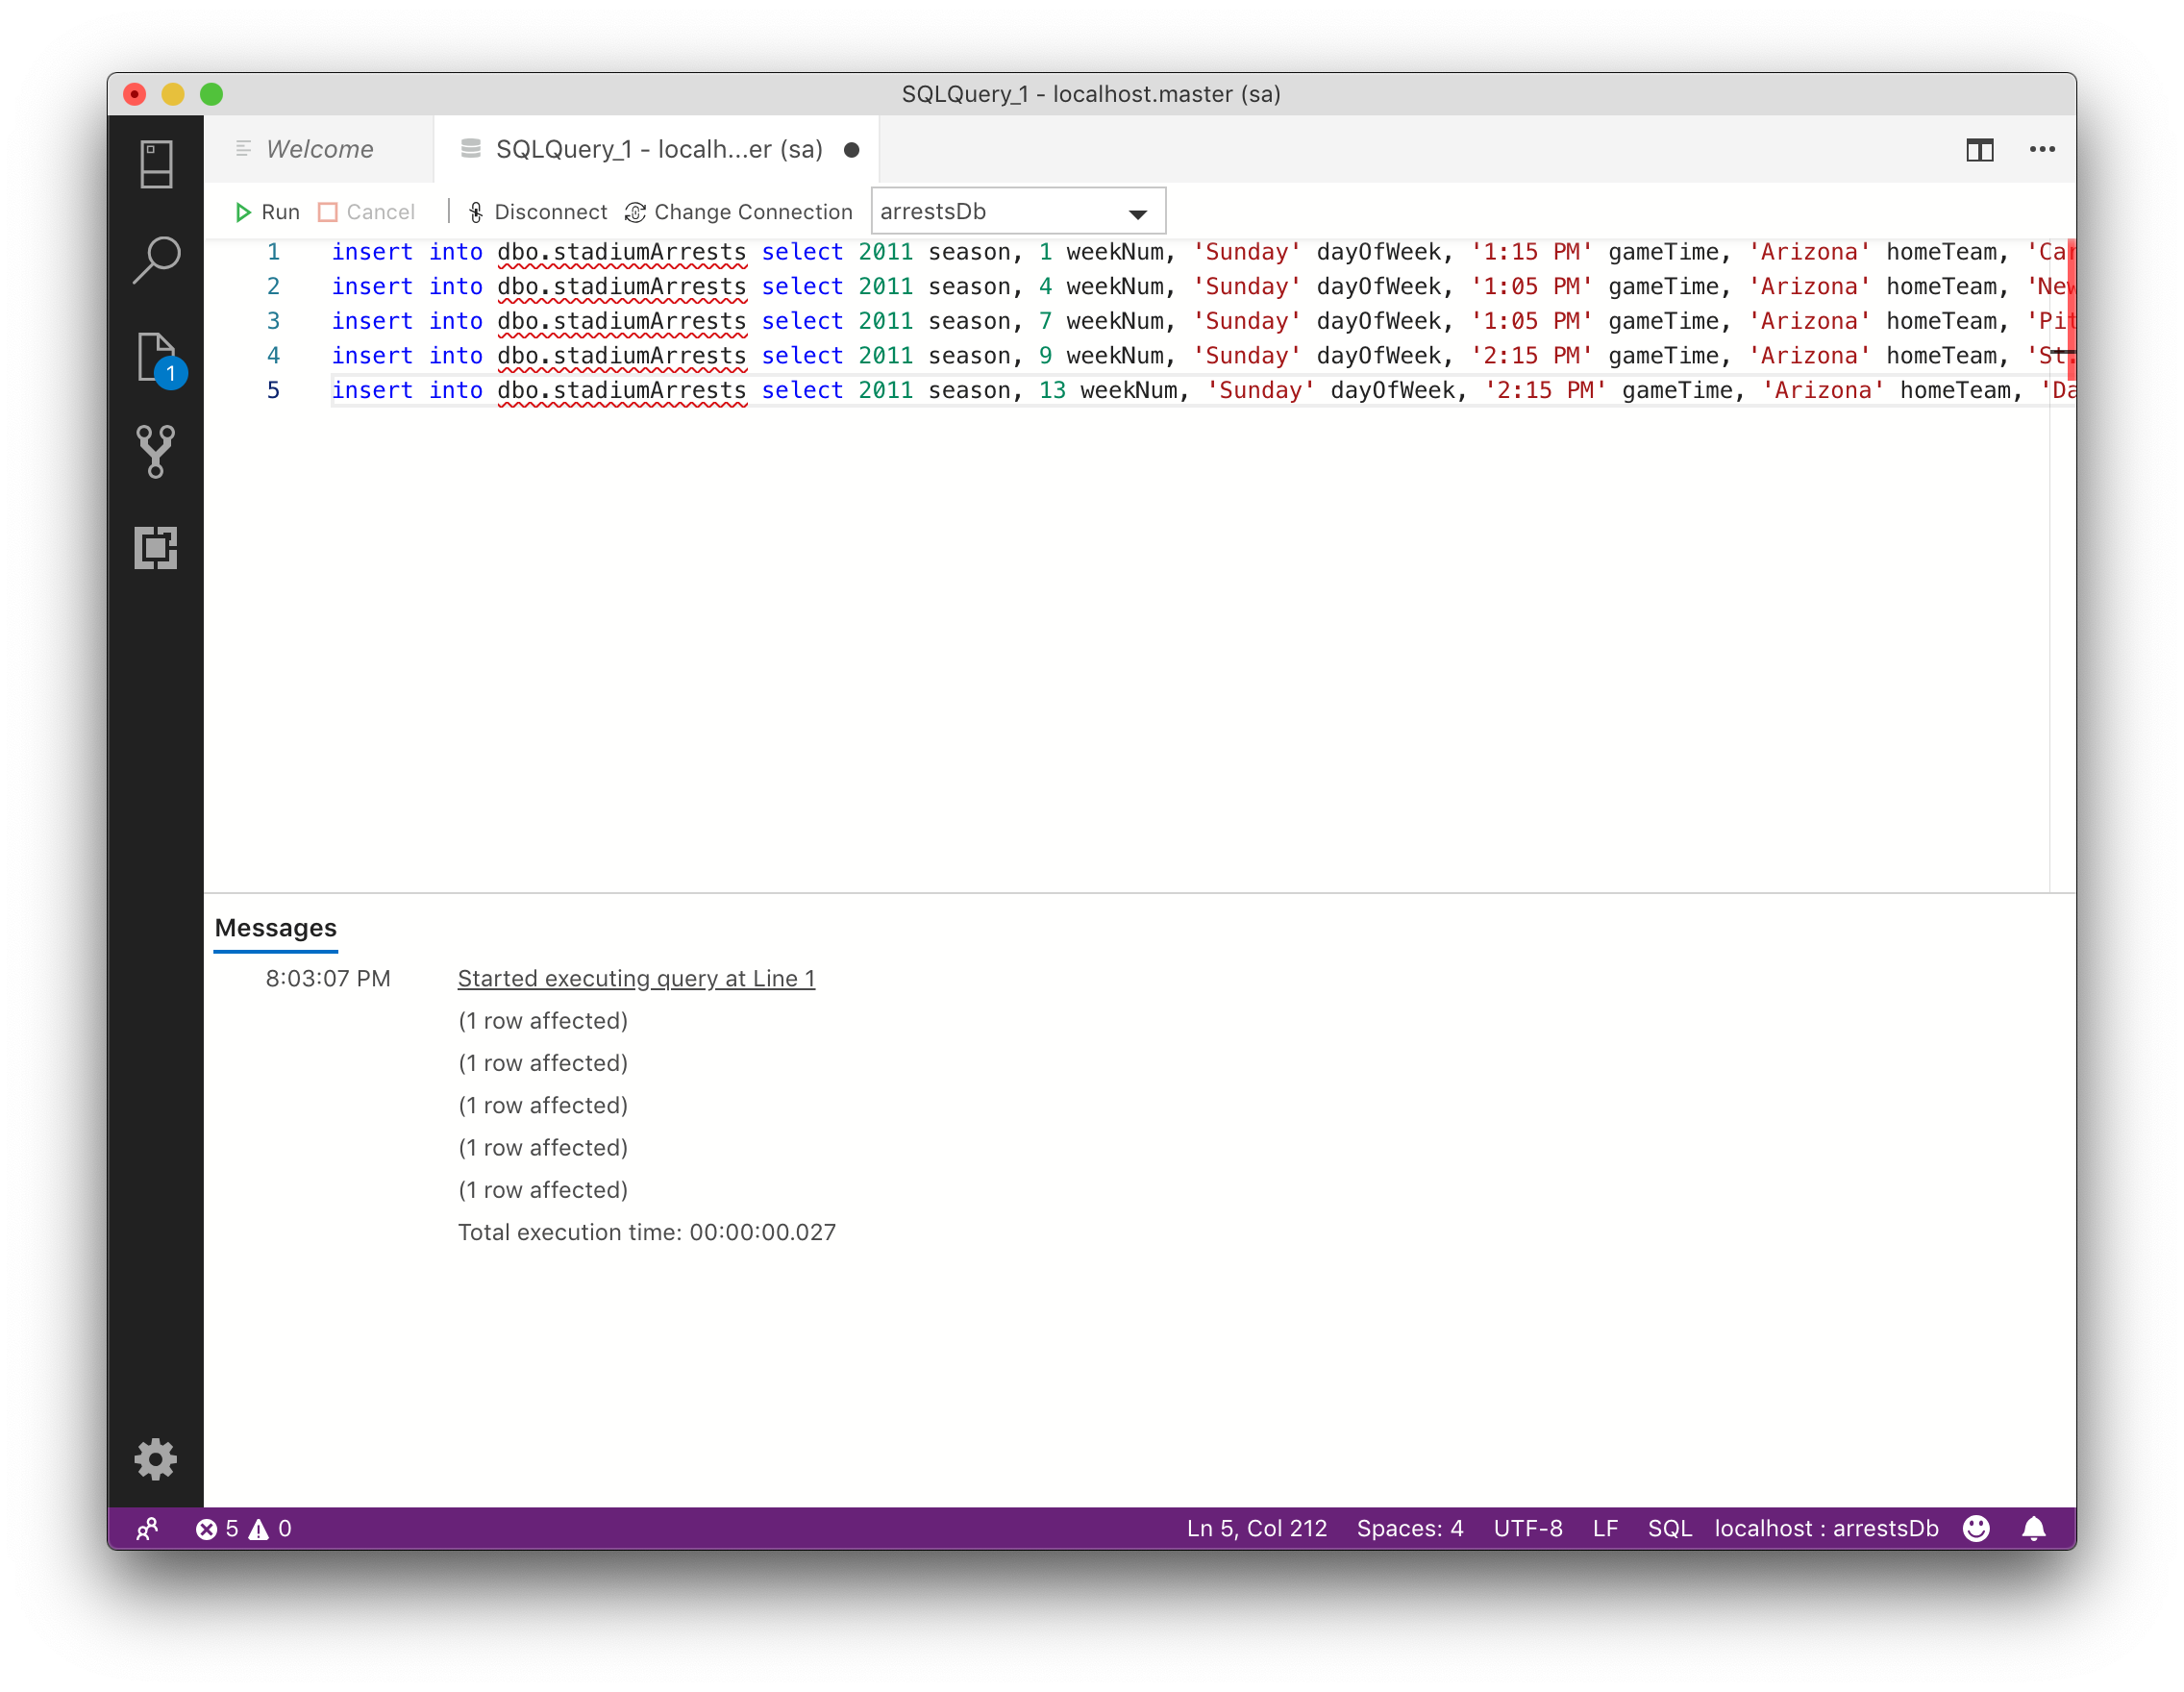
The actual data can be inserted into the table in a variety of ways, here using insert into and select commands for five rows of data.
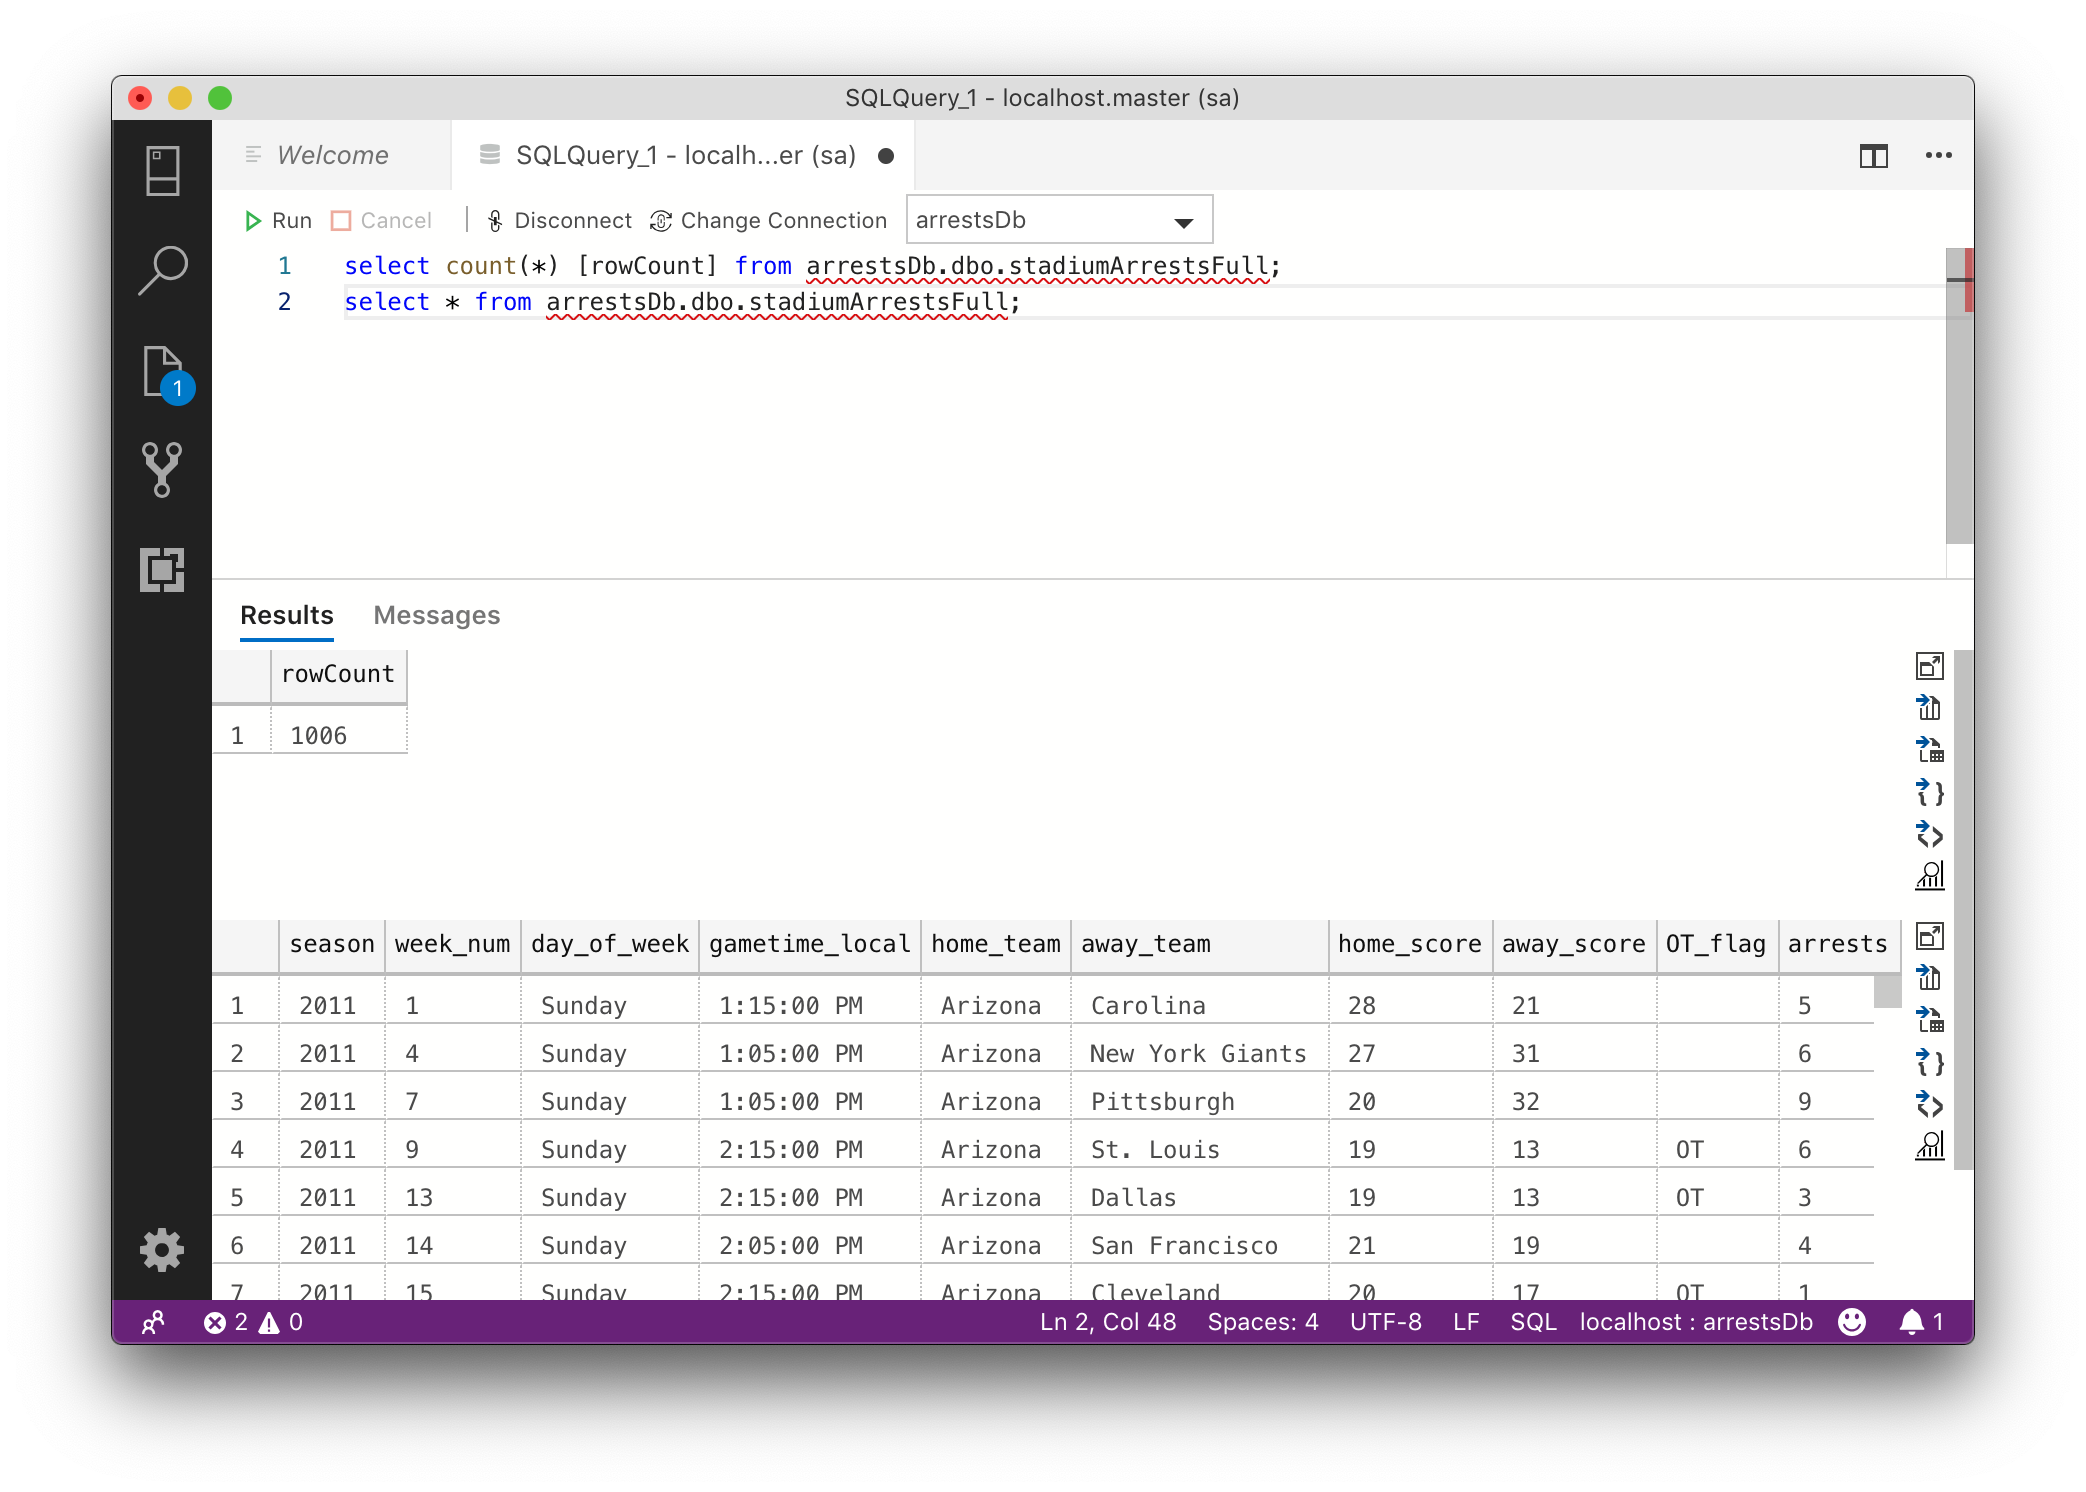
Data can now be selected and the database is fully functional! Add more tables, create schema and begin using this versatile and powerful tool from your Mac.
select * from dbo.stadiumArrests;
Start Docker Container
The docker container that enables SQL may go down if you log out / restart your machine, meaning a connection cannot be made to run commands. Get it going again by running the following command in Terminal. When listing all containers, the container should have a status of “Up”
docker start SqlExpress
Remove Docker Container
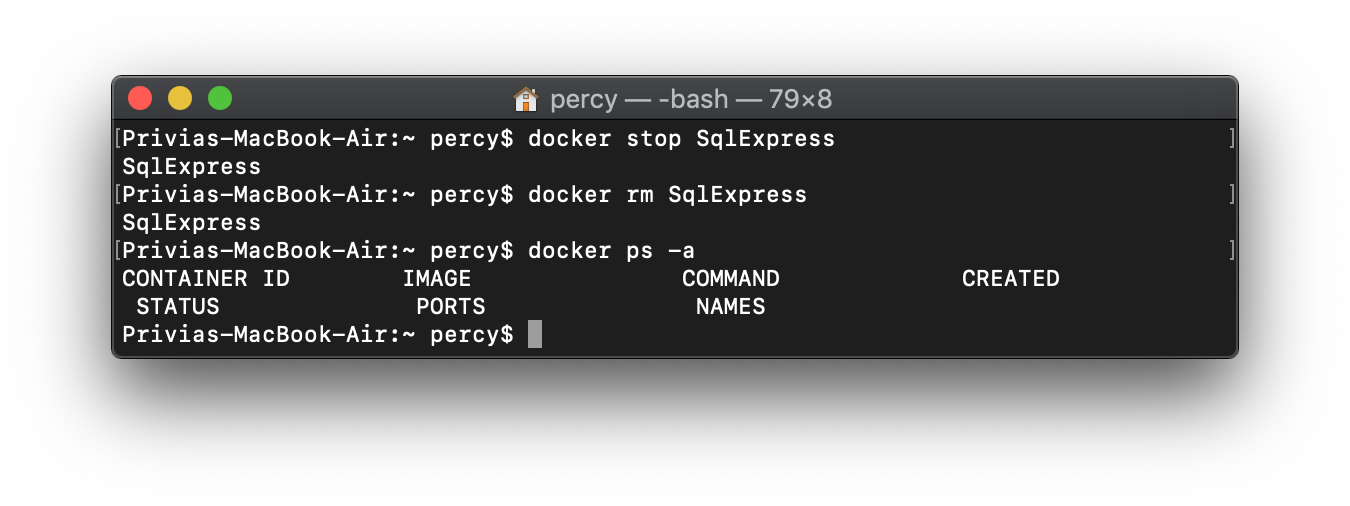
You may want to remove your Docker container that runs your SQL environment from for a variety of reasons. This can be done simply from the command prompt. When listing the active containers, SqlExpress will not display.
docker stop SqlExpress # only required if the container is running
docker rm SqlExpress
docker ps -a